1100435108
12
Troubleshooting • Solución de problemas • Guide de dépannage service. sher-price.com
ASSEMBLY MONTAJE ASSEMBLAGE
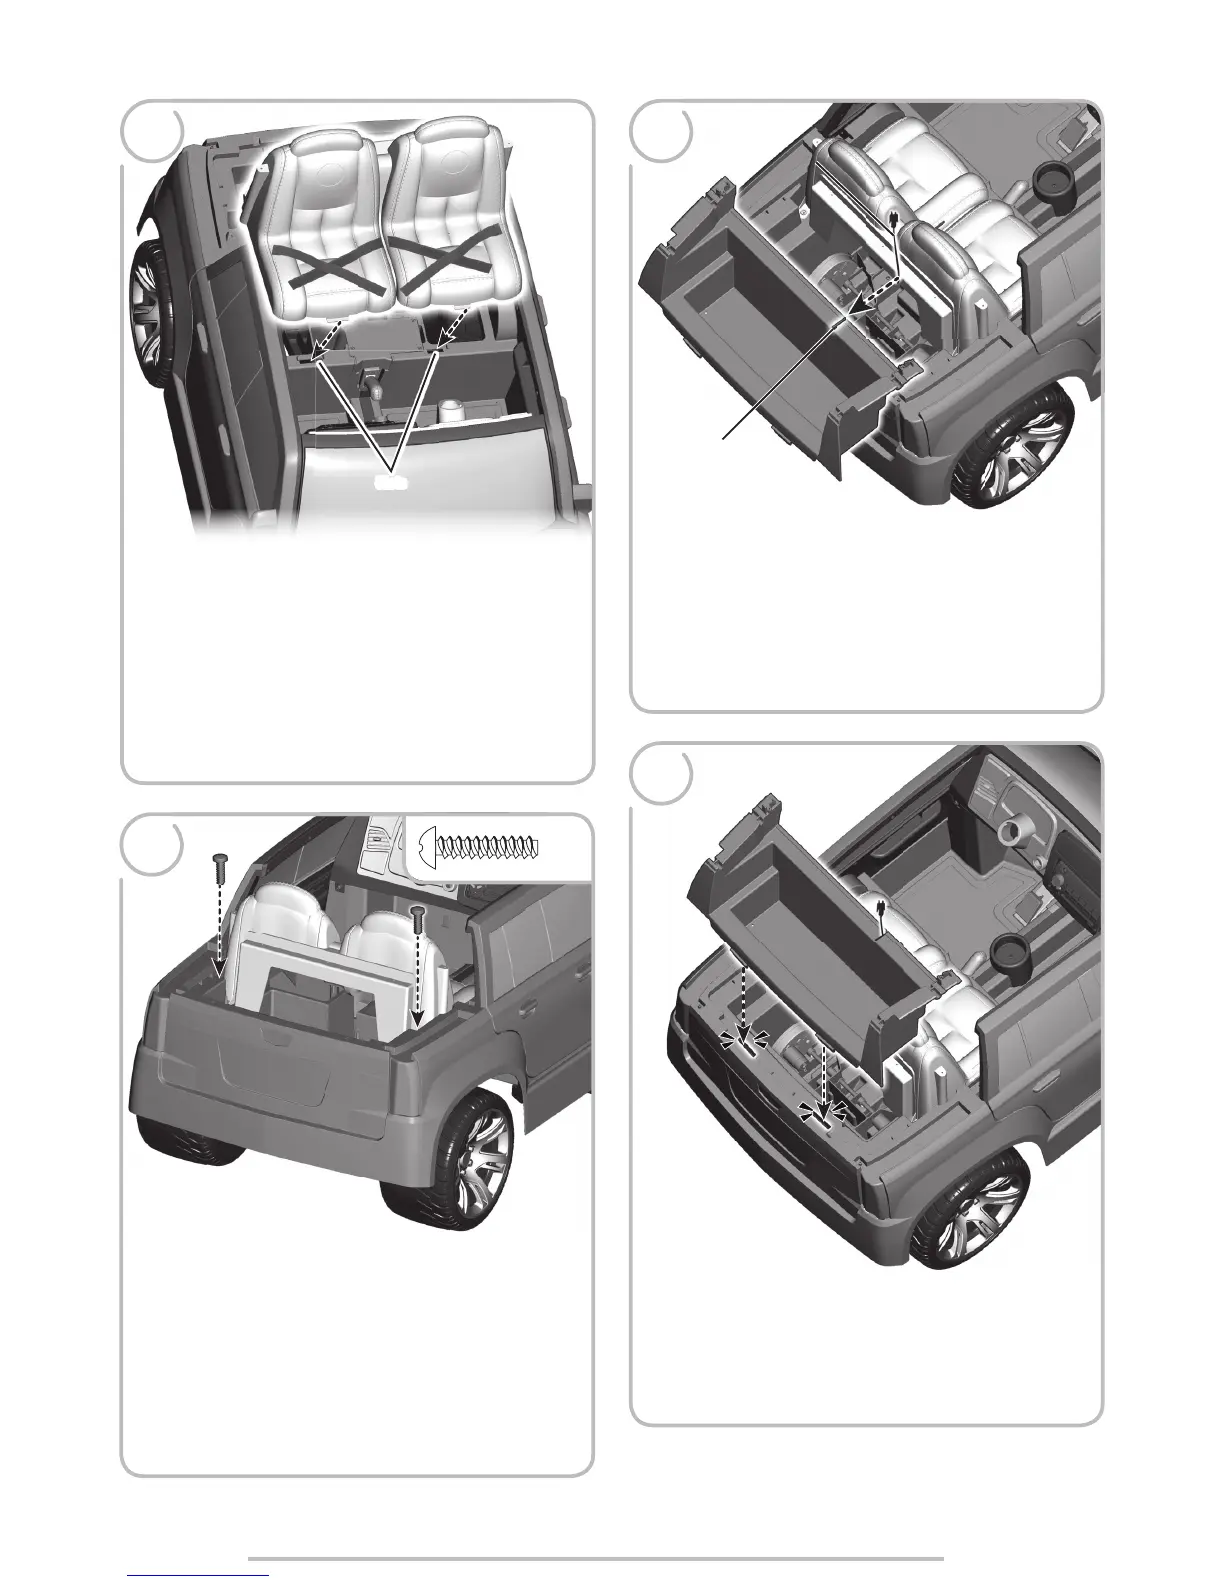
• Insert both tabs on the front edge of the seat into the slots in
the vehicle.
• Insertar las dos lengüetas del borde delantero del asiento en las
ranuras del vehículo.
• Insérer les deux languettes sur le bord avant de la banquette dans
les fentes du véhicule.
TOP VIEW
VISTA DE ARRIBA
VUE DE DESSUS
Slots
Fentes
12 14
15
BACK VIEW
VISTA DE ATRÁS
VUE ARRIÈRE
• Insert two #8 x ¾" (1,9 cm) screws into the back of the seat.
Tighten the screws.
• Insertar dos tornillos
№
8 x 1,9 cm en el dorso del asiento.
Apretar los tornillos.
• Insérer deux vis nº 8 de 1,9 cm à l’arrière de la banquette. Serrer
les vis.
x2
13
• Position the trunk over the back end of the vehicle.
• Pull up the speaker connector wire from inside the vehicle and fit it
into the slot in the trunk.
• Colocar la cajuela sobre el extremo trasero del vehículo.
• Jalar hacia arriba el cable del altavoz desde el interior del vehículo
y meterlo en la ranura de la cajuela.
• Positionner le coffre sur la partie arrière du véhicule.
• Tirer sur le câble du connecteur de haut-parleur et l’insérer dans la
fente du coffre.
• Insert the tabs on the trunk into the slots in the vehicle.
• Push to “snap” the trunk in place.
• Insertar las lengüetas de la cajuela en las ranuras del vehículo.
• Empujar la cajuela para ajustarla en su lugar.
• Insérer les languettes du coffre dans les fentes du véhicule.
• Pousser pour emboîter le coffre.