7.3 Head units
You need an ANT+-enabled head unit that supports the power-only profile (PWR). For example,
suitable head units are:
CYCLEOPS: Joule 2.0 and 3.0
GARMIN: Edge 500/510/520/800/810/820/1000, Forerunner 310XT/910XT
O-SYNCE: navi2coach, Macro X and Macro High X
Wahoo: Elemnt
You can find a current list of compatible products at the ANT+ Alliance:
http://www.thisisant.com/directory/power2max-road-rotor-3d-plus-bcd-110-or-130/
The data for power, cadence, left-right distribution and smoothness are calculated and transmitted
via ANT+.
In addition, your power2max NG power meter offers the option of using a Bluetooth low-energy
compatible display instrument (BLE) that supports the Cycling Power Profile.
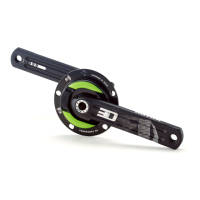
7.4 Installation of your power2max NG power meter on your bike
7.4.1 Chain ring installation
1. First install the chainrings on the power2max NG power meter. In the process, take care that
they are aligned correctly and solidly attached in accordance with the respective
manufacturer’s specifications. Guide the large chainring from above onto the power2max NG
power meter.
2. Align the holes for the bolts.
3. After you have guided the small chainring onto the power2max power meter from the rear,
tighten everything with the dedicated chainring bolts.
IMPORTANT: Observe the torque values prescribed by the manufacturer.
Pay attention to the alignment of the chainrings and bolts. Please adhere to the manufacturer’s
specifications.
7.4.2 Crank Installation
1. Mount the crankset to the power2max power meter.
2. Guide the right crankarm from the front through the opening in the power meter. Pay
attention to the alignment and the correct fitting of the crankset to the power meter.
3. For models with lockrings (e.g. Cannondale Hollowgram, FSA BB386evo, Rotor 3D24, Rotor
3D30, Rotor 3D+ or Specialized S-Works): place a few drops of medium-strength threadlock
(e.g. Loctite 243) on the inner side of the lockring and tighten it with the help of the Lockring
tool. PLEASE NOTE: Pay attention that the lockring is seated properly on the thread. Lock the
lockring tool into a vice. Doing so, you can make sure that the lockring tool is secure and
stable for further installation.
4. Tighten the lockring to the prescribed torque values
5. For models that are installed with threads (e.g. FSA Megaexo, SRAM Force22/S900): place a
drop of medium-strength threadlock on the installation bolts. If threadlock has already been
applied at the factory, then you can skip this step. Tighten the installation bolts to the
prescribe torque values. You can also find these values in the download area on
power2max.com.
Install the entire crankset to your bicycle. To do so, follow the steps in the installation
instructions provided by the crankset manufacturer. If necessary, these can be requested
from the crankset manufacturer or from a retail store. We recommend checking the correct
function of the front derailleur and, if needed, re-adjusting it.
IMPORTANT: Observe the installation instructions prescribed by the manufacturer.
The initial operation and installation of your power2max power meter is now completed.