ENGLISH SETUP
For best results, fully charge controller and power bank prior to first use.
CHARGING CONTROLLER + POWER BANK
• Using the included 6.6 ft. (2 m) USB Cable, connect the Micro-USB end
to lower port at top of the controller, and connect the Standard USB
end to any powered USB source.
• When charging, four LEDs will display the charging level from
25-50-75-100%.
CHARGE LEVEL INDICATOR
Check battery charge level by pressing the battery status button
(
) on front lower left of controller. The LEDs will indicate the current
charge level from 25-100% even when controller is off.
WIRELESS MODE
Move Wireless/Wired switch on front center of controller to BT ( )
which indicates Bluetooth wireless mode.
• If controller is off, press the MENU button (
) to turn on (LED will
illuminate).
• Press and hold the Bluetooth sync button (
) on top of controller
for 2 seconds to enter pairing mode (LED will flash rapidly).
• Enter the Bluetooth settings on your device and choose the MOGA
controller. The pairing LED will turn solid when connected.
NOTE: A previously paired device will automatically pair to the
controller when powered on.
POWERING OFF
Hold the menu button ( ) for 5 seconds to turn controller off and save
battery capacity.
WIRED MODE
Move Wireless/Wired switch on front center of controller to USB ( )
which indicates wired mode.
• Connect Micro-USB end of the 11.8” (30 cm) or 6.5ft (2 m) cable
to lower port at top of controller, and connect other end to your
gaming device.
• Gaming device input ports (Standard USB, Micro-USB, USB-C) will
determine whether you use shorter or longer micro-USB cable for
wired gaming.
• This MOGA controller supports DirectInput by default, but also
supports XInput mode. If initial wired connection is unsuccessful,
switch modes by pressing Start + Select for three seconds. Three LED
flashes indicate mode was changed and retained in memory. Repeat
process to switch back.
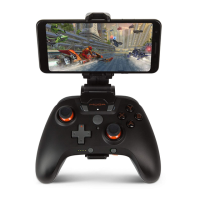
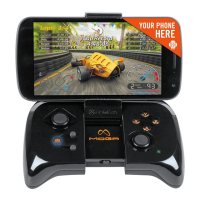
GAMING CLIP
A detachable gaming clip is included for use with gaming on your phone.
You can use USB cables with clip attached for charging or wired mode.
1. Slide MOGA Controller into gaming clip by tipping top edge in first.
2. Push controller bottom edge down into clip until it locks into notch on
front edge of controller.
3. To insert phone, push top edge of phone against top of phone grip to
expand upward.
4. Push bottom of phone down flat into place as you reach top limit
of phone grip.
5. Adjust phone horizontally to center alignment over controller, and
adjust viewing angle forward or back.
6. Open kickstand on clip when setting controller down between
sessions to prevent tipping.
7. Remove clip by pulling front edge forward to release from notch.
INTEGRATED POWER BANK
A Power Bank built into the controller allows you to charge your phone
during gameplay or while controller is off.
• Connect Standard USB end of the 11.8” (30 cm) cable to upper port at
top of controller, and connect other end to your mobile device.
• During gameplay, move the Power Bank switch below right
thumbstick to the right (on) to start charging. If you prefer to use
battery power to extend controller usage time rather than charge
phone, move swith to the left (off).
• To charge mobile device when controller is not in use, simply connect
cable between controller and device to begin charging (Power Bank
Switch must be ON).
• Your mobile device will display charge status once connected. If
charging does not begin, the power bank battery may be too low:
recharge controller.
• The amount of charge available for your phone depends on how much
battery capacity remains on the controller when charging begins.
ASSIGNING THE ADVANCED GAMING BUTTONS
1. Press the Orange Program Button on the bottom of the controller
for 2 seconds. The LED Connection Indicator will flash, signaling the
controller is in assign mode.
2. Press 1 of the following buttons (A/B/X/Y/LB/RB/LT/RT/Left Stick
Press/Right Stick Press/D-pad) to re-assign. Then press the
Advanced Gaming Button (AGR or AGL) that you wish to assign. The
LED connection indicator will stop flashing, signaling the Advanced
Gaming Button has been set.
3. Repeat for the remaining Advanced Gaming Button.
NOTE: Advanced Gaming Button assignments will remain in memory even
after disconnected.
RESETTING THE ADVANCED GAMING BUTTONS
1. Hold the Program Button down for 2 seconds. The LED Connection
Indicator will slowly flash, signaling the controller is in assign mode.
2. Press the previously assigned button for 5 seconds, and the function
will be cleared.
 Loading...