PowerMate
Operation Manual
MOTOR REPLACEMENT INSTRUCTION for
M-SERIES POWERMATE SN 36000 and higher.
PN010660B
11/ 16/ 15
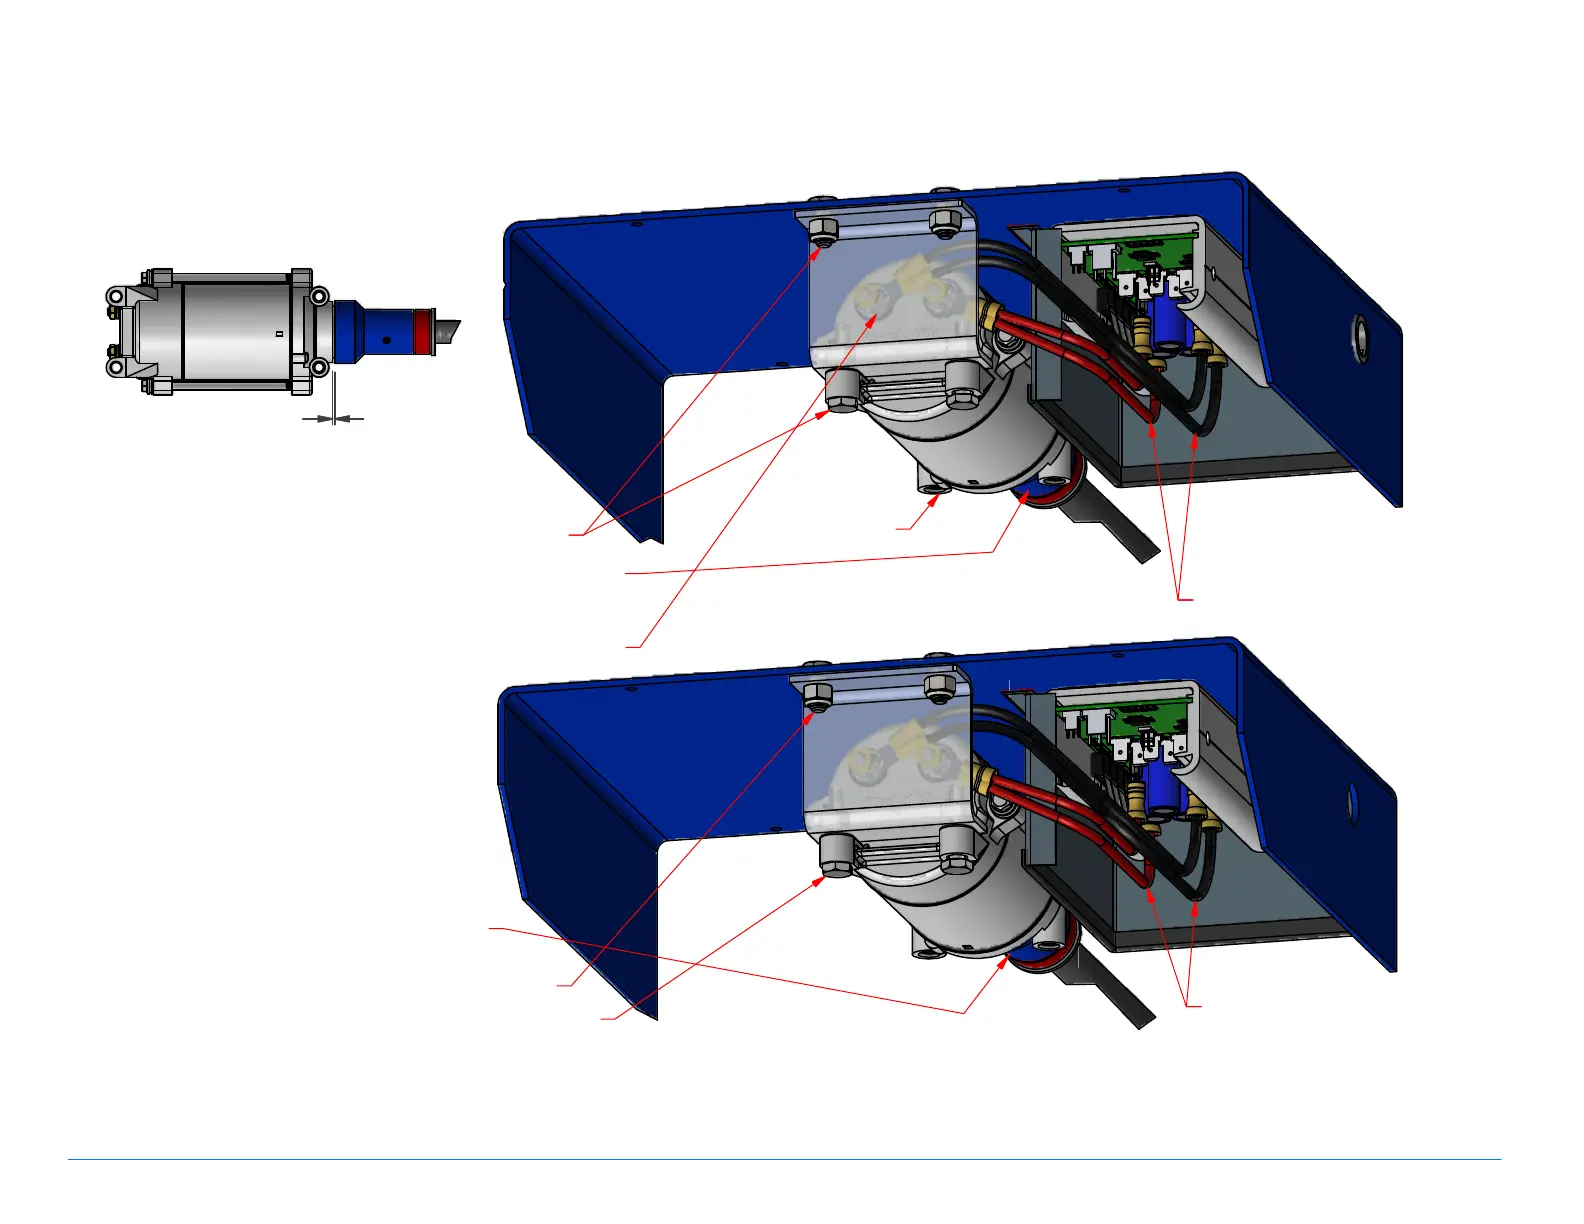
1. Remove the four 10-32NF Screws securing the Motor Cover. Remove the Motor Cover to give access to the Motor. Tip the PowerMate back to
rest horizontally with the Motor and Controller facing up. Having the PowerMate on a work table in this position is helpful. Extend the PowerMate
approximately 30 inches, and then remove the electrical power by way of the Circuit Breaker.
REMOVE OLD MOTOR
INSTALL NEW MOTOR
NOTE: The Roller Axle has been removed for clarity.
NOTE: The Roller Axle has been removed for clarity.
6. Assemble the pair of Black Wires (PN301197) and the
pair of Red Wires (PN301198) to the Motor post
connections as shown.
7.Install the new motor engaging the Drive Screw Coupling.
8. Re-install the 1/4"Bolts and Nuts securing the Motor
and Motor Support. Provide a .060"gap between the
Coupling and Motor as shown. Tighten the Bolts and
Nuts ensuring Screw Assembly alignment.
.060
Coupling/Motor Gap Detail
9. Connect paired Black and Red
Wires to the Controller.
Refer to the Manual Electrical
Diagram for proper installation
position.
10. Activate the electrical power at the Circuit Breaker. Close the unit and stand the unit up vertically.
Re-install the Motor Cover and fasten with the four 10-32NF Screws. Test and return to service.
2. Disconnect the Motor power
wires from the Controller.
5. Dis-engage the Motor from the Drive Screw
Coupling, rotating the Motor such that the
Motor mounting lugs fork around the Roller
Axle (not shown), and remove the Motor.
3. Remove 1/4"Bolts and Nuts retaining the old Motor.
4. Remove the 1/4"Bolts and Nuts retaining the Motor
Support. Remove the Motor Support.
5.10
MOTOR
PN050860D