Ceiling Tile; Carpeting, Picture Frames, Screening Cover
Strips, Small Moldings.
Wire Attachment (fig.4)
If your POWERSHOT includes a wire attachment follow these directions:
-Installing (fig. 4A) Spread sides of wire attachment and push.
-Application (fig. 4B) Place PowerShot over wire: line up center attachment over wire. Avoid over stapling.
-Removal (fig. 4C) Spread sides of wire attachment and pull.
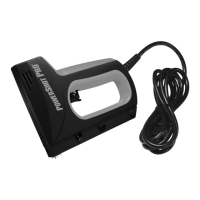
2. Using Your POWERSHOT ® Staple and Nail Gun
The POWERSHOT staple gun has a unique forward action® design to give maximum ease of use and control.
To use, grasp the handle of the gun, making sure that the staple exit is pointing away from you (fig. 5). Place
it firmly on the workpiece and push the handle steadily down towards the staple exit to activate. Maximum
leverage is gained by pushing down at the front of the handle using the force of your arm rather than just
squeezing with the hand. In vertical applications the front finger hole provides added support.
POWERSHOT has many other useful features - each designed to help make stapling easier and more com-
fortable (fig. 8).
A.
B.
Staples Remaining Window– This feature is located on the left side of the gun. Reload when end
of strip is seen through window “A” (FIG #8).
Staple Exit Indicator– Use the Staple Exit Indicator when you need greater precision in placing your
staples. The notch in the front of the gun shows you where the staple legs will be fired. Staples will exit
the gun directly behind the noseplate “B” (FIG #8).
C. Soft Grip Handle
D. Finger Hole
E. Track Release
3. To Clean Magazine
In the unlikely event of a staple jam, make sure that the bottom of the gun is pointing away from
yourself and others before carrying out the following instructions.
1. Remove pusher rod “A” (FIG. #1).
2. Remove screw & nut “B” from hole “C” (FIG. #6).
3. Remove entire magazine from housing.
NOTE: THE TRACK MOVEMENT MAY BE STIFFER THAN USUAL IF THERE IS A STAPLE JAM.
Storing Your POWERSHOT®
When you have finished using your POWERSHOT staple gun, unload remaining staples before storage.
Always store in a dry place out of the reach of children.
Part #
26
57M41
57M43
Postage & Handling Extra
FIG. 7