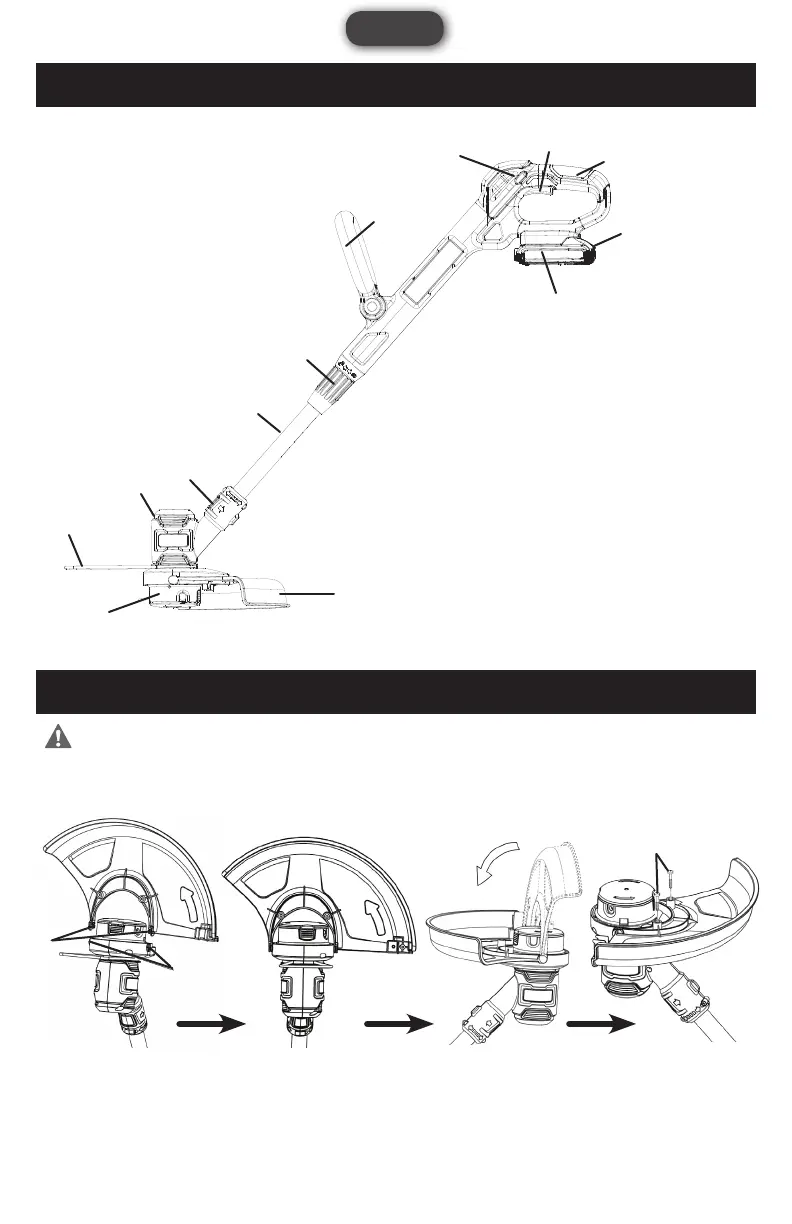
1. Rear Handle
2. Trigger Switch
3. Lock-Off Button
4. Battery Pack
5. Battery Locking Tab
6. Adjustable Front Handle
7. Telescoping Shaft Coupler
8. Shaft
9. Edger Shift Button
10. Motor Head
11. Guard
12. Wire Garden Guard
13. String Spool
11
12
10
9
4
1
2
3
6
7
8
13
5
FIG 1
FIG 2 FIG 3 FIG 4 FIG 5
2
1
3
8
English
kNOWINg YOUR STRINg TRIMMER
ASSEMBLY AND ADJUSTMENTS
WARNING: Always be sure that the product is switched off and the battery is
disconnected before adjusting, adding accessories, or checking a function on the tool.
ATTACHING THE GUARD (FIG 2, 3, 4, 5)
Fit the guard onto the trimmer head by inserting two pins (1) to the slots (2) on the trimmer head. See Fig 2 & 3.
Rotate the guard to be flat as shown in FIG 4. Tighten two screws (3) to secure the guard in place. See Fig 5.