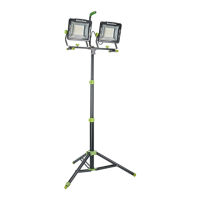
FIG 3
D2
E2
E
E3
E1
B
B
F
A
C1
C2
D1
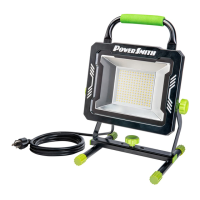
FIG 4
E3
E2
E1
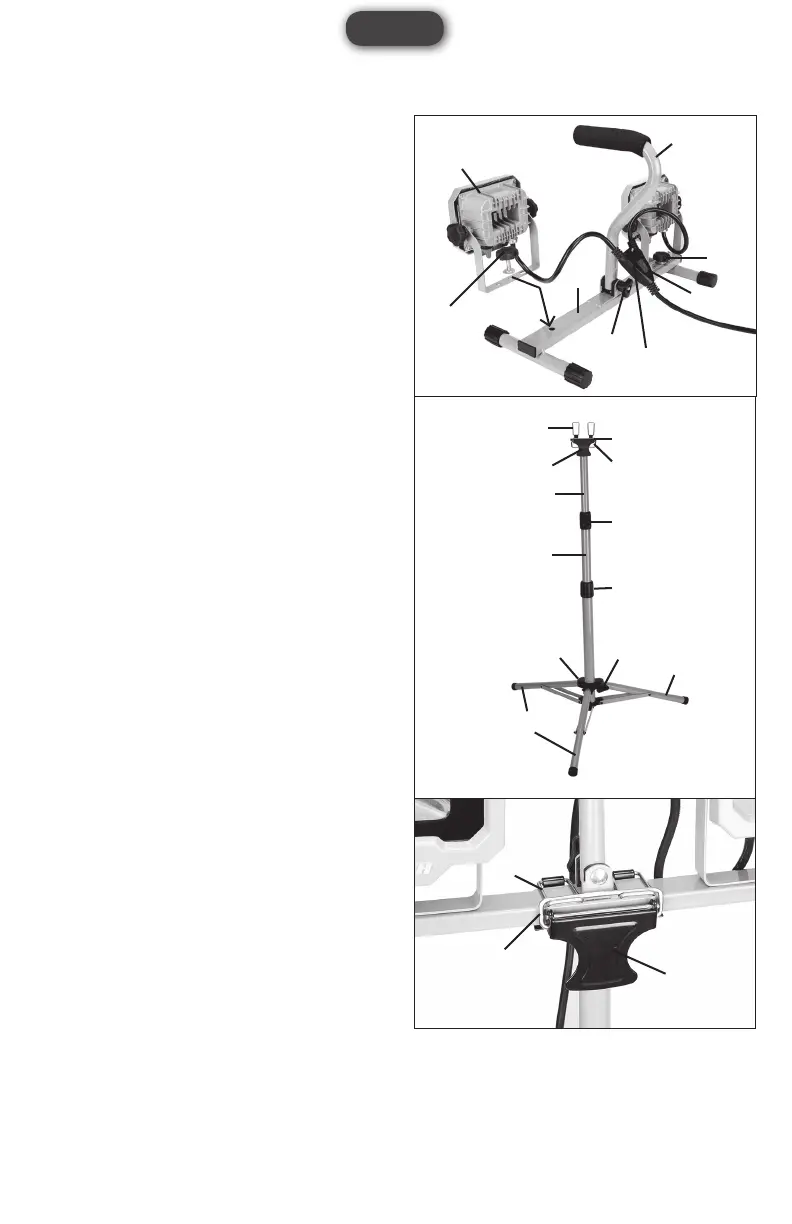
FIG 2
7
1
H
G4
2
G3
G1
G1
4
English
ASSEMBLY INSTRUCTION
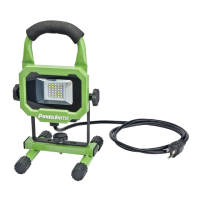
ATTACHING WORK LIGHT
HEADS TO STAND (FIG 2)
1.Placethestand(7)onaatsurface.
2.Rotatethe carryinghandle(1)straight up.Tighten
the handle locking knob (G3) to secure it in place.
3.Usethelockingknobs(G1),atwashersandspring
washers to secure both work light heads to the sides
ofthestandasshowninFIG2.
4.Hangthepowercablesplitter(H)onthehook(G4).
ADJUSTING THE TRIPOD (FIG 3)
1.Loosenthetripodlockingknob(F).
2.Pushdownthelegconnector(A)untilthelegs(B)
are fully extended and firmly tighten the locking
knob (F).
3. Adjust the height of the tripod by loosening the twist
collars(C1&C2)andraisingthecenterpoles(D1&
D2)oftripod.Firmlytightenthetwistcollarswhen
the tripod reaches desired height.
NOTE:Themaximumheightofthistripodis48".
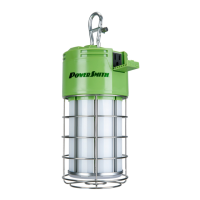
ATTACHING THE WORK LIGHT
ASSEMBLY TO THE TRIPOD
(FIG 4)
1.Placetheworklightassemblyontopofthetripod.
2.Use the bracket locking system (E1, E2 and E3)
to secure the work light assembly to the tripod as
showninFIG4.
NOTE:Makesurethetwolockingbrackets(E1)are
over the raised metal plate in the middle of the stand.