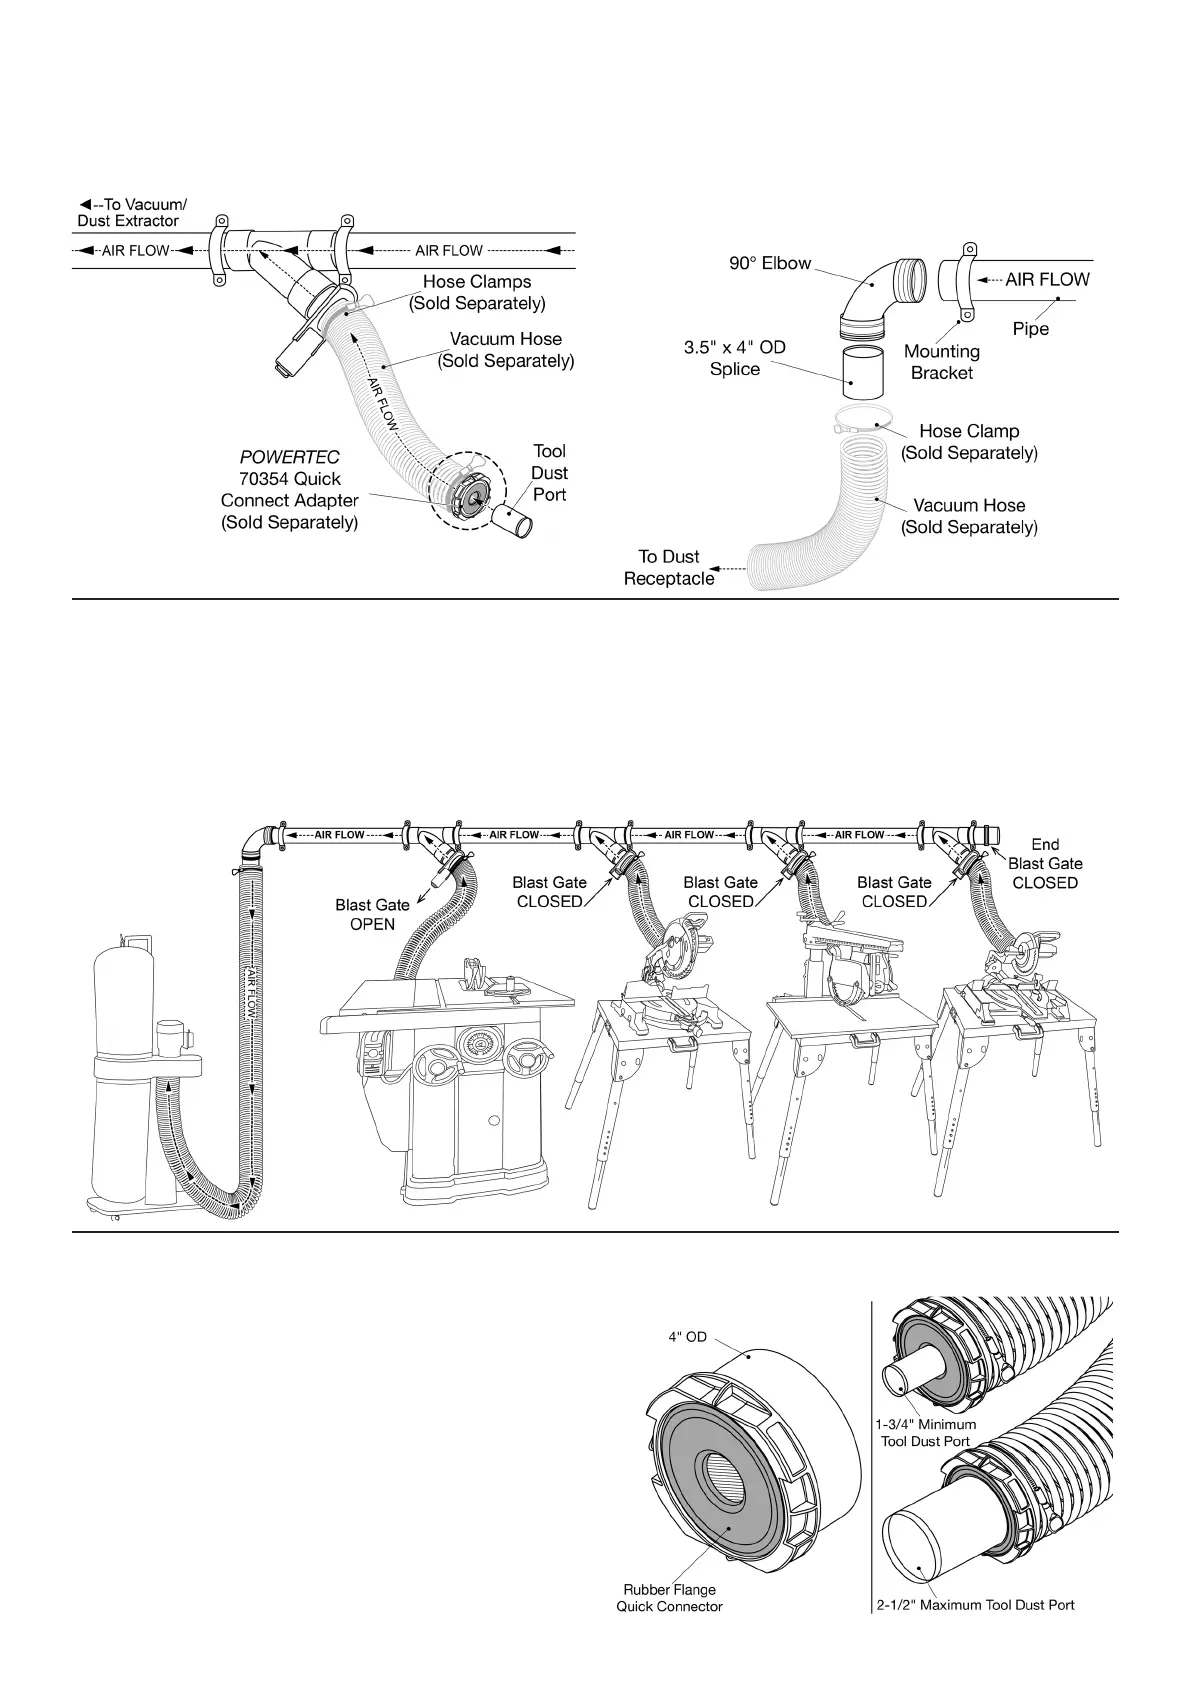
• See Figure 6. Complete network by attaching the 90° Elbow
onto the pipe. Add the included 3.5" Splice to the elbow.
Slide a Hose Clamp (not included) over the splice then t the
vacuum hose (not included) onto the splice. Position hose
clamp over the vacuum hose, tighten the clamp. Attach the
vacuum hose to the Dust Receptacle.
Figure 6
• See Figure 5. Connect a 4" ID vacuum hose (not included)
from the Blast Gate to the tool. Figure 5 shows using
POWERTEC 70354 Quick Adapter (sold separately).
Figure 5
SHOP SETUP EXAMPLE
See Figure 7. Example of a Dust Collection Network setup.
NOTE: The vacuum/dust extractor must have at least 100 CFM.
• Jointers and planers should be positioned closest to the
vacuum/dust extractor for best performance.
• Assemble a blast gate at the end of the dust collection network.
• For best performance of the network close all of the blast gates
except for the one attached to the tool being used. Figure 3
shows the blast gates in the Open and Closed positions.
• Assemble the vacuum/dust extractor connector to the
dust collection network and then to the vacuum hose of a
vacuum/dust extractor.
Figure 7
Want a fast convenient way to swap tools
on your Dust Collection Network?
Consider adding a POWERTEC 70354 4-inch Quick Connect
Dust Port Adapter (sold separately) to each station.
Easy to Use: Quickly connect or disconnect the tools dust port
outlet when using the POWERTEC 70354 4" Quick Connect
Dust Port Adapter.
Handles Multiple Size Ports: The POWERTEC 70354 Quick
Connect Dust Port Adapter, when attached to a 4" ID vacuum
hose, can handle connection ports from 1-3/4" OD to 2-1/2" OD.
Flexible, Durable Materials: The ange is very elastic and
seals well around tool ports ranging from 1-3/4" OD to
2-1/2" OD making this a useful adapter for 4" vacuum hoses.
The Adapter body is made of durable heavy duty plastic.
Figure 8
 Loading...