INSTALL THE FENCE
Figure 8
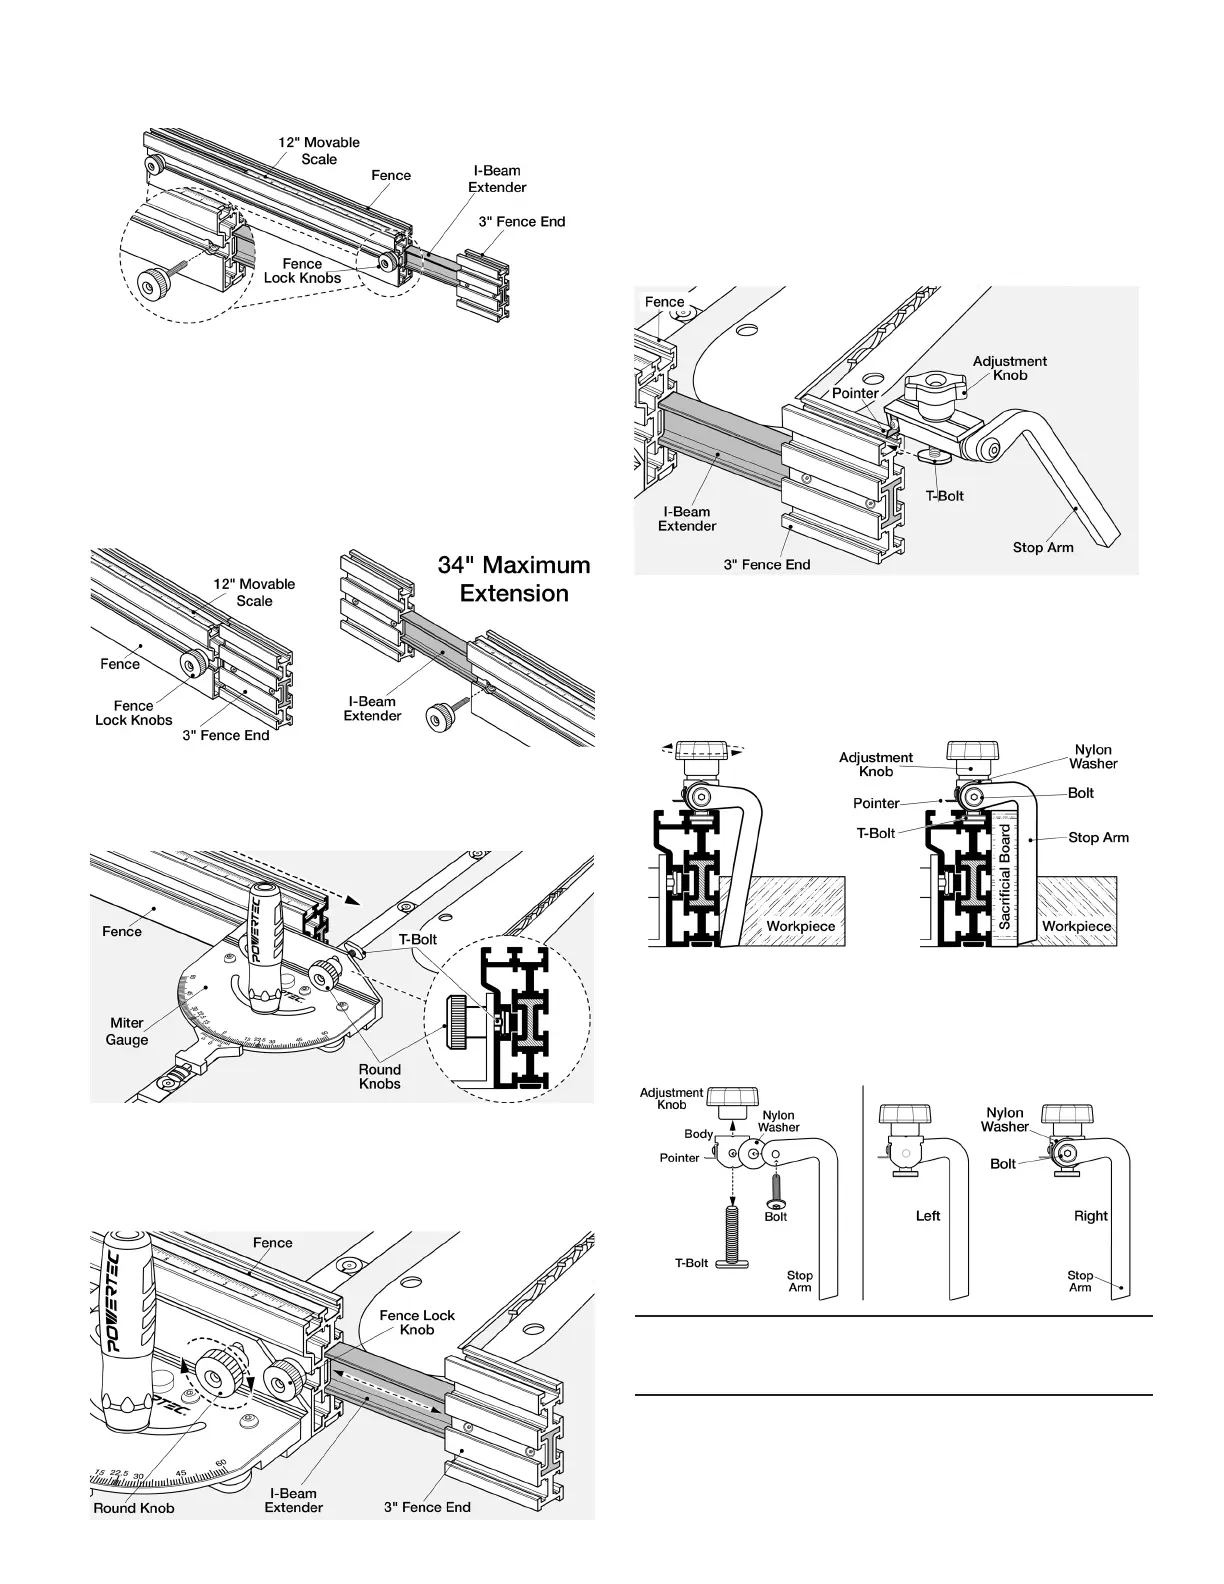
1. See Figure 9. To expand the Fence and/or switch Fence
position, loosen the two Lock Knobs and pull the 3" Fence
End out to desired length and secure Lock Knobs. The I-Beam
Extender with 3" Fence End allows an additional 17" extension.
2. The I-Beam Extender can be used on either end of the Fence. To
change sides, loosen the Lock Knob, remove the 3" Fence End
with I-Beam Extender. Locate the I-beam prole on the other end
of the Fence and insert I-Beam into the Fence. Tighten Knobs.
Figure 9
3. See Figure 10. Remove Fence Lock Knob. Loosen the two
5/16" Round Knobs on the Miter Gauge and slide the T-bolts
into the Fence slot.
Figure 10
4. See Figure 11. Insert I-Beam Extender with 3"Fence End.
Set to desired length. Tighten 5/16" Round Knobs on Miter
Gauge. Reinsert Fence Lock Knobs and tighten to secure
I-Beam Extender in position.
Figure 11
INSERT THE FLIP STOP
1. See Figure 12. Slide the T-Bolt into the slot on the top of the
Fence or 3" Fence End (shown with 3" Fence End). Position
the arm as needed and tighten the AdjustmentKnob.
NOTE: When clamped, the unique cylindrical shape of the body
wedges into the top of the T-Track allowing the flip stop to work
with different size of T-Tracks and eliminates slack ormovement.
Figure 12
2. See Figure 13. This Fence Flip Stop is extremely versatile.
The Stop Arm can be used with or without a sacricial board.
If using a sacricial board, the angle of the specially designed
arm accommodates for the extra 3/4" width and ips down.
No conversion or adjustment is required.
Figure 13
3. See Figure 14. To reposition the ip arm, use a 5 mm hex
wrench (not included) to remove the bolt and move the ip arm
assembly to the required side of the body. Make sure nylon
washer is between the ip arm and body and replace bolt.
Figure 14
The Fence Flip Stop arm can be positioned to Left or Right of thebody.
Remove Adjustment Knob and T-Bolt.
Remove Bolt, Arm and Nylon Washer of Flip Stop.
Reposition and assemble on opposite side of body.
 Loading...