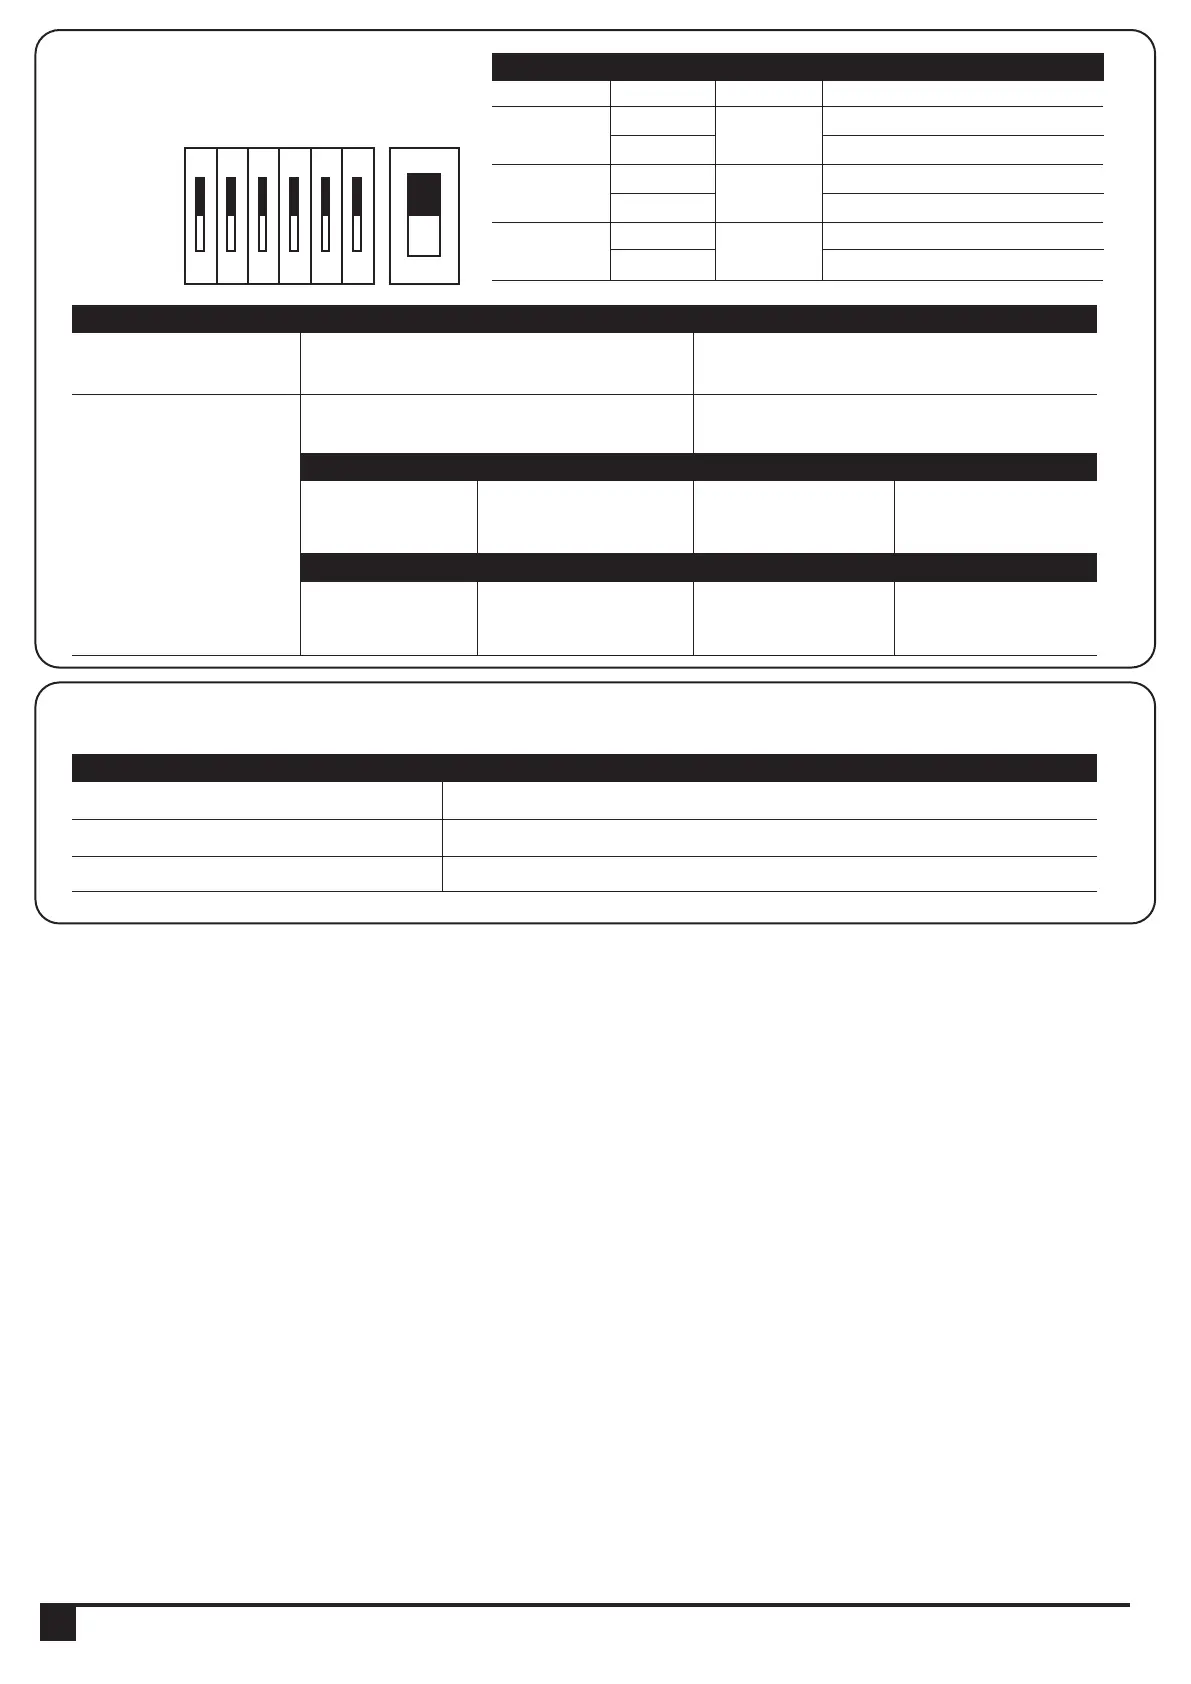
3.6 SW2/SW6 Setting:
ON
OFF
ON
OFF
PH2
Ph2
Stop
D
C
SW6
SW2
1 2 3 4 5 6
SW6 Dip Switch
Dip Switch
1
2
3
Setting
ON
OFF
ON
OFF
ON
OFF
Device
Ph1
Ph2
Stop
Description
Ph1 NOT connected
PH2 connected
Ph2 NOT connected
Ph2 connected
Stop NOT connected
Stop connected
10
INSTRUCTIONS PL500 SLIDING GATE OPENER USER MANUAL
2 channel transmitter
4 channel transmitter
(Optional)
Button A(left): Open-Stop-Close-Stop
Button B(right): External Device
Button A(left): Open-Stop-Close-Stop
Button B(right): External Device
Button A(left): Open-Stop-Close-Stop
Button B(right): Pedestrian Mode
Button A(left): Open-Stop-Close-Stop
Button B(right): Pedestrian Mode
Button C(up):
External Device
Button D(down):
No Function
Button C(up):
Pedestrian Mode
Button D(down):
No Function
Transmitter SW2 Dip Switch on SW2 Dip Switch off
SW6 Dip Switch 4 on, Dip Switch 5 off SW6 Dip Switch 4 on, Dip Switch 5 off
Button C(up):
No Function
Button D(down):
External Device
Button C(up):
No Function
Button D(down):
Pedestrian Mode
SW6 Dip Switch 4 off, Dip Switch 5 on SW6 Dip Switch 4 , Dip Switch 5 on
LED1 Photocells
LED2 Photocells
LED3 RF Learning
LED1 will be on when the first pair of the photocells are activated.
LED2 will be on when the second pair of the photocells are activated.
LED3 will be on when RF-learn button is pressed.
LED Indication Descriptions
3.6.1 Recognition of LED