23
PM-1030V v5 2020-10 Copyright © 2020 Quality Machine Tools, LLC
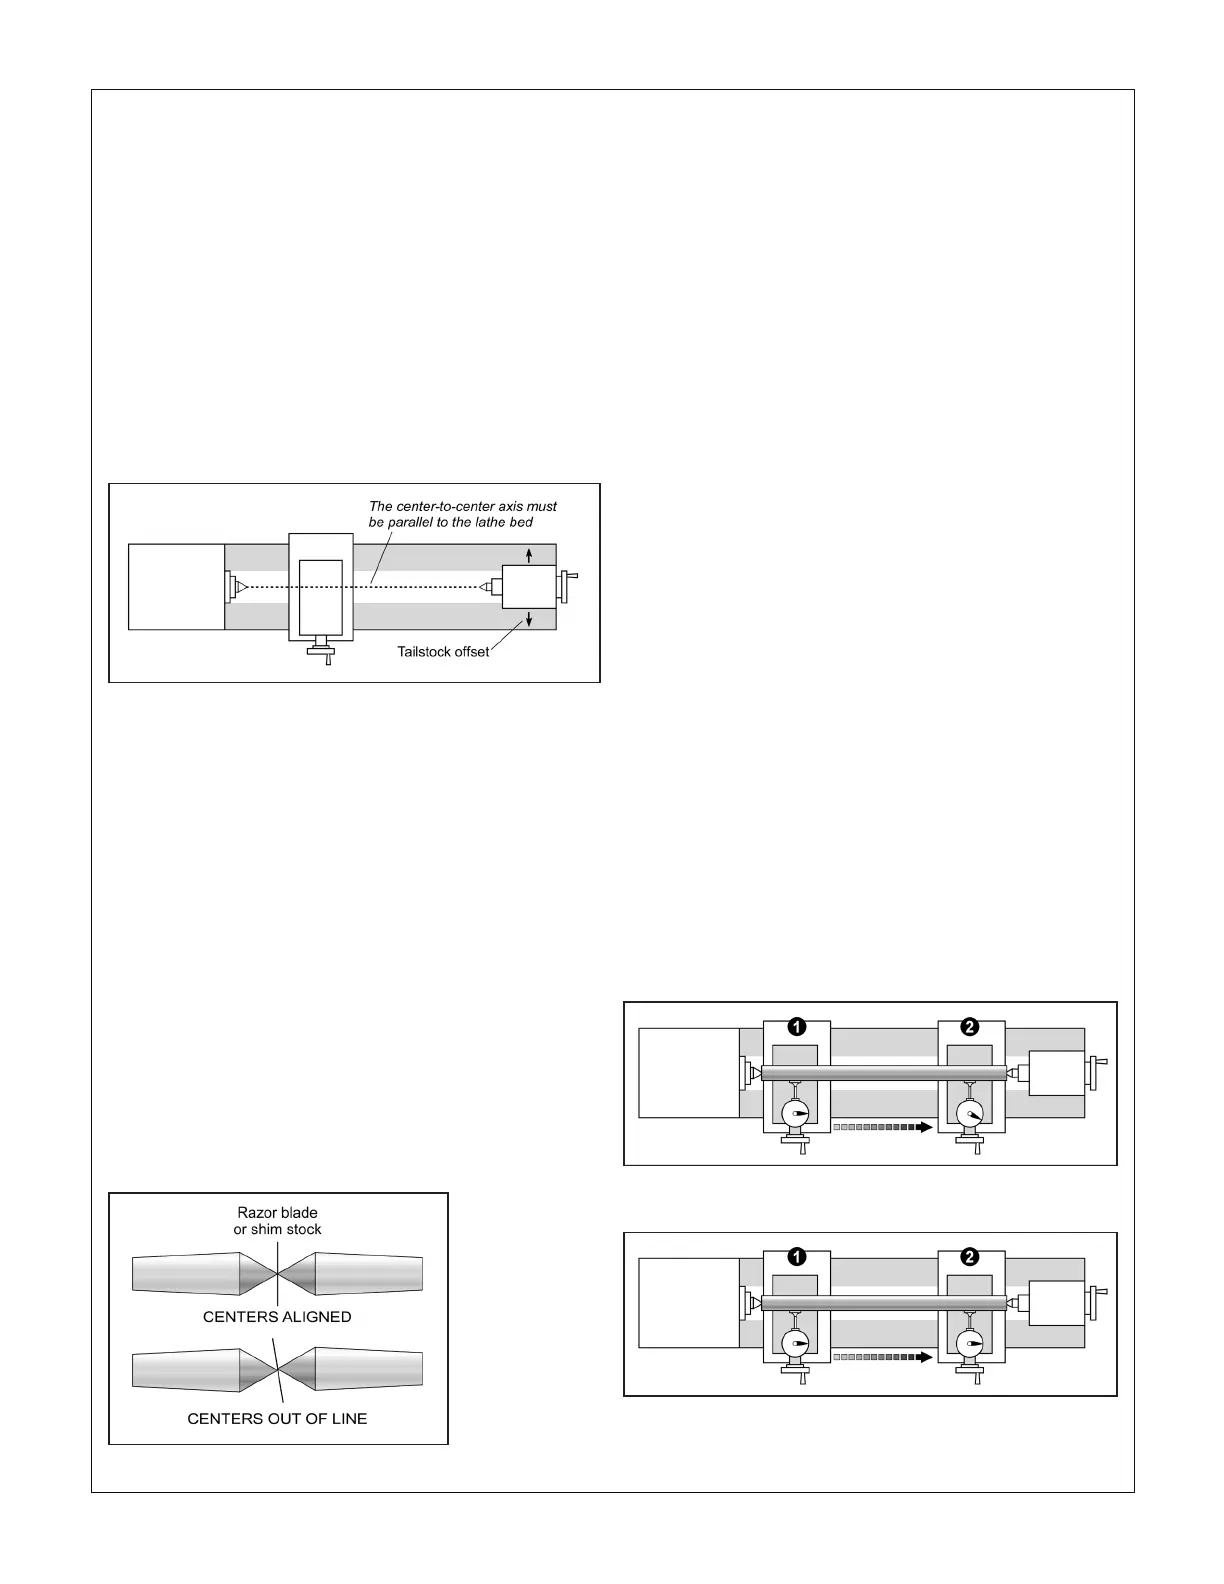
Figure A Center-to-center axis
ALIGNING THE LATHE
The most important attribute of a properly set up lathe is its
ability to “machine parallel”, to cut a cylinder of uniform diame-
ter over its entire length. In other words, no taper.
Leveling of the lathe is a part of this, see Section 1. Equally
important is the alignment of the center-to-center axis with the
lathe bed, as seen from above. [Vertical alignment is nowhere
near as critical, rarely a cause of taper unless the lathe is dam-
aged or badly worn.]
How to align lathe centers
The tailstock may be oset for taper turning and other oper-
ations. For routine operations, the oset must be precisely
zero, Figure A.
Precise method
This method uses a precision ground steel rod at least 10"
long. Look for 3/4 or 1 inch "drill rod" with a diameter tolerance
of ± 0.001" or less.
Straightness and uniform diameter are both important
(absolute diameter is not).
1. Set the rod in a collet chuck, or independent 4-jaw chuck,
with the outer end about 1/2 inch clear of the chuck.
2. Use a dial indicator to check for runout. If using a 4-jaw
adjust as necessary for minimum TIR (aim for 0.0005" or
less).
3. Center-drill the end of the ground rod.
4. Reverse the rod, re-adjust for minimum TIR, then drill the
other end.
5. Set the drill rod snugly between centers, as Figure C. Lock
the tailstock.
6. Set a dial indicator on the cross-slide (to eliminate vertical
error use a at disc contact, not the usual spherical type —
if a disc contact is not available, machine a cap to t over
the spherical point).
7. Starting at location (1), note which way the pointer rotates
when the cross-slide is moved inward. (In this diagram the
pointer is shown turning clockwise.)
8. Pre-load the indicator by a few thousandths, then traverse
the saddle from (1) to (2).
If the pointer turns clockwise as you go toward the tailstock, as
Figure C, the tailstock is biased to the front. This will cause the
lathe to cut a tapered workpiece with the larger diameter at the
headstock end. Correct this by a series of very small adjust-
ments to the tailstock oset, aiming for the perfect result — no
pointer movement from (1) to (2), Figure D.
The scale provided on the tailstock is not reliable for pre-
cision work — think of it as only a starting point. What follows
are two methods for aligning centers, one quick and easy, the
other more precise.
Quick method
This method works only if the centers are in new condition,
sharp and clean.
1. Carefully clean the taper sockets and the tapers them-
selves. Install the tapers.
2. Move the saddle left as far as it will go, then slide the
tailstock left to touch the saddle.
3. Lock the tailstock (this is important — unlocked to locked
can mean an oset of several thousandths). Try to use the
same locking force every time you move the tailstock.
4. Advance the tailstock quill to bring the centers together.
5. Place a scrap of hard shim stock or an old-style dou-
ble-edge razor blade between the centers, Figure B.
6. Advance the tailstock quill to trap the blade, then lock the
quill. If the centers are aligned, the blade will point squarely
front to back. If not, adjust the tailstock oset by a series of
very small adjustments.
7. If the range of quill motion permits, check the blade align-
ment at various extensions of the quill. There should be no
appreciable variation.
Figure C Drill rod between misaligned centers
Figure B Quick alignment check
Figure D Perfect alignment: zero indicator change between
locations 1 and 2
 Loading...