4
5. OPERATION (CONT.)
5.2 Filling Bath
NOTE:
DISTILLED WATER IS RECOMMENDED; IT WILL
NOT CORRODE THE BATH CHAMBER
AND IT REDUCES THE NEED FOR FREQUENT
BATH CLEANING.
DO NOT USE 18 MEG DEIONIZED WATER.
NOTE: If this is the only source of treated water
available; mix 50% with regular tap water.
Before filling, check the power switch and make
sure that it is in the "OFF" position.
Fill the bath with distilled water, making allowance
for displacement by the sample(s) being immersed
and for expansion of the media upon reaching
operating temperature.
For Model 181 and above, the maximum liquid
level should be 1-1/2" from the top surface of the
bath after sample(s) are immersed. For the Model
180, the maximum liquid level should be 3/4" from
the top of the bath.
5.3 Bath Cover
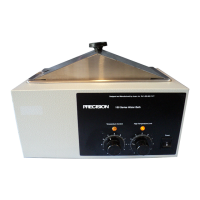
To conserve energy and reduce evaporation, use
the cover supplied with the
bath throughout the
temperature range of the bath. This cover must be
in place to reach and maintain 100°C.
CAUTION:
DO NOT USE ALUMINUM FOIL AS A COVER; IT
MAY CAUSE CORROSION OF THE STAINLESS
STEEL AS A RESULT OF AN ELECTROLYTIC
REACTION.
NOTE:
AS WATER BATHS ARE OPERATED,
ESPECIALLY AT ELEVATED TEMPERATURES,
CONDENSATION WILL FORM ON THE
UNDERSIDE OF THE GABLE COVER. THE
AMOUNT OF CONDENSATION CAN BE
CONSIDERABLE. CARE SHOULD BE
EXERCISED WHEN REMOVING THE COVER
SO THAT WATER WILL FALL BACK INTO THE
BATH CHAMBER, AND NOT ON THE BATH
SURFACE. THE COVER SHOULD BE PLACED
UPSIDE DOWN WHEN REMOVED TO MAINTAIN
A DRY WORK AREA.
5.4 Bath Thermometer
Each bath is supplied with a thermometer and O-ring
(packed separately). The
thermometer is attached to
the bath via a metal clip on the top of the bath.
Slip the O-ring onto the thermometer; insert this
assembly through the metal clip until the immersion
depth indicator line is at or below the water surface.
The thermometer bulb should always be located
above the diffuser shelf.
CAUTION:
CARE SHOULD BE TAKEN TO PROTECT THE
THERMOMETER FROM ACCIDENTAL
BREAKAGE AND SPILLAGE OF CONTENTS.
5.5 Power ON
Insert the line cord into the proper receptacle and
turn the power switch to the "ON" position. This
action will energize the heater and cause the
amber pilot lamp to light. The pilot lamp will stay lit
as long as the heater(s) is energized.
5.6 Setting Thermostats
NOTE:
DIAL NUMBERS ON FRONT PANEL ARE FOR
REFERENCE ONLY; THEY ARE NOT VALUES
FOR WATER
TEMPERATURE WITHIN THE UNIT.
WARNING:
DO NOT LEAVE THE BATH UNATTENDED DUR-
ING THE SETTING PROCEDURE.
A. Turn both the Temperature Control and High
Temperature Limit thermostat knobs fully
clockwise. The Temperature Control Pilot lamp
should illuminate.
B. When the bath temperature reaches the desired
temperature, slowly turn the High Temperature
Limit Thermostat counterclockwise and stop
when the High Temperature Limit Pilot Lamp
illuminates.
C. Turn the High Temperature Limit Thermostat
Knob clockwise to next highest reference number.
The High temperature Limit light should go off.
The High Temperature Limit thermostat is now
set approximately 5° above the desired bath
temperature.

 Loading...