8
7. SERVICE
WARNING:
UNIT MUST BE DISCONNECTED FROM POWER
SOURCE PRIOR TO SERVICING. IT IS
RECOMMENDED THAT ALL SERVICE BE
PERFORMED BY QUALIFIED SERVICE
PERSONNEL.
7.1 General Information
To service the water bath, turn it on its side or top
and remove the bottom plate and insulation. To
prevent scratching of the enameled surface, place
protective material (such as cardboard, cloth, or
newspaper) under unit.
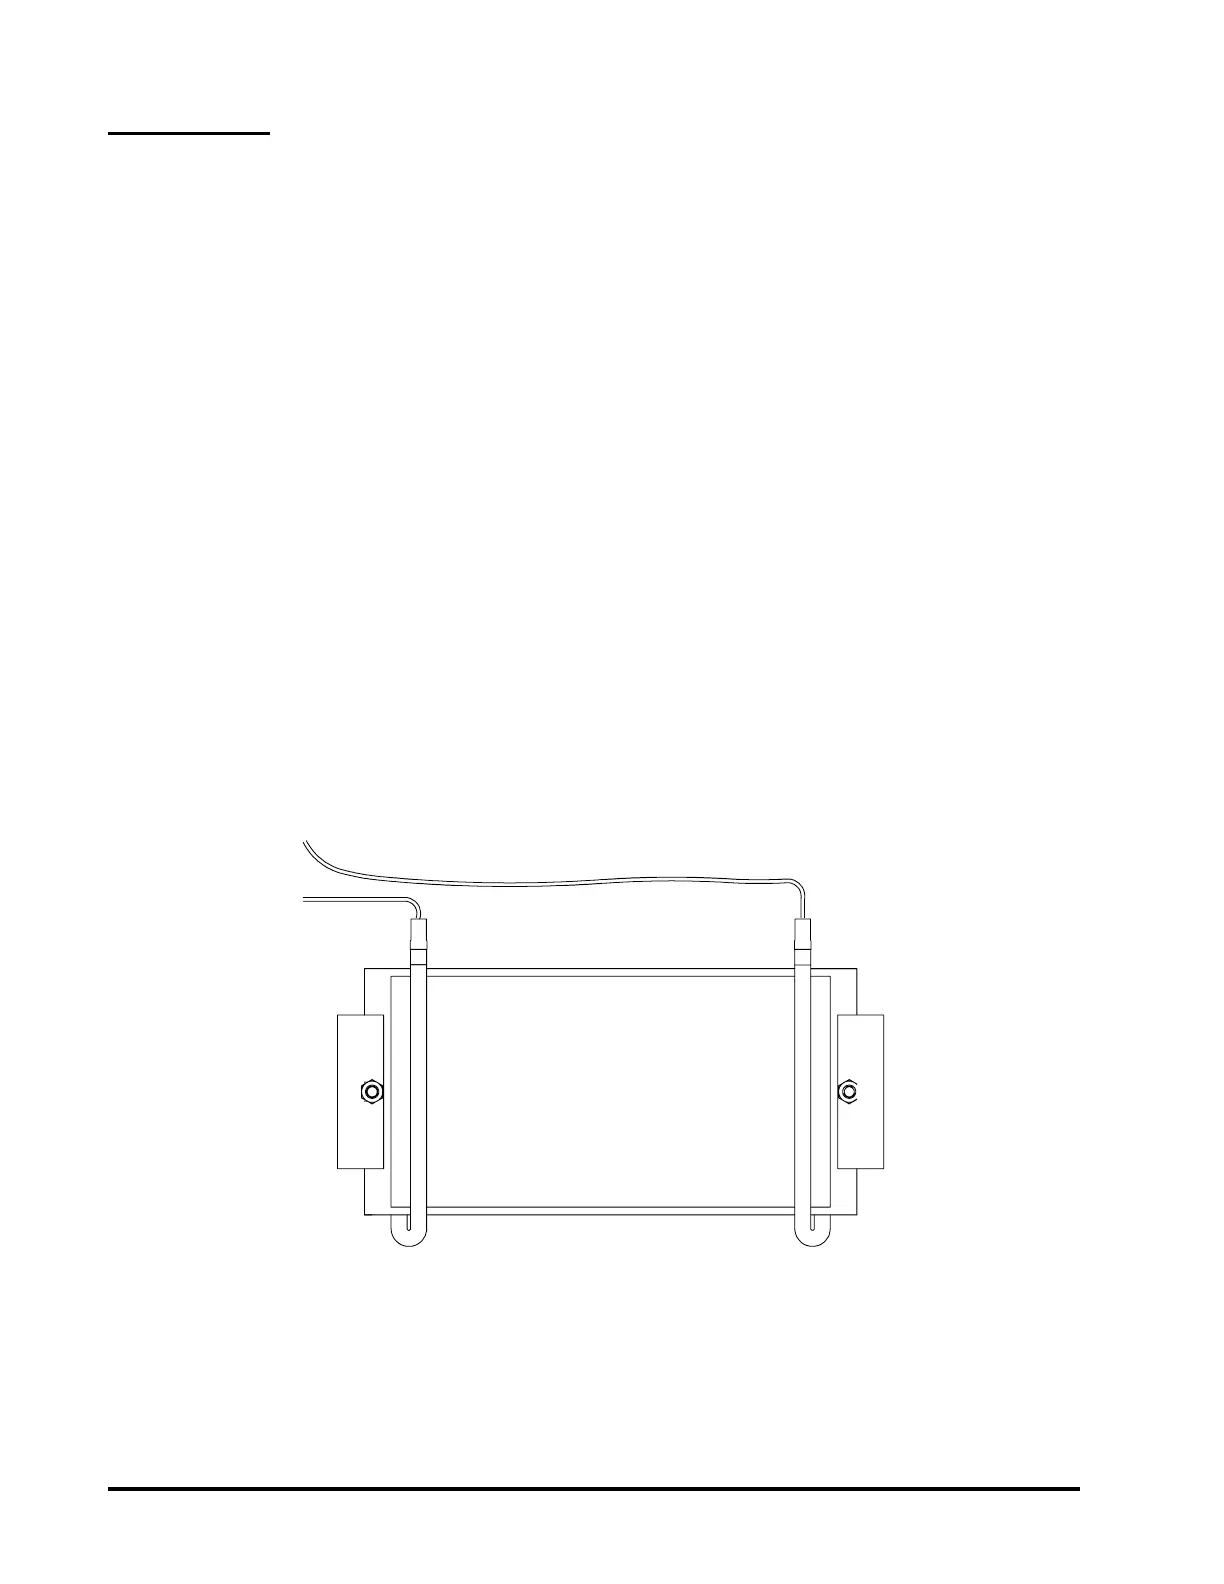
7.2 Heater Element Replacement
A. Put the power switch in the "OFF" position and
disconnect power to the bath.
B. Turn bath upside down and remove bottom plate
& fiberglass insulation
C. Disconnect the two leads from heater element.
D. Remove the two hex nuts that fasten the heater
element to the pan and remove element.
E. Remove FiberFax insulation from the old element
and insert it into the new element.
F. Fasten the new heater element to the pan and
connect the two leads.
CAUTION:
BE SURE THE WIRE LEADS DO NOT TOUCH
THE HEATER ELEMENT.
G. Replace insulation and install bottom plate.
NOTE:
USE NO THERMAL COMPOUNDS OR PASTE
ON HEATER.
Figure 7.1 Heater element