Do you have a question about the Precision 280 Series and is the answer not in the manual?
Importance of user satisfaction and understanding the unit for safety objectives.
User's duty to understand operation, train operators, and follow warnings.
Specifies the product is not for sterile/patient use or hazardous locations.
Details factory packing, inspection, and saving material if damage is found.
Outlines steps for filing claims for visible and concealed transit damage with the carrier.
Precision's commitment to support claims if specified procedures are followed.
Highlights Precision Baths' use in research and quality control for tests requiring uniformity.
Describes the control panel's role in operation, adjustment, and calibration.
Explains PID temperature control and the importance of the gable cover for optimal sensitivity.
Details the automatic cutout triggered by high temperatures and reset procedure.
Describes the interior (stainless steel) and exterior (galvanized steel) construction.
Presents key performance specifications like uniformity and sensitivity at 37°C.
Instructs on bath placement on a level surface away from ambient changes.
Details installing the shelf and using leg extensions for height adjustment.
Emphasizes proper grounding, use of three-prong plugs, and avoiding adapters.
Advises on determining total current draw for the circuit to avoid overload.
Explains the power switch and the main control panel's components.
Explains the three-digit display for actual, set, and calibrated temperature values.
Describes the indicator light that shows when the heater is active.
Explains how the calibrate key enters calibration mode for temperature matching.
Describes keys for adjusting setpoints and confirming values.
Advises on filling the bath, displacement, and maximum liquid level.
Recommends using the gable cover for energy conservation and accuracy.
Describes the sequence of display lights and temperature readings upon powering on.
Explains how to temporarily view the set temperature using specific keys.
Details the process of adjusting and confirming a new temperature setpoint.
Provides step-by-step instructions for calibrating the bath to a thermometer reading.
Advises on general cleaning, dealing with algae, and avoiding harsh chemicals.
Lists acceptable and unacceptable chemicals for use in or near the bath.
Outlines steps for removing iron rust using acid solutions and safety precautions.
Advises on handling condensation from the gable cover during operation.
Directs users to a table for basic repair information.
Lists tools and instruments needed for troubleshooting procedures.
Provides steps to diagnose and resolve issues when the unit does not heat.
Provides steps to diagnose and resolve issues with inconsistent temperature control.
Suggests checks for the unit overheating or displaying excessive heat.
Outlines steps to diagnose and resolve issues where the display shows no output.
Details checking the TRIAC output voltage for heater operation.
Advises verifying the faulty part using the troubleshooting guide before replacement.
Refers to a table for specific replacement procedures and consequences of failure.
Provides step-by-step instructions for replacing the temperature sensor.
Details the procedure for removing and replacing the unit's heater element.
Outlines the steps to replace the main control board.
Describes how to attach extension legs to the diffuser pan.
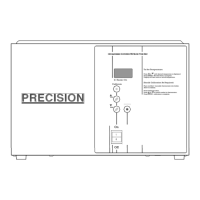
Illustrates the front panel layout with labeled components and controls.
Shows a cross-section of the unit from the rear, highlighting insulation and cord.
Displays the bottom view, showing internal components like the heater and PCB.
Illustrates the electrical connections for 120 VAC operation.
Shows the electrical connections specific to 230 VAC operation.
States the one-year warranty for defects and usage conditions.
Defines Precision's obligation for repair/replacement and notes on part replacement.
Explicitly disclaims warranties of merchantability, fitness, and liability for consequential damages.
States Precision is not responsible for issues arising from unauthorized repairs or modifications.
Clarifies that oral advice is not a warranty and should not be relied upon.
Details replacement of defective components within one year, including labor for factory returns.
This document describes the Precision Microprocessor-Controlled General Purpose Water Baths, 280 Series Models (280, 281, 282, 283, 284, 285, 286 & 288).
The Precision 280 Series Water Baths are microprocessor-controlled general-purpose laboratory instruments designed for research and quality control applications. They are engineered to provide superb temperature uniformity and stability, making them particularly suitable for legal or reference tests where precise temperature control is critical. The baths utilize a Proportional Integral Derivative (PID) temperature control system to achieve and maintain accurate temperatures. A high-limit temperature cutout is integrated as a safety feature to prevent overheating in the event of an empty water bath. If the sensor detects a temperature 5°C higher than the set temperature, the cutout activates, displaying "EEE" and inhibiting the heater. To reset, the power must be cycled off and then back on. This high-limit cutout is internally set and not user-adjustable.
The operation of the 280 Series Water Baths is managed through a user-friendly microprocessor control panel. This panel includes push-button keys and a single digital display window, allowing operators to easily adjust the bath temperature and perform calibration.
Setting Temperature: To set the desired temperature, users press the up or down arrow keys until the target temperature is displayed. Continuous pressing of these keys will initially change the display slowly, then rapidly after a 1-degree change. Once the desired temperature is reached, pressing the ENTER key accepts the new set point, which will flash three times before the display reverts to the actual bath temperature. If the ENTER key is not pressed, the new set temperature will not be accepted, and the bath will continue to operate at the previous setting.
Calibration: The water baths are factory-calibrated for a wide range of temperatures. However, due to potential non-linearities in the control system, users may need to calibrate the display to match a certified thermometer's reading, even for small differences. To perform calibration, a certified/traceable thermometer should be placed in the holder and allowed to stabilize for at least 15 minutes. The CALIBRATE key is then pressed, causing the display to show "CAL" and flash back to the bath temperature four times. Pressing the CALIBRATE key again while the display is flashing allows users to adjust the readout using the up or down arrow keys to match the thermometer's reading. Pressing ENTER completes the calibration, and the display will flash three times with the adjusted reading before stopping. This ensures more accurate control at the set point.
Filling and Operation: When filling the bath, distilled water is recommended. If deionized water is the only option, a 50/50 mixture with tap water should be used, as 18 MEG deionized water can damage metals. Allowance must be made for water displacement when immersing samples, ensuring the liquid level remains at least one inch below the top of the pan. To conserve energy, reduce evaporation, and improve temperature control accuracy, especially at 100°C, the provided gable cover should always be used. Aluminum foil is not recommended as a cover due to potential corrosion from electrochemical reactions. The stainless steel metal shelf (diffuser pan) should be placed inside the bath chamber with corners facing downward. This shelf provides a sample base and protects samples from direct contact with the hot bath bottom. For models other than the 281, a Leg Extension Kit is included to increase the diffuser pan height if needed.
Powering On: The power switch is located at the lower end of the control panel. Upon activation, all display segments and the "HEATER ON" indicator will illuminate. After 3 seconds, the current set temperature will be displayed for 5 seconds, then the display will switch to the actual bath temperature.
Proper maintenance is crucial for the longevity and optimal performance of the Precision 280 Series Water Baths.
Cleaning and Care of Stainless Steel: While stainless steel is corrosion-resistant, it is not impervious. Regular care is necessary for maximum life. Routine cleaning typically involves changing the water and using mild soapy water or a non-scratching scouring powder. Harsh chemicals should be avoided, as spills can attack the galvanized steel bath body. If spills or condensation occur, the bath liquid should be immediately drained, and the unit thoroughly flushed. All metal surfaces should be cleaned and dried after use to prevent corrosion.
Preventing Electrolysis: Electrolysis can damage stainless steel. This occurs if an object rests directly on the surface, trapping moisture that becomes oxygen-starved while surrounded by oxygen-containing water. This electrolytic action can pit or erode the stainless steel.
Addressing Algae and Microorganisms: If algae or other undesirable microorganisms form on the bath media, a small amount of formaldehyde or zephiran chloride can be added to alleviate the problem.
Use of Alternative Media: If media other than water (such as those listed in the manual, e.g., Barium Chloride, Calcium Chloride, Phenol) must be used, their contact time should be limited to a maximum of four hours. Surfaces should be cleaned immediately after use. Certain chemicals, including Aqua Regia, Ferric Chloride, Iodine, Sodium Azide, and Sulfuric Acid, should never be used.
Removing Rust: Should the stainless steel become discolored by iron rust, a specific procedure is recommended. Users should prepare a solution of 20% nitric and 1.5% hydrochloric acid (or a 2% to 5% solution of warm oxalic acid). This solution should be swabbed over the surface and allowed to remain for 1 to 2 minutes until the rust loosens. Immediately after, flush thoroughly with clean water until all acid is removed, then dry completely. Safety precautions are paramount during this process: heavy gloves or other adequate hand protection, goggles or other adequate eye protection, and working in well-ventilated areas are mandatory.
Managing Condensation: During operation, condensation will form inside the gable cover. When removing the cover, position one corner over the water bath to allow runoff into the bath. Shaking the cover can assist water runoff. Any water spillage on or around the bath should be wiped up.
Troubleshooting and Parts Replacement: The manual provides detailed troubleshooting procedures for common issues like "No Heat," "Unstable temperature control," "Too much heat," and "No Display." These procedures guide qualified technicians through steps such as checking the temperature probe, heater, and TRIAC (high voltage output of the control board). A list of suggested tools is also provided. For parts replacement, the manual outlines procedures for replacing the temperature sensor, heater, and control board, emphasizing that service should only be performed by qualified personnel after disconnecting the power source. Specific instructions are provided for installing or removing jumpers (JP3 and JP4) on the control board depending on whether the unit is 115 Volt or 230 Volt.
| Type | Precision Balance |
|---|---|
| Display | LCD |
| Pan Size | 90mm |
| Power Supply | AC adapter |
| Interface | RS232 |
| Units | g, kg, oz, lb, ct |