©2023 Peloton Interactive | P94 P84 Touchscreen Console | Installation Guide
25 September 2023 | 306876-101B ENU | 2 of 2
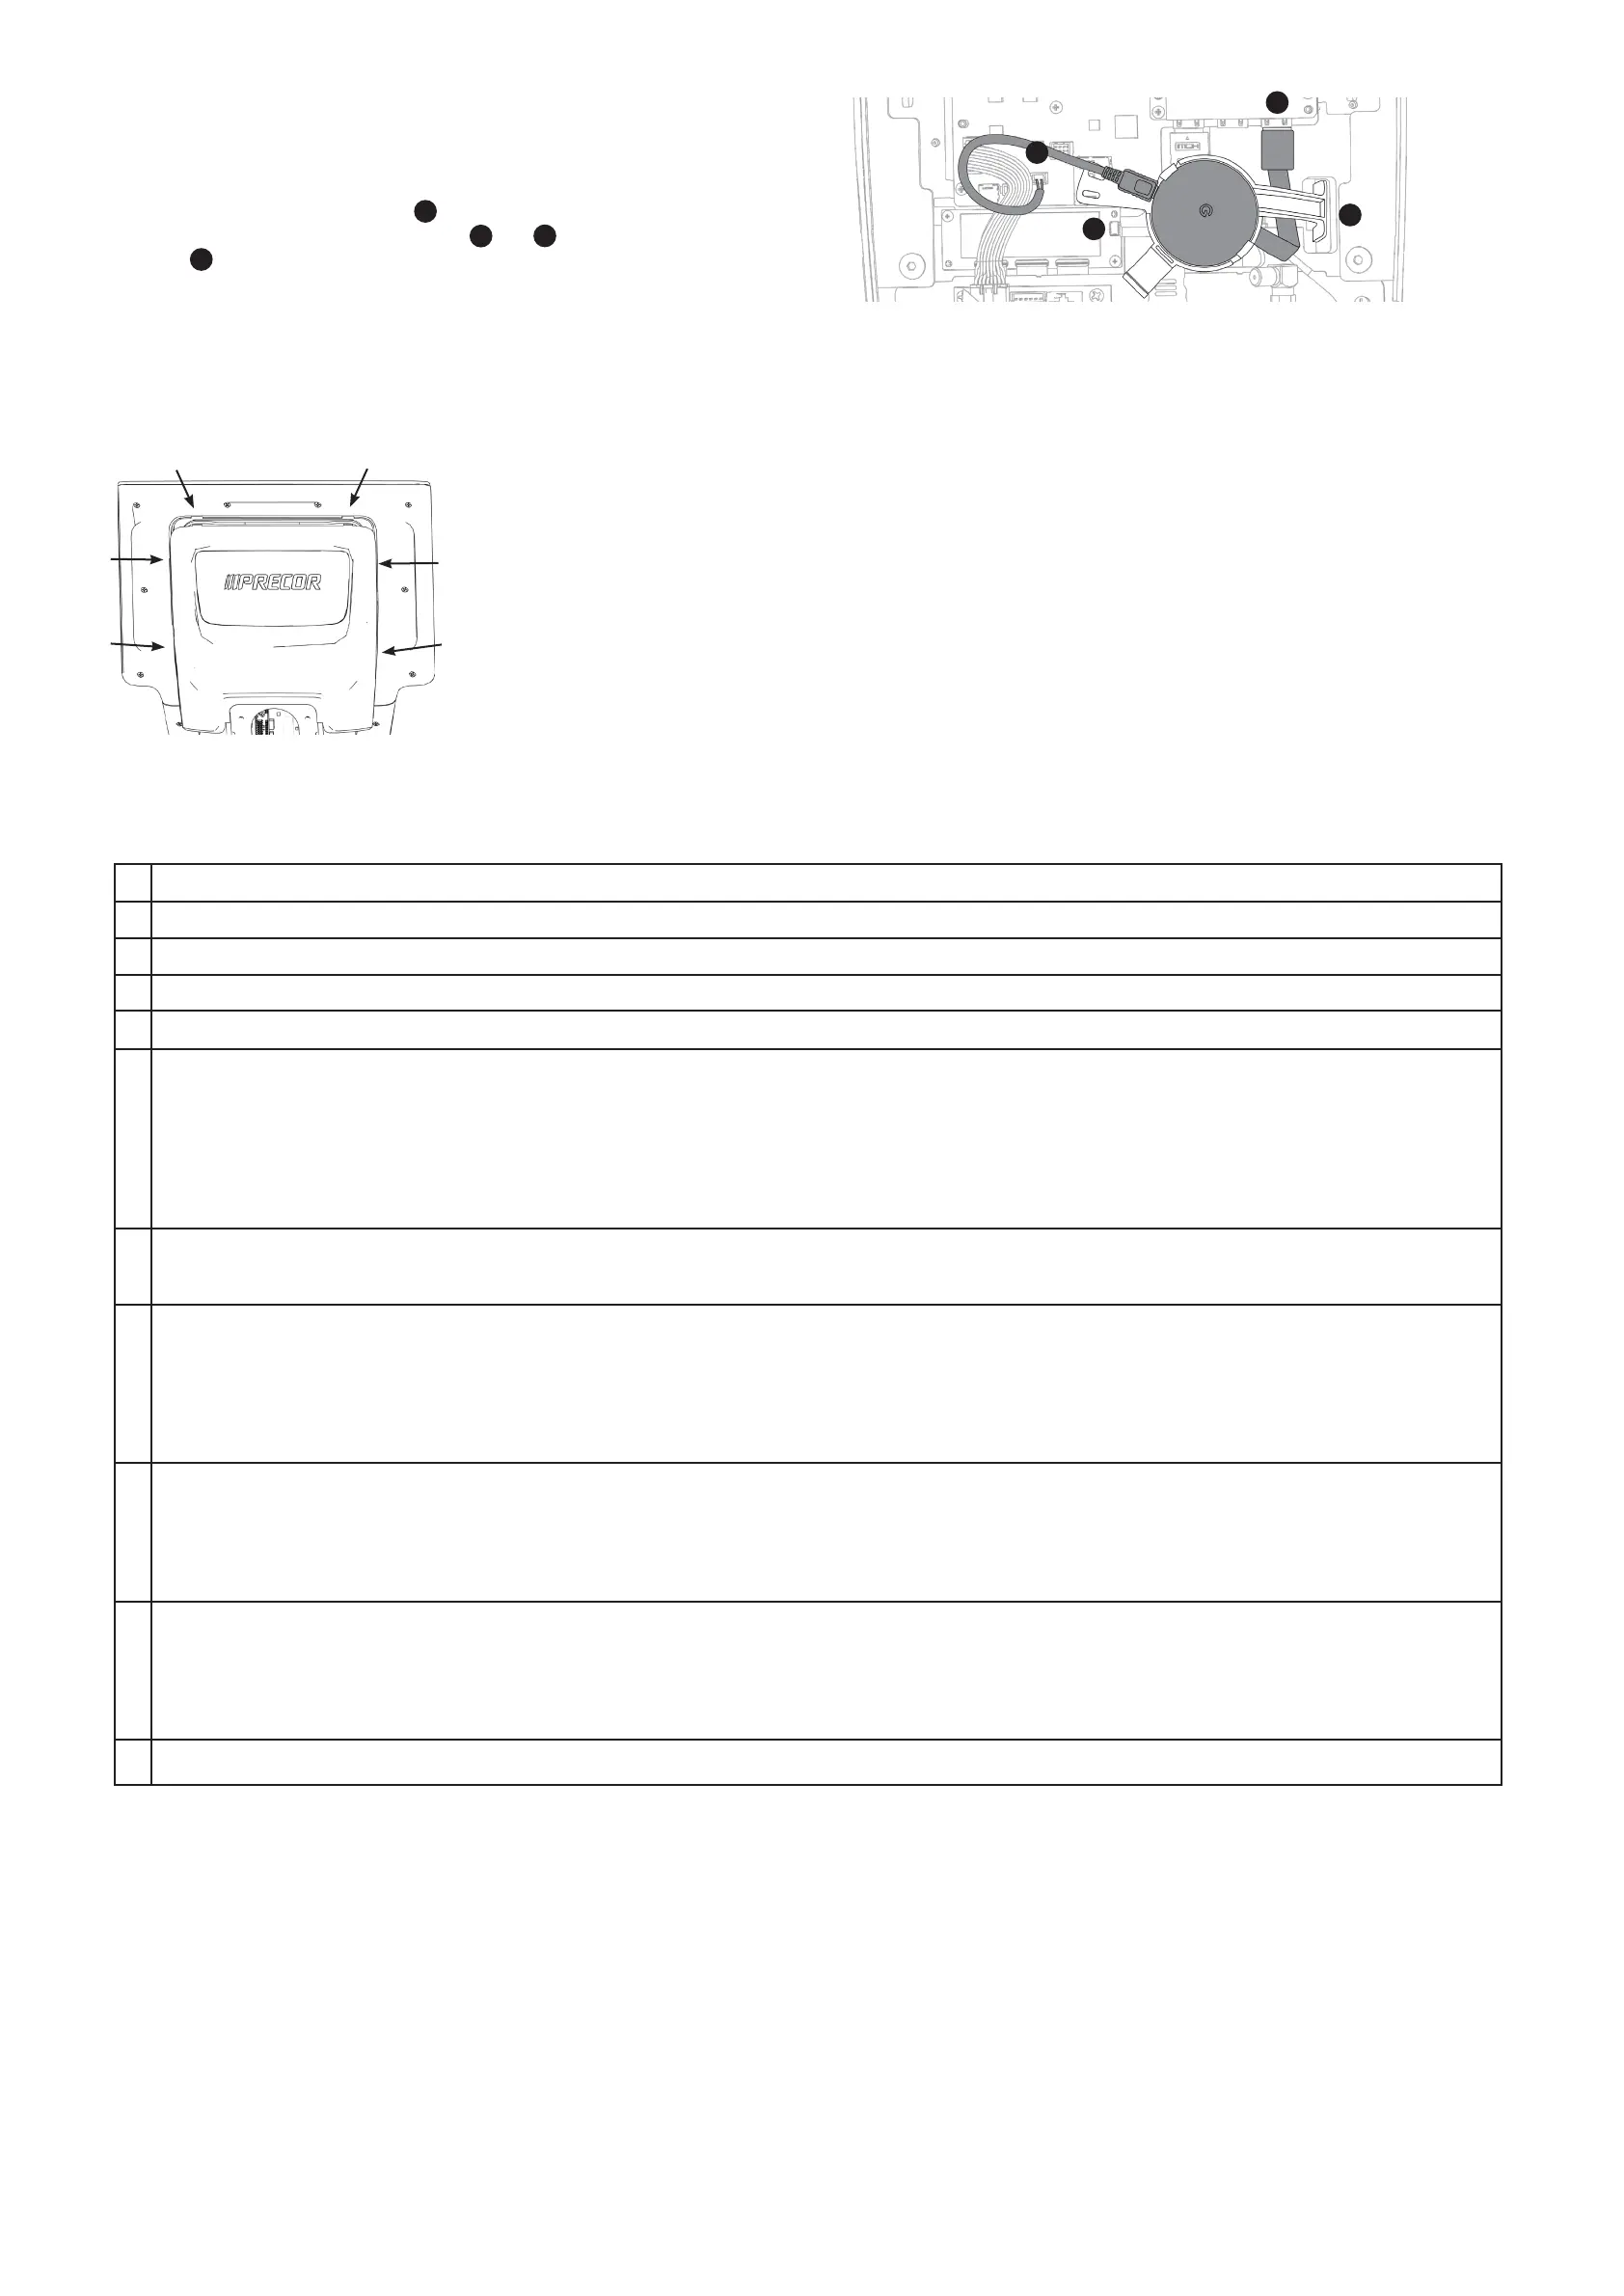
Install casting puck and connect cables (optional)
NOTE Casting requires installation of the casting puck and PrecorCast™ server. Refer to
the server installation and conguration guide for casting and server set up. Casting is not
available in China.
1. Plug the HDMI cable from the puck into HDMI-3 connector (Figure 6).
2. Slide puck with holder into holder connectors ( and in Figure 6).
3. Connect the power cable (Figure 6).
Install back cover and power on
1. Ensure cables are routed correctly and not pinched anywhere.
2. Snap back cover into place (Figure 7).
3. Connect unit to power source, turn on, and allow console to
power on.
Connect to a network
Once powered on, connect the console to the network:
1. On the console, press and hold the Stop button for seven seconds to bring up the code entry screen to access
the system settings.
2. Enter code and tap OK.
3. Go to Settings > System Settings > Connectivity.
4. Go to Network Type > Wired (or Wi-Fi) > Go.
5. Tap Congure. From the list, select appropriate network and enter the credentials.
6. Tap Back to return to the Connectivity screen. Your settings will automatically be saved.
Final Checklist
Complete the installation by following this checklist in order below to test performance, function, and network set up.
1 Ensure the new power supply is installed.
2 Install the console as instructed in this document.
3 Ensure that the CPA to MPA cable is reconnected at both ends.
4 Verify that any cables from the oor or wall cannot become caught in the moving components of the equipment.
5 Verify equipment has power and is turned on.
6 Verify the motion controls work:
1. Step on the equipment as shown on the labels and place your hands in the correct positions, if applicable.
2. Tap Home on the console. For all equipment except treadmills, manually move on the equipment to wake up the console.
3. Tap QuickStart to begin a workout.
4. Verify the speed and elevation work.
5. Verify the resistance works (bikes, EFX, AMT, SCL).
6. Ensure paddle or paddles work and validate on the cradle display above the paddles.
7. Test the STOP button on the console for (Treadmill and SCL), STOP button on handle of SCL, and emergency stop lanyard (Treadmill only) work.
7 Verify network connectivity:
• Go to Settings > System Settings > Connectivity.
• The IP address eld should be populated (10.15.80.90, for example). If it does not, repeat the Connect to a network section earlier in this document.
8 Set up Live TV option:
• Set PlutoTV (in select markets) or for tuner, scan for channels, or for set-top-box/media refer to https://broadcastvision.com/precorcab/ to congure for your
provider before adding channels.
• For tuner or set-top box/media adapters:
1. Verify channels available match the channel list.
2. Rename channels if necessary.
3. Set the default channel, if applicable.
9 Tap the Home button on the screen and verify:
• For TV option, check navigation for channels (select from channel guide or channel up/down) and volume (up/down)
• Headphone jack and volume controls
• Bluetooth pairing for headset or heart rate chest strap (tap Add Bluetooth icon on screen and follow instructions; for heart rate strap, ensure contact with skin
and allow 7-14 seconds to appear as option on screen)
• USB-C connection (for charging a device and updating software)
10 Verify the heart rate display works:
Begin exercising on the equipment and grasp both touch-sensitive handlebars. The heart icon ashes while the heart rate is read. You must maintain contact with
both metal plates to ensure an accurate reading. Within ten seconds, your heart rate number appears in the HEART RATE (HR) display. Perform the following checks
if a number does not appear:
1. Verify that the HR cable is properly connected in the console.
2. Repeat the test with a different person. In rare instances, it may not work.
9 If using PrecorCast, verify casting by selecting option on screen and following prompts. Refer to the PrecorCast™ install guide and online conguration guide.
Figure 6
Figure 7
 Loading...