Do you have a question about the Precor P94 and is the answer not in the manual?
Steps for securing the console cradle and seating the display onto the equipment mount.
Guidance on connecting the optional casting puck via HDMI and power cables.
Procedure for attaching the back cover and powering on the console.
Instructions for connecting the console to a wired or Wi-Fi network.
A comprehensive checklist to verify performance, function, and network setup post-installation.
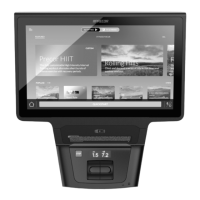
The Precor P94 (22") and P84 (16") Touchscreen Consoles are advanced user interfaces designed for integration with various Precor fitness equipment, including treadmills, StairClimbers, upright bikes, recumbent bikes, Adaptive Motion Trainers (AMT), and ellipticals (EFX). These consoles serve as the central control and display unit, offering users an interactive experience during their workouts.
The primary function of these touchscreen consoles is to provide a comprehensive and intuitive interface for operating Precor fitness equipment. They allow users to initiate workouts, adjust settings such as speed, elevation, and resistance, and monitor their progress. The consoles are equipped with high-resolution touchscreens that display workout metrics, entertainment options, and system information.
For treadmills and StairClimbers, the P94 22" console is specifically designed to fit, while both P94 and P84 consoles can be matched to other equipment based on the number of paddles on the touchscreen. Single-paddle touchscreens are compatible with upright bikes, recumbent bikes, and StairClimber™ (SCL) models, whereas dual-paddle touchscreens are used with treadmills, Adaptive Motion Trainer™ (AMT), and elliptical (EFX) machines. This paddle configuration ensures proper functionality and control specific to the equipment type.
The consoles facilitate a range of user interactions, including QuickStart workouts, predefined programs, and manual adjustments. They integrate with various external devices and services to enhance the user experience. This includes connectivity for media devices, heart rate sensors, and network access for streaming content and system updates.
The consoles offer a rich set of usage features designed for ease of access and a personalized workout experience.
The installation and maintenance guide provides clear instructions for ensuring the console's longevity and optimal performance.
By combining robust functionality with user-friendly features and clear maintenance guidelines, the Precor P94 and P84 Touchscreen Consoles offer a comprehensive and reliable interface for an engaging fitness experience.
| Display Type | LCD |
|---|---|
| WiFi | Yes |
| Ethernet | Yes |
| USB Port | Yes |
| Connectivity | WiFi, Ethernet |
| Compatibility | Precor fitness equipment |