Page 10 For technical questions, please call 1-888-866-5797. ITEM 57480
SAFETY SETUP OPERATION MAINTENANCE
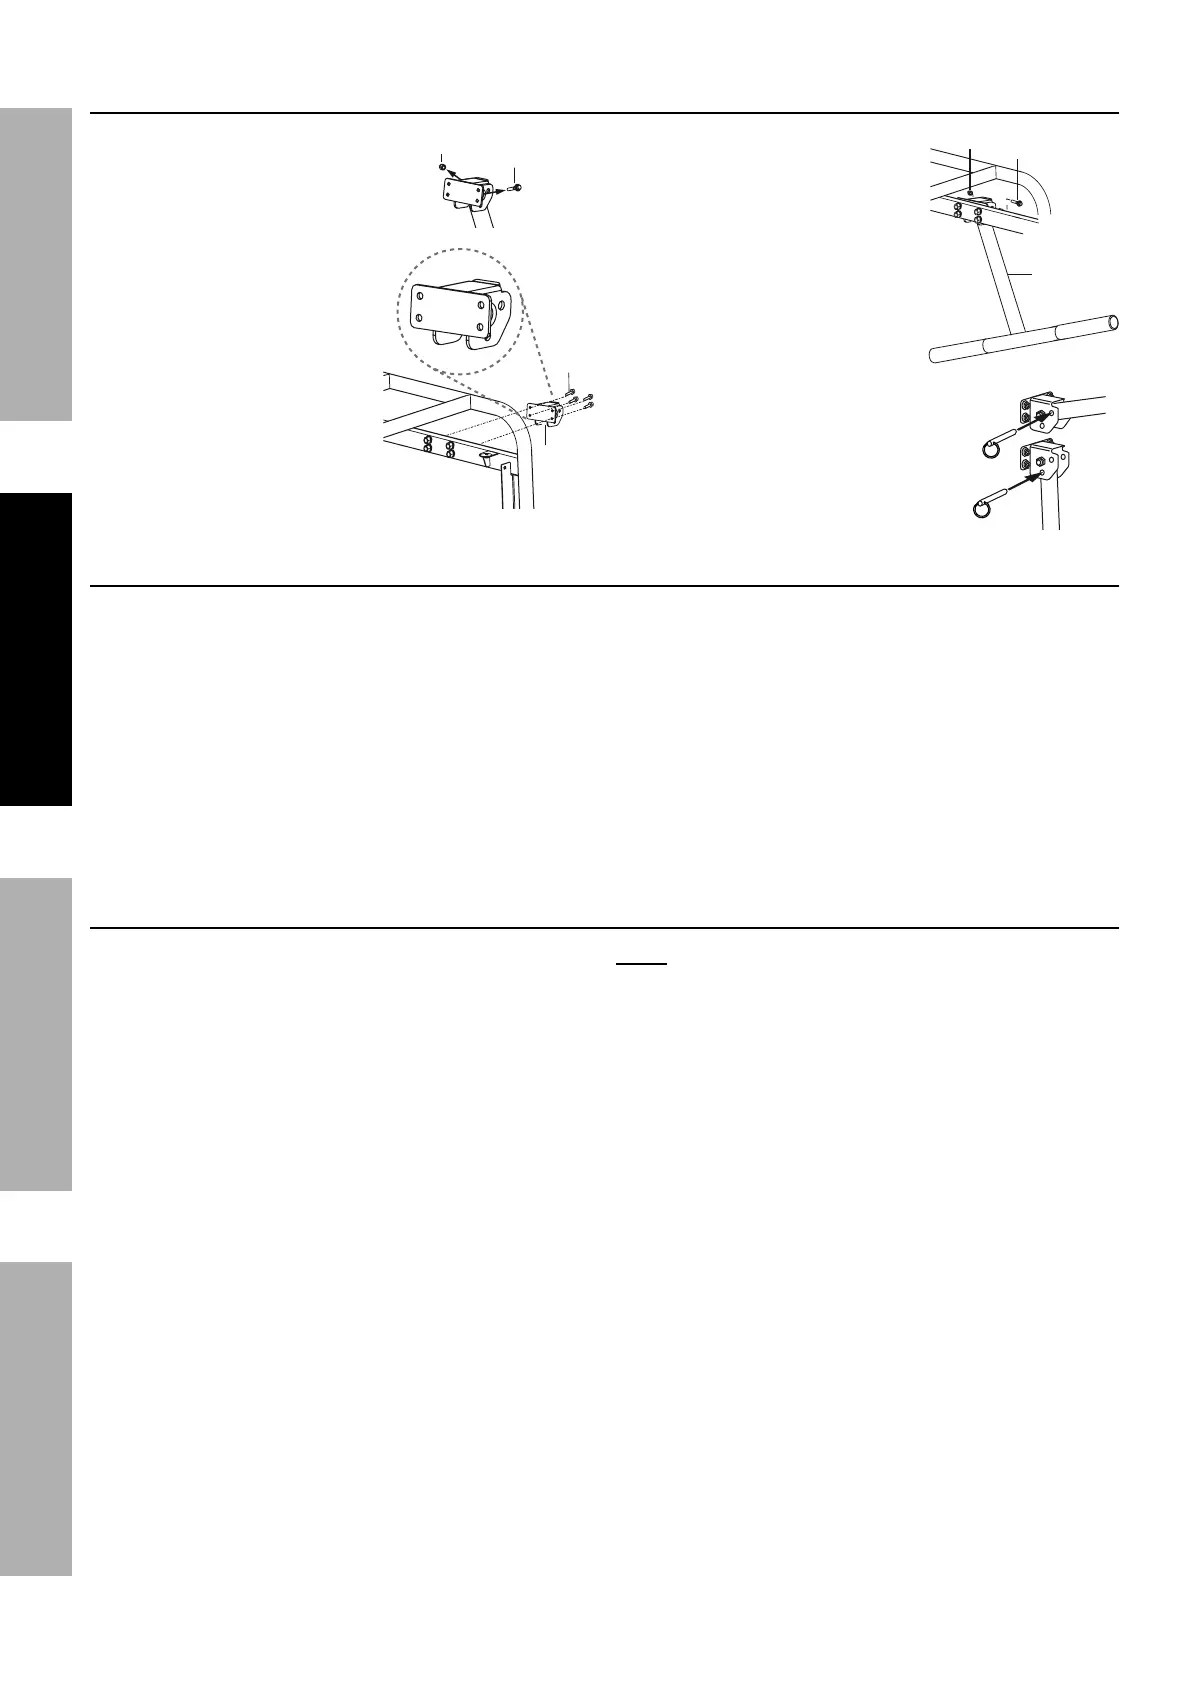
Installing the Handle
1. Remove the Bolt (6a)
holding the Handle (4a) to the
Handle Seat (7a) before installing
the Handle Seat.
2. Holding the Handle Seat
as shown at right, align the
holes of the
Handle Seat (7a) with the
holes on the generator
frame on the same side as
the Feet.
3. Secure in place with
four Bolts (5a).
4. Align the Handle (4a) with
the holes in the Handle Seat
and secure in place with the
Bolt (6a) and Nut (8a).
5. Use the Pin (2a) to secure
the handle in the raised or
lowered position.
Battery Setup Instructions
All generators can be started using the recoil method. This Generator requires installation of a
battery to operate the electric start feature. Connect the battery to the Generator engine:
1. Remove terminal covers from the battery, if installed.
2. Attach the positive (red) cable connector
from the engine to the Positive Terminal
on the battery. Connect cable securely to
prevent disconnection and short circuits.
3. Attach the negative (black) cable connector
to the negative battery terminal.
Grounding
The Generator must be properly grounded before
use. Have the unit grounded by a qualified
electrician if you are not qualified to do so.
To ground the Generator, connect a #6 AWG
grounding wire (not included) from the Grounding
Terminal on the Control Panel to a grounding rod
(not included) that has been driven at least 24
inches deep into the earth. The grounding rod must
be an earth-driven copper or brass rod (electrode)
which can adequately ground the Generator.
Note: There is a permanent conductor between
the portable generator inverter module
(Neutral Conductor) and the frame.
6a
8a
7a
5a
6a
4a
To lock
raised
To lock
lowered