10. Clean & basic maintenance
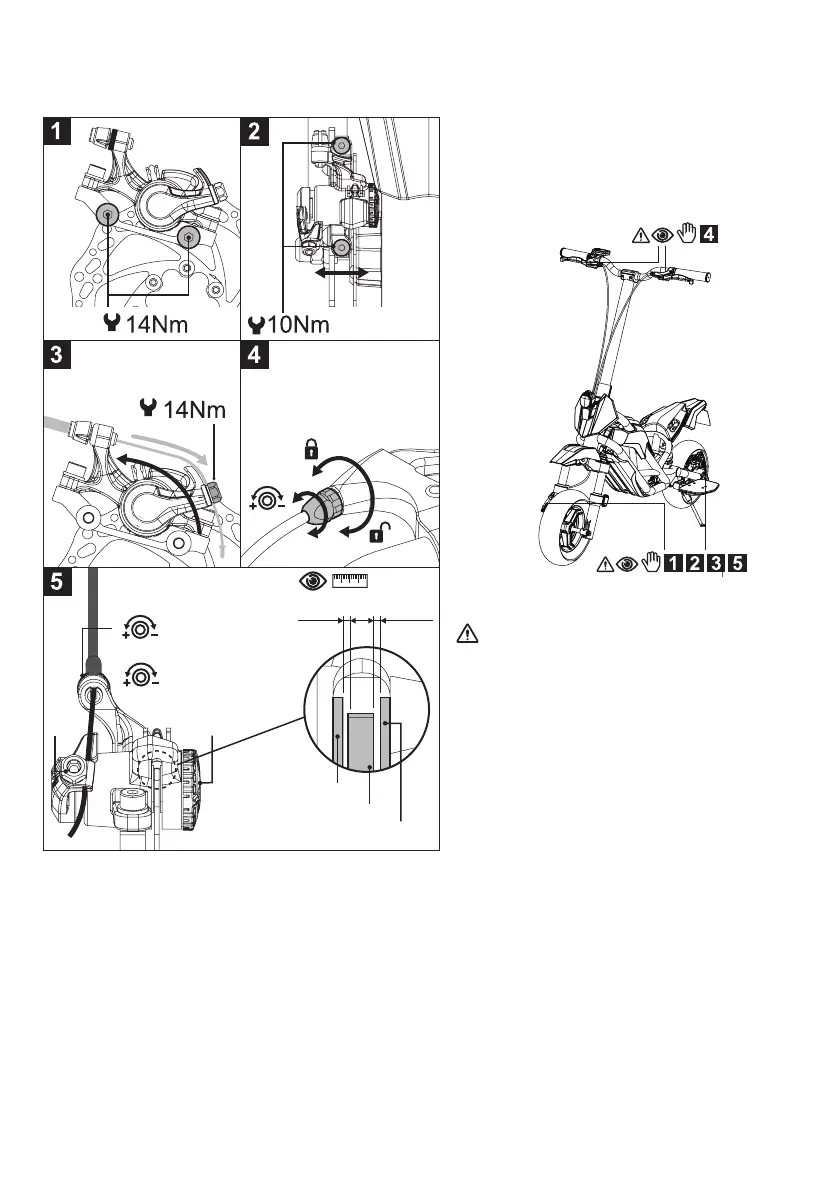
Part A: Brake system
Use cable lock nut to
adjust cable tension
Adjust brake lever
adjustment nut to ne
tune master brake
pad.
Cable lock nut
*Master brake
pad adjustment
knob
*Slave brake
pad adjustment
knob(screw)
0.2mm
~ MAX.0.3mm
Master Brake pad
Brake disk
Brake pad
Regular maintenance enhances the safety
of the kick scooter. Turn off the power before
scooter maintenance. Follow the instruction in
this chapter to check, clean, adjust, or replace
when necessary.
* Brake caliper may vary by different model.
The adjust method is the same.
Danger: Adjust brake system at your
own risk. If you have any doubt of faluty
adjustment, contact your local dealer.
Brake pads are consumables parts, replace it
when necessary. It is recommend to change
brake pad at least twice a year. Check brake
system before every ride. Do not spray or
drop any lubricant into brake system to avoid
brake failure.Check and x when abnormal
sound occurred immediately.
• Step1: Tighten the adapter screw in Figure1.
• Step2: Loosen the caliper screw to adjust the position, center the caliper and make it parallel to the
brake disk then tighten the screws in Figure2.
• Stpe3: Adjust the cable tension with cable lock nut, so the distance of brake pad and brake disk
have reasonable gap for ne tune in Figure3.
• Step4: Adjust the gap in-between master brake pad and brake disk by use the master brake pad
adjustment nut in gure.5
• Step5: Adjust the gap in-between slave brake pad and brake disk by use the slave brake pad
adjustment nut/screw in gure.5
• Step6: Adjust to 0.2mm gap in-between brake disk and brake pad as illustrated in gure 5.
• Step7: Fine tune the brake travel by the adjustment nut on brake lever as shown in gure4.
• Step8: both front and rear brake system, adjust it by the method as described above if necessary.
 Loading...