4
Red
locking
lever
Red
locking
lever
Fig. G
Groove in
hinged base
Red locking lever
in UNLOCKED
position
Fig. H
Red locking lever
in LOCKED
position
Fig. I
Undercut
Timer
Fig. J
Fluffy Wafes
1¾ cups all-purpose our 1¾ cups milk
1 tablespoon baking powder 2 eggs, separated
¼ teaspoon salt 2 tablespoons vegetable oil
Mix our, baking powder, and salt in a large bowl. Whisk milk, egg yolks, and oil in a medium bowl. Whisk milk mixture into dry
ingredients just until dry ingredients are thoroughly moistened. Beat egg whites until stiff in a small bowl with an electric mixer. Fold
whites into batter, leaving a few uffs. Preheat wafe maker. Pour 1 cup batter onto the center of the bottom grid. Close top and ip
wafe maker. Bake until brown and crisp, about 4 minutes.
Makes 4 wafes
Pecan Wafes
2 cups all-purpose our ¼ cup chopped pecans
2 tablespoons packed brown sugar 2 cups buttermilk
2 teaspoons baking powder 2 eggs
1 teaspoon baking soda 3 tablespoons vegetable oil
¼ teaspoon salt ½ teaspoon maple avoring
Mix our, brown sugar, baking powder, baking soda, and salt in a large bowl. Stir in pecans. Whisk buttermilk, eggs, oil, and maple
avoring in a medium bowl. Whisk milk mixture into dry ingredients just until dry ingredients are thoroughly moistened. Preheat wafe
maker. Pour 1 cup batter onto the center of the bottom grid. Close top and ip wafe maker. Bake until brown, about 4 minutes.
Makes 4 wafes
Care, Cleaning, and Storage
1. Unplug unit and allow to cool completely before cleaning.
Never immerse wafe maker in water or other liquid or wash
in a dishwasher.
2. Brush any loose crumbs from the wafe grids. Then wipe the
grids with a paper towel or cloth.
3. Should any batter become baked onto the grids or the outside
of the unit, apply a small amount of cooking oil to the batter.
Allow it to sit for a few minutes to soften and wipe off with a
paper towel or cloth.
4. Wipe the outside of the wafe maker with a damp cloth. Do
not use steel wool scouring pads or abrasive kitchen cleaners
on the unit.
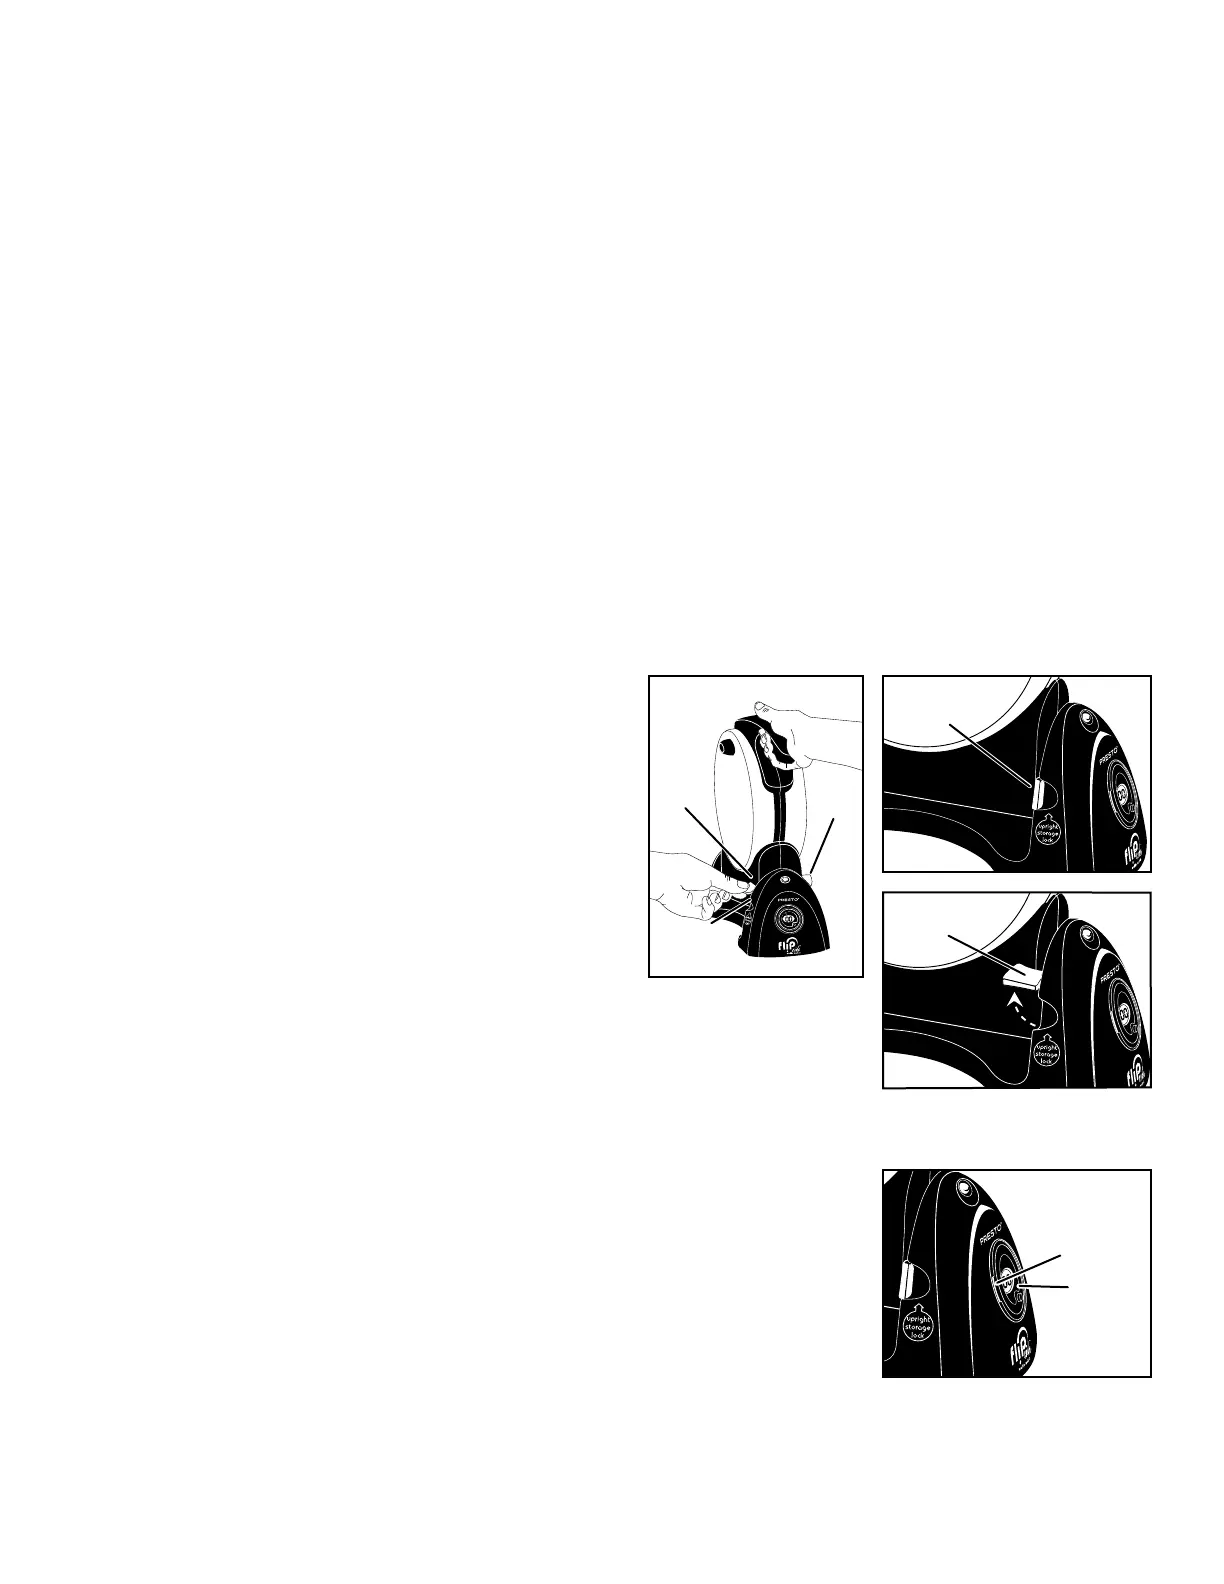
5. For compact vertical storage, rotate wafe maker to upright position (Fig. G). While holding
the handles together, lock in position by carefully ipping up one of the red locking levers
from the grooves in the hinged base (Fig. H and Fig. I).
Before next use, remember to unlock from storage position (Fig. I) by dropping the red locking
levers back in towards base (Fig. H).
Replacing the Timer Battery
The battery used in the wafe maker is a CR2032 3V lithium battery which will seldom need to
be replaced. If you ever need to replace the battery, follow the instructions below.
1. On the left and right side of the timer is an undercut. Use your ngernail or insert a thin
object (such as a butter knife) in the undercut on the left side of the timer (Fig. J) and
lift that side of the timer away from the wafe maker. Hold that side of the timer with
your nger so it does not slip back in the wafe maker and insert your ngernail (or
the knife) in the undercut on the right side of the timer; lift the right side away from the
wafe maker. Now pull the timer out completely from the opening in the wafe maker
(Fig. M).
2. Turn the timer over so the back side is facing up. Using a small Phillips screwdriver, loosen the large screw on the battery compartment
cover. (Screw is not intended to be removed.) Lift the cover off (Fig. K).

 Loading...