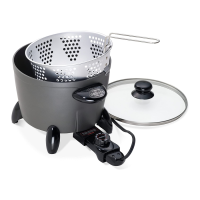
Fig. P
Air vent/
cover lock in
up position.
CAN position
Fig. O
8
III. FILL JARS
11. When the canner beeps twice and FILL JARS lights up, the jars are preheated and ready for lling. The canner will continue
to keep the jars warm until you are ready to ll them. Unlock the green latch and lift the temperature sensor arm. Then
unlock and remove
the canner cover. Lift the cover toward you to keep any steam away from you.
Remove one jar at a time from the canner; discard the water from the jar. Immediately ll the jar with food and liquid,
according to the specic tested recipe. Remove air bubbles by moving a clean, nonmetal spatula around the jar. Clean the
jar rim with a damp cloth. Center a at lid on the jar rim, making sure the sealing compound is touching the glass. Position
a band over the lid and, using your ngertips, screw it onto the jar evenly and rmly (ngertip tight). Do not overtighten as
air must release from the jars during processing and cooling. Place the jar on the canning rack promptly after lling.
Repeat the above procedure for each jar.
IV. VENTING
12. Place the cover back on the canner and lock it on. Lower the temperature sensor arm and turn the green latch clockwise,
following the instructions in step 9, page 7. IMPORTANT: Conrm the regulator is
not on the cover. Press
and HEAT will light up.
13. Once the proper temperature is reached, the canner will proceed to the vent phase; VENT
and
will light up. The venting timer will begin counting down.
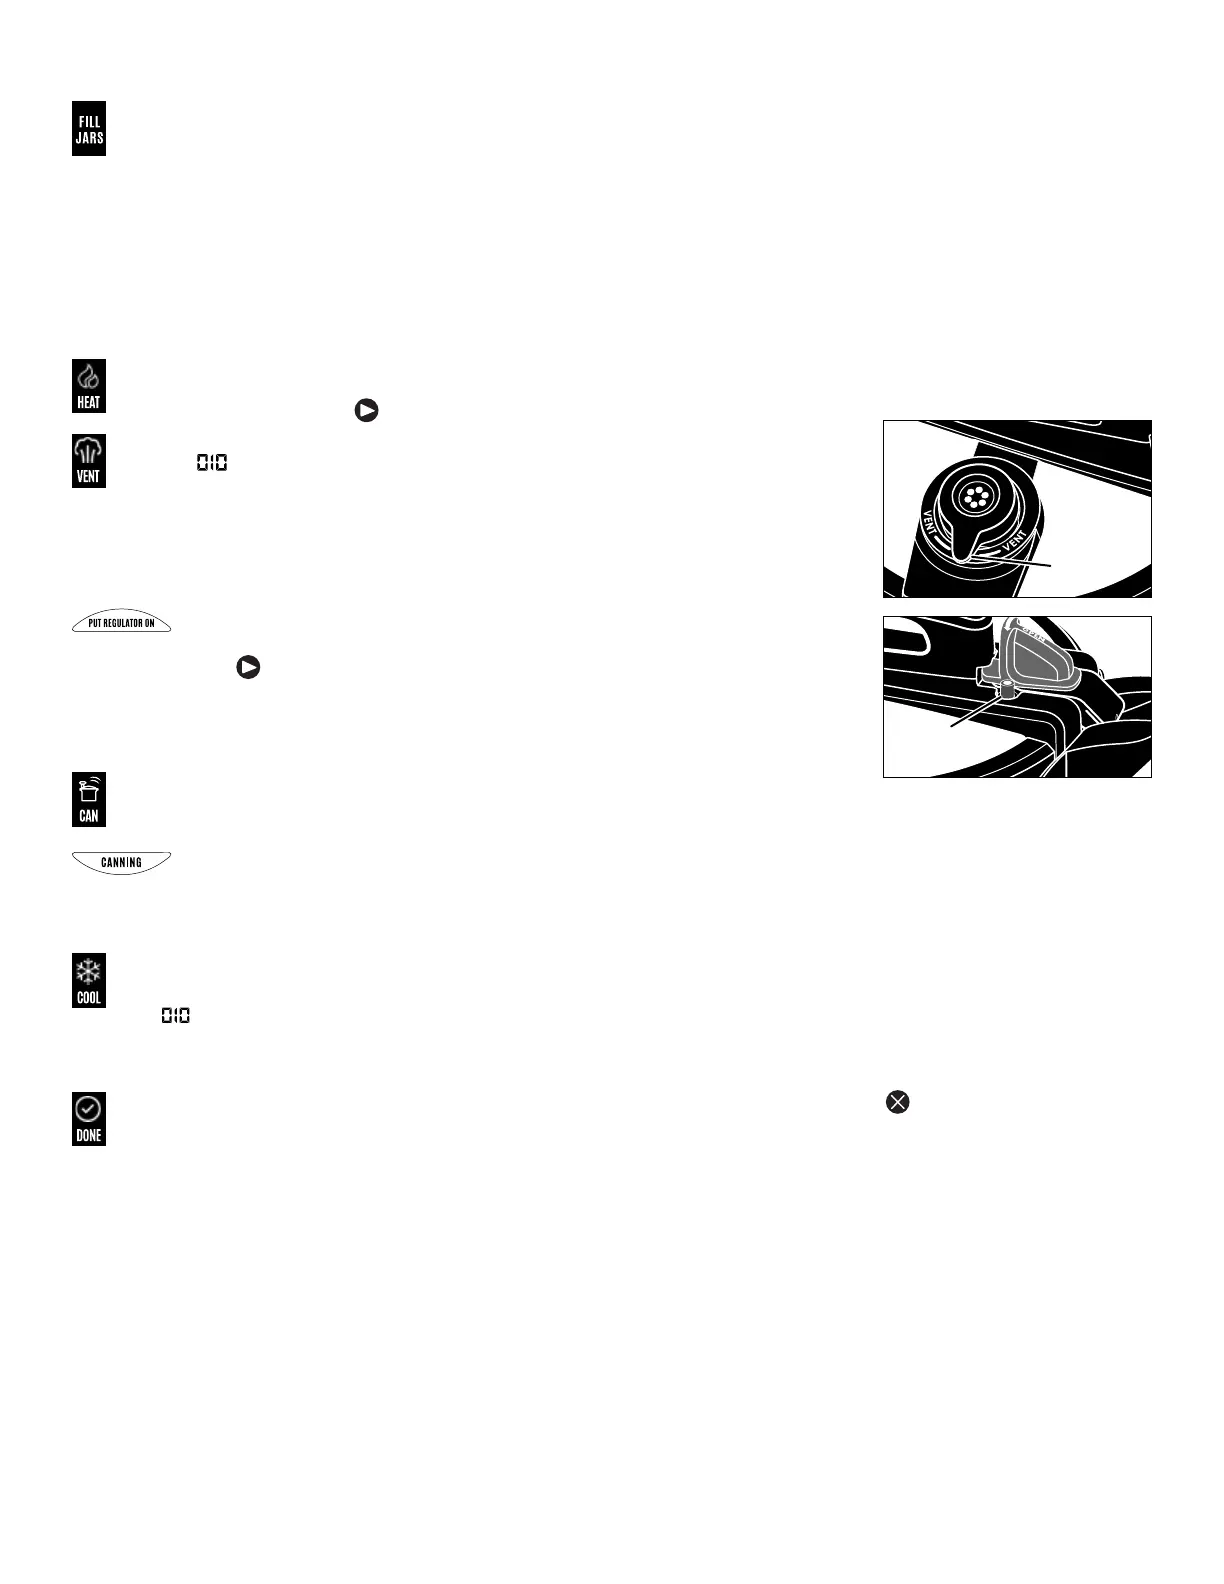
During venting, air/steam will release from the vent pipe and air vent/cover lock. This
will be noticeable. Throughout the venting and canning phases you will hear boiling.
Depending on the number and size of the jars, the air vent/cover lock may lift during
venting. The smaller the load, the more likely the air vent/cover lock will lift.
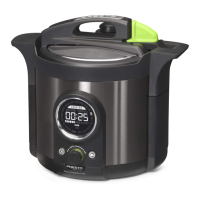
14. When the time expires, the unit will start beeping and PUT REGULATOR ON will light
up. Using a pot holder, push the regulator onto the vent pipe and snap it in place. The
regulator will t loosely on the vent pipe. Point the regulator lever to the CAN position (Fig.
O). Press to advance to the canning phase. The beeping will stop.
If the air vent/cover lock did not lift during venting, air/steam will continue to release
from the air vent/cover lock until it lifts (Fig. P).
V. CANNING
15. CAN will light up and the processing time programmed in step 6 will appear in the
display. The progress bar will continue to scroll as the canner heats.
16. Once the required canning temperature is reached, the unit will beep twice and CANNING will light up. The canner is now
processing and the timer will start to count down. The progress bar will stop scrolling and begin to light up in segments,
increasing in length as the processing time counts down (e.g., if 15 minutes of a 20 minute processing time have elapsed,
75% of the bars will be illuminated).
VI. COOLING
17. When the processing time expires, the canner will beep 4 times and COOL will light up. This is the nal canning phase. The
length of the cool-down period will depend on the canner load and may take about 1½ hours.
will light up in the display. The unit will start to count down when cooling is almost done. The progress bar will scroll
from right to left to indicate the unit is cooling.
VII. DONE
18. When the time expires, the unit will beep 10 times and DONE will light up. Press and hold for 3 seconds. If the air vent/
cover lock remains in the up position when the display indicates DONE, wait for it to drop.
Unlock the green latch and lift the temperature sensor arm. Then unlock and remove
the canner cover.
Lift the cover toward
you to keep any steam away from you.
19. Using a jar lifter, remove jars by lifting them straight up. Be careful not to tilt the jars, which causes liquid to siphon out.
Place jars upright on a board or dry towel, away from drafts. Do not retighten bands.
Allow jars to cool naturally. Check seals no earlier than 12 hours, but no later than 24 hours. See page 6 for “After
Processing” information.
20. NOTICE: When processing consecutive batches, before warming the next batch of jars, allow the water in the canner to
cool or replace with fresh water. Placing jars in hot water may cause the jars to break.
If reusing the water, check the water level in the canner. Add water, if necessary, to keep water at the 3-quart ll mark
(Fig. A, page 3).
21. To can additional jars, repeat steps 6 to 19.
22. When canning is complete, unplug the cord from the wall outlet and then from the canner base. Allow canner to cool
completely, pour out water from removable pot, and clean according to the instructions on page 28.
 Loading...