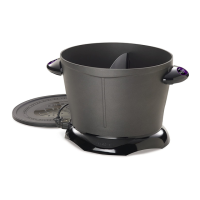
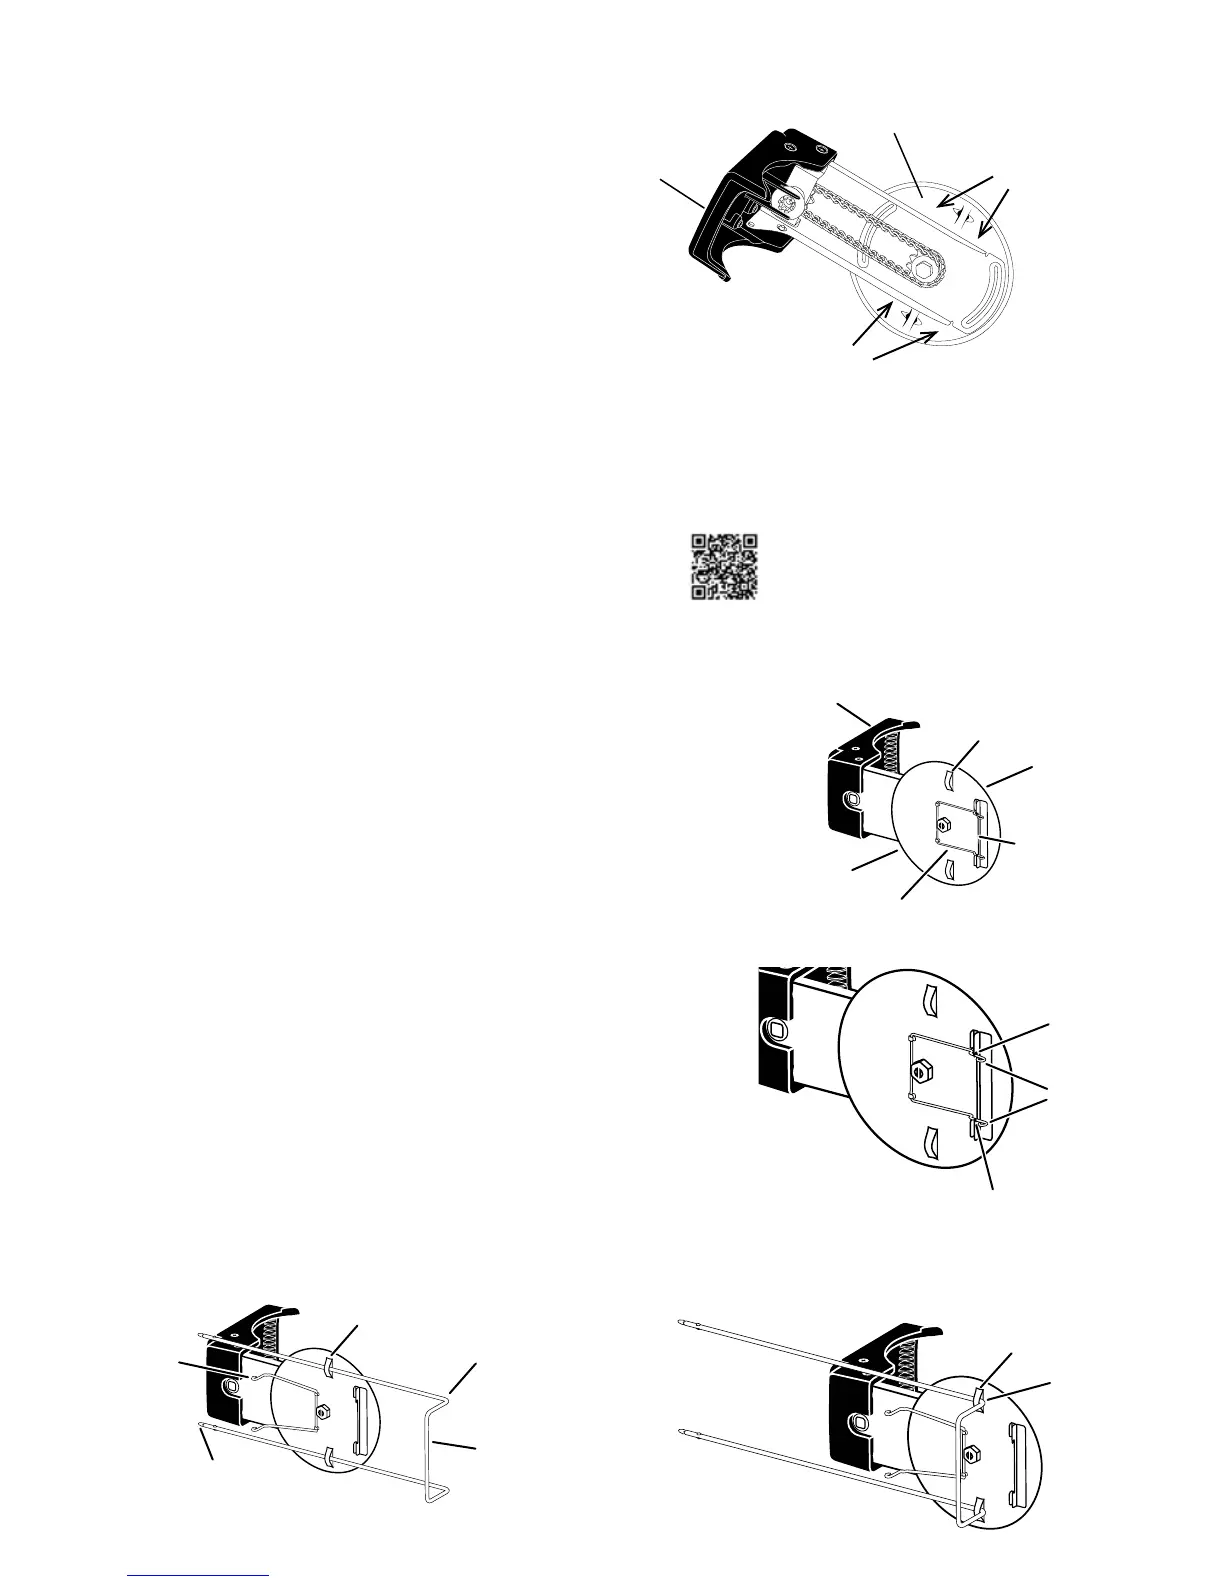
Fig. 14
Pivot handle
Lock channel
Lock spring
Pivot plate
Chain (on back)
Loops
Hook
Squeeze lock
spring ends to
release them
from hooks
Fig. 15
Hook
Fig. 16 Fig. 17
Bent ends
Loops
Loops
Closed
end of
skewer
Pointed end
Bent ends
Lock
spring
Fig. 13
Apply cooking oil here
before each use
Pivot handle
assembly
Pivot plate
Apply cooking oil here
before each use
How to Use Rotisserie
The rotisserie must be used whenever cooking a whole
turkey in the fryer. The rotisserie consists of three parts:
the pivot handle assembly, the skewer, and the lifting
handle assembly (Fig. 1B, page 4). Before frying a
turkey, the skewer must be attached to the pivot plate
on the pivot handle assembly. Only then can the turkey
be pierced and the locking plate attached.
Each time you assemble the rotisserie, lubricate the
chain side of the pivot plate (Fig. 13). Using a paper
towel, apply a very light coating of cooking oil from
the edge of the plate toward the center, about ½ inch.
Be sure to rotate the plate as you apply oil, so that the
entire circumference of the plate is lubricated.
How to Attach Skewer to the Pivot Handle Assembly
For a helpful HOW-TO video, visit www.GoPresto.com/how/assemble/
The pivot handle assembly contains the handle with ProFry
™
printed on it, the chain, and a plate which rotates, hereafter
referred to as the pivot plate (Fig. 14). You will be attaching the
skewer to the side of the pivot plate opposite of the chain, which
contains two loops, a lock channel with hooks, and a lock spring.
When assembled correctly, the skewer will be secured in the
channel with the lock spring.
Step 1 Grasp the pivot handle with one hand. Rotate the pivot
plate so the lock channel is opposite of and parallel to
the handle (Fig. 14). Squeeze the ends of the lock spring
together (Fig. 15) and rotate the spring so it rests against
the plate, ends pointing toward the handle (Fig. 16).
Step 2 Using your other hand, grasp the closed end of the
skewer, which should be facing toward you, and slide the
pointed ends through the loops (Fig. 16). Continue sliding
the skewer toward the handle until the bent ends touch the
loops (Fig. 17).
10