Do you have a question about the Pride CELEBRITY XL and is the answer not in the manual?
Read and follow all instructions, warnings, and notes in this manual and all other accompanying literature before attempting to operate this product for the first time.
By accepting delivery of this product, you promise that you will not change, alter, or modify this product or remove or render inoperable or unsafe any guards, shields, or other safety features of this product.
Before using your scooter, make sure your delivery is complete as some components may be individually packaged.
We want to hear your questions, comments, and suggestions about this manual. We would also like to hear about the safety and reliability of your new scooter.
The symbols below are used on the scooter to identify warnings, mandatory actions, and prohibited actions. It is very important for you to read and understand them completely.
MANDATORY! Do not operate your new scooter for the first time without completely reading and understanding this owner's manual.
WARNING! Do not modify your scooter in any way not authorized by Pride. Do not use accessories if they have not been tested or approved for Pride products.
WARNING! Do not attempt to lift or move your scooter by any of its removable parts, including the armrests, seat, or shroud.
Get to know the feel of your scooter and its capabilities. Pride recommends that you perform a safety check before each use to make sure your scooter operates smoothly and safely.
WARNING! It is critically important that 30-35 psi (2-2.4 bar) tire pressure be maintained in pneumatic tires at all times.
MANDATORY! Stay within the specified weight capacity for your scooter. Exceeding the weight capacity voids your warranty.
Proceed with extreme caution as you approach the downgrade of a ramp or other incline. Take wide swings with your scooter around any tight corners.
Figure 1. Maximum Recommended Incline Angle. WARNING! Any attempt to climb or descend a slope steeper than what is shown in figure 1 may put your scooter in an unstable position and cause it to tip.
Excessively high cornering speeds can create the possibility of tipping. Factors which affect the possibility of tipping include, but are not limited to, cornering speed, steering angle.
Your scooter is equipped with these powerful brake systems: Regenerative: Uses electricity to rapidly slow the vehicle. Disc Park Brake: Activates mechanically.
Your scooter is designed to provide optimum stability under normal driving conditions—dry, level surfaces composed of concrete or asphalt.
WARNING! You should not operate your scooter on public streets and roadways. Be aware that it may be difficult for traffic to see you when you are seated on your scooter.
WARNING! Do not drive near raised surfaces, unprotected ledges, and/or drop-offs (curbs, porches, stairs, etc.).
Exposure of your scooter to inclement weather conditions should be avoided whenever possible. If suddenly caught up in rain, snow, severe cold or heat...
WARNING! When your scooter is in freewheel mode, the braking system is disengaged. Disengage the drive motors only on a level surface.
WARNING! Do not use your scooter to negotiate steps or escalators. Always use an elevator.
Determine if the door opens toward or away from you. Use your hand to turn the knob or push the handle or push-bar.
Modern elevators have a door edge safety mechanism that, when pushed, reopens the door(s).
WARNING! Never sit on your scooter when it is being used in connection with any type of lift/elevation product.
MANDATORY! Battery posts, terminals, and related accessories contain lead and lead compounds. Wear goggles and gloves when handling batteries.
If you encounter a damaged or cracked battery, immediately enclose it in a plastic bag and call your authorized Pride Provider for instructions on disposal.
WARNING! If you anticipate being seated in a stationary position for an extended period of time, turn off the power.
WARNING! Although your scooter may be equipped with a positioning belt, this belt is not designed to provide proper restraint during motor vehicle transport.
Getting onto and off of your scooter requires a good sense of balance. Please observe the following safety tips when getting onto and off of your scooter.
WARNING! Do not bend, lean, or reach for objects if you have to pick them up from the scooter deck or from either side of the scooter.
WARNING! If you require a positioning belt to safely operate your scooter, make sure it is fastened securely in order to reduce the possibility of a fall from the scooter.
WARNING! Consult your physician if you are taking prescribed or over-the-counter medication or if you have certain physical limitations.
WARNING! Do not operate your scooter while you are under the influence of alcohol, as this may impair your ability to drive safely.
WARNING! Laboratory tests have shown that electromagnetic and radio frequency waves can have an adverse affect on the performance of electrically-powered mobility vehicles.
Figure 4. Scooter Dimensions. Shows overall length, width, turning radius, and other key measurements of the scooter.
Figure 4A. Front Tire Dimensions. Shows the size specifications for the front tires.
Figure 4B. Rear Tire Dimensions. Shows the size specifications for the rear tires.
Model Numbers, Overall Length, Overall Width, Total Weight, Heaviest Piece When Disassembled, Turning Radius, Speed, Range, Ground Clearance, Weight Capacity, Standard Seating, Drive System, Braking System, Tires, Battery Requirements, Battery Charger.
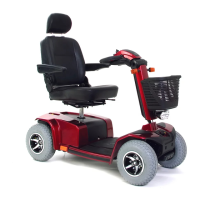
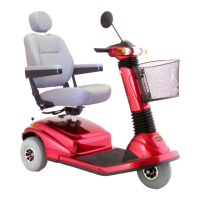
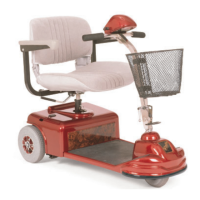
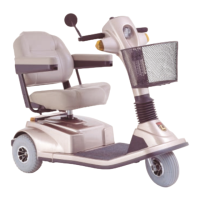
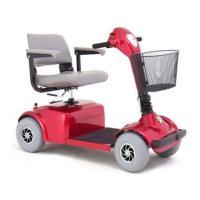
The tiller console houses all of the controls needed to drive your scooter, including the speed adjustment dial, throttle control lever, battery condition meter, lights switch, and horn buttons.
These buttons activate a warning horn. Your scooter must be powered up for the horn to be operational.
Insert the key into the key switch and turn it clockwise to power up (turn on) your scooter.
When the key is fully inserted and turned clockwise to power up your scooter, this meter indicates the approximate battery voltage strength.
Use these buttons to turn on the left and right turn signal (amber) lights. The signals are timed to shut off automatically.
This switch activates the 4-way flashers on your scooter.
This switch controls your scooter's lights. Toggle the switch forward to turn on your scooter's front top light and running lights.
This lever allows you to control the forward speed and the reverse speed of your scooter up to the maximum speed you preset.
This dial allows you to preselect and limit your scooter's top speed.
The off-board charger power cord plugs into this port when charging the batteries.
These fuses help protect your scooter's front lighting, turn signals, and key switch console systems from receiving an overload of electrical current.
The batteries, the main circuit breaker (reset button), the manual freewheel lever, the anti-tip wheels, and the motor/transaxle assembly are located on the rear section of your scooter.
The anti-tip wheels are an integral and important safety feature of your scooter.
The batteries store the electrical energy that powers your scooter.
The motor/transaxle assembly is an electromechanical unit that converts electrical energy from your scooter's batteries into the controlled mechanical energy that drives the scooter's wheels.
When the voltage in the batteries becomes low or your scooter is heavily strained, the main circuit breaker may trip to protect the motor and electronics.
Whenever you need or want to push your scooter for short distances, you can put it in freewheel mode.
Steel loops welded to the anti-tip wheel brackets and/or front frame components of your scooter provide securement points.
Your scooter requires two long-lasting, 12-volt, deep-cycle batteries that are sealed and maintenance free.
The battery condition meter on the tiller console indicates the approximate strength of your batteries using a color code.
PROHIBITED! Never use an extension cord to plug in your battery charger. Plug the charger directly into a properly wired standard electrical outlet.
How does the charger work? When your scooter's battery voltage is low, the charger works harder, sending more electrical current to the batteries.
For the safest and most efficient charging of your scooter's batteries, we recommend use of the charger supplied as original equipment with your Pride product only.
Ensure the red (+) and black (-) battery cables are connected properly to the battery terminals.
Two major factors must be considered when deciding how often to charge your scooter's batteries: All day scooter use on a daily basis. Infrequent or sporadic scooter use.
Fully charged deep-cycle batteries provide reliable performance and extended battery life. Keep your scooter's batteries fully charged whenever possible.
Always fully charge your scooter's batteries prior to daily use. Maintain 30-35 psi (2-2.4 bar) in each tire.
We recommend deep-cycle batteries that are sealed and maintenance free. Both AGM and Gel-Cell are deep-cycle batteries that are similar in performance.
WARNING! Do not replace the batteries while the scooter is occupied. The batteries on your scooter should only be serviced or replaced by an authorized Pride Provider or a qualified technician.
Deep-cycle batteries employ a different chemical technology than that used in car batteries. It may take a few charging cycles to establish the critical chemical balance.
Have you fully charged the batteries? Is the manual freewheel lever in the drive (rearward) position? Is the tiller lock knob in the unlocked position?
WARNING! Never attempt to get onto or off of your scooter without first removing the key from the key switch.
Is the seat at the proper height? Is the seat fixed securely in place? Is the tiller at a comfortable setting and locked securely in place?
WARNING! The following can adversely affect steering and stability while operating your scooter, resulting in loss of control or tipping: Holding onto or attaching a leash to walk your pet.
Bring your scooter to a complete stop. Remove the key from the key switch. Disengage the seat rotation lever and rotate the seat until you are facing toward the side of your scooter.
Your scooter is equipped with an energy saving automatic power down timer feature designed to preserve your scooter's battery life.
Your scooter is equipped with an adjustable pivoting tiller. WARNING! Remove the key from the key switch before adjusting the tiller, console, or the seat.
The tiller console can be adjusted to different angles. Loosen the adjustment dial (turn counterclockwise) and move the tiller console up or down to a comfortable riding position.
The armrest angle of your scooter can be adjusted upward or downward by turning the adjustment dial.
WARNING! Do not operate your scooter with the seatback in a reclined position. WARNING! Always keep your back pressed firmly against the seatback while adjusting the angle.
The seat rotation lever will secure the seat into several positions. Push forward on the seat rotation lever to disengage the seat.
You can reposition the seat forward or rearward to adjust the distance between the seat and the tiller.
The seat can be repositioned to different heights. Remove the seat and rear shroud from your scooter.
Your scooter seat may be equipped with an auto-type positioning belt that can be adjusted for operator comfort.
WARNING! The power seat is intended for operation only while your scooter is stationary and on a level surface.
You can disassemble the scooter into seven pieces: the seat, the front section, the rear section, the rear shroud, the basket, and the batteries.
Lock the tiller in the straight ahead position by pushing the tiller lock knob in and turning it clockwise 90°.
Lift up on the frame release lever. Lift the front section up until the frame hooks of the front section separate from the rear section.
Position the front and rear sections of your scooter as shown in figure 24. Use the frame release lever to lift the front section as you align the frame hooks.
The diagnostic beep codes for your scooter are designed to help you perform basic troubleshooting quickly and easily.
Make certain that the key is in the “on” position. Check that the batteries are fully charged.
When the manual freewheel lever is pushed forward, the brakes are disengaged and all power to the motor/transaxle assembly is cut.
Charge the scooter's batteries more frequently. If the problem continues, have both of your scooter's batteries load tested by your authorized Pride Provider.
Fully charge your scooter's batteries. Have your authorized Pride Provider load test each battery.
If equipped with pneumatic tires, always maintain a proper 30-35 psi (2-2.4 bar) tire pressure.
If your scooter is equipped with pneumatic tires and you have a flat tire, you can have the tube replaced.
Use a damp cloth and mild, non-abrasive cleanser to clean the plastic and metal parts of your scooter.
Make certain that the terminal connections remain tight and uncorroded.
Regularly check all wiring connections. Regularly check all wiring insulation, including the charger power cord, for wear or damage.
The motor brushes are housed inside of the motor transaxle/assembly. They should be inspected periodically for wear by your authorized Pride Provider.
You do not need to lubricate these items, as they are all prelubricated and sealed.
Keep these areas away from moisture. Before operating your scooter, allow any of these areas to dry thoroughly if they have been exposed to moisture.
To replace a fuse: Remove the fuse by pulling it straight out of its slot. Examine the fuse to be sure it is blown.
If you plan on not using your scooter for an extended period of time, it is best to: Fully charge its batteries prior to storage.
Your scooter must be disposed of according to applicable local and national statutory regulations.
For three (3) years from the date of purchase, Pride will repair or replace at our option to the original purchaser, free of charge, any of the following parts found upon examination...
Three-year prorata drivetrain warranty, including: Transaxle, Motor Brake (electronic function ONLY), Brake.
For one (1) year from the date of purchase, Pride will repair or replace at our option to the original purchaser, free of charge, any of the following parts found upon examination...
The battery is covered by a separate six-month warranty, provided by the battery manufacturer. The batteries are not warranted by Pride.
This warranty does not extend to those items which may require replacement due to normal wear and tear.
Contamination, Abuse, misuse, accident, or negligence, Battery fluid spillage or leakage, Commercial use, or use other than normal, Improper operation, maintenance, or storage.
Warranty service must be performed by an authorized Pride Provider. Do not return faulty parts to Pride without prior written authorization.
Implied warranties, including those of merchantability and fitness for a particular purpose, are limited to one (1) year from the date of original purchase.