3
6. Run a 16 AWG ( or larger) wire to the remote turn-on lead of the headunit.
7. Connect the speakers as per wiring diagrams in the manual. 12AWG or larger speaker
wire is recommended.
8. Mount remote level control in the car where it can be easily reached from the driver's
seat, if desired.
9. Using rca interconnect cables, connect all line inputs per the wiring diagrams which
follow. If possible, keep rca cables away from the 1 2V power and ground wire.
10. Set the controls as described on following pages.
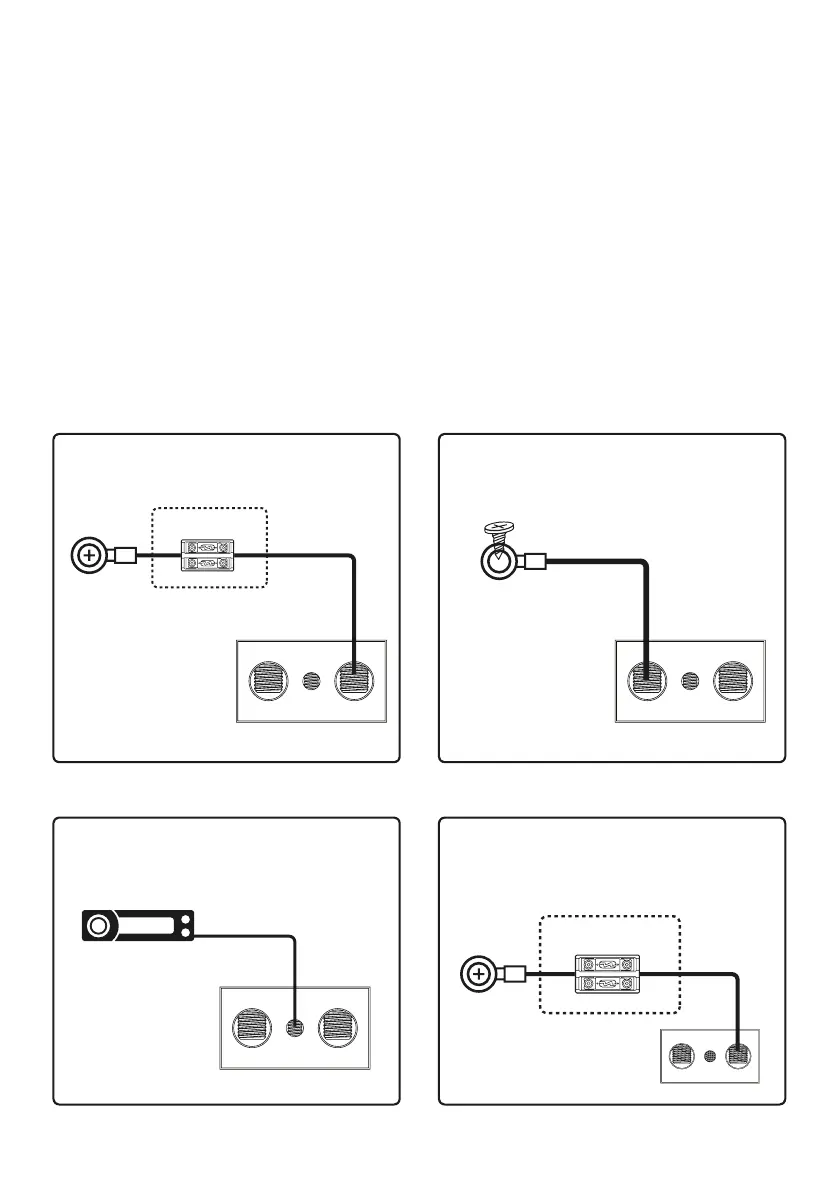
Power, Remote, Ground Connection
Power Terminal (+12 V) Ground Terminal (GND)
Remote / Turn on Termina Fuses
Connect directly to the vehicle battery
+ terminal with 0 or 4 AWG wire
4~0 AWG wire
Battery
Terminal
Adapter
Install as close as
to the battery as possible
External or
Built in Fuses
POWER
REM +12 VGND
Connect to a good chassis ground. The ground
connection should be clean, unpainted metal
to provide a good electrical connection
Drill 1/8” hole in
Chassis sheet metal
Sheet Metal
screw
4~0 AWG wire
POWER
REM +12 VGND
Connect the source unit’s remote turn on lead
from the source unit to the amplifier’s remote
terminal. This turns on the amplifier whenever
the source unit is turned on.
POWER
REM +12 VGND
Please follow original fuse type
and fuse rates.
MILLE has built-in Fuses (30 A x 3 )
MEZZO : 120 A (240 A for Link)
4~0 AWG wire
Battery
Terminal
Adapter
External or
Built in Fuses
POWER
REM +12 VGND
 Loading...