The next steps go through the disassembly of the freehub ready for bearing replacement. As each part is disassembled ensure
that all parts are laid out in a orderly format to avoid any lose or parts and to aid with ease of re-assembly.
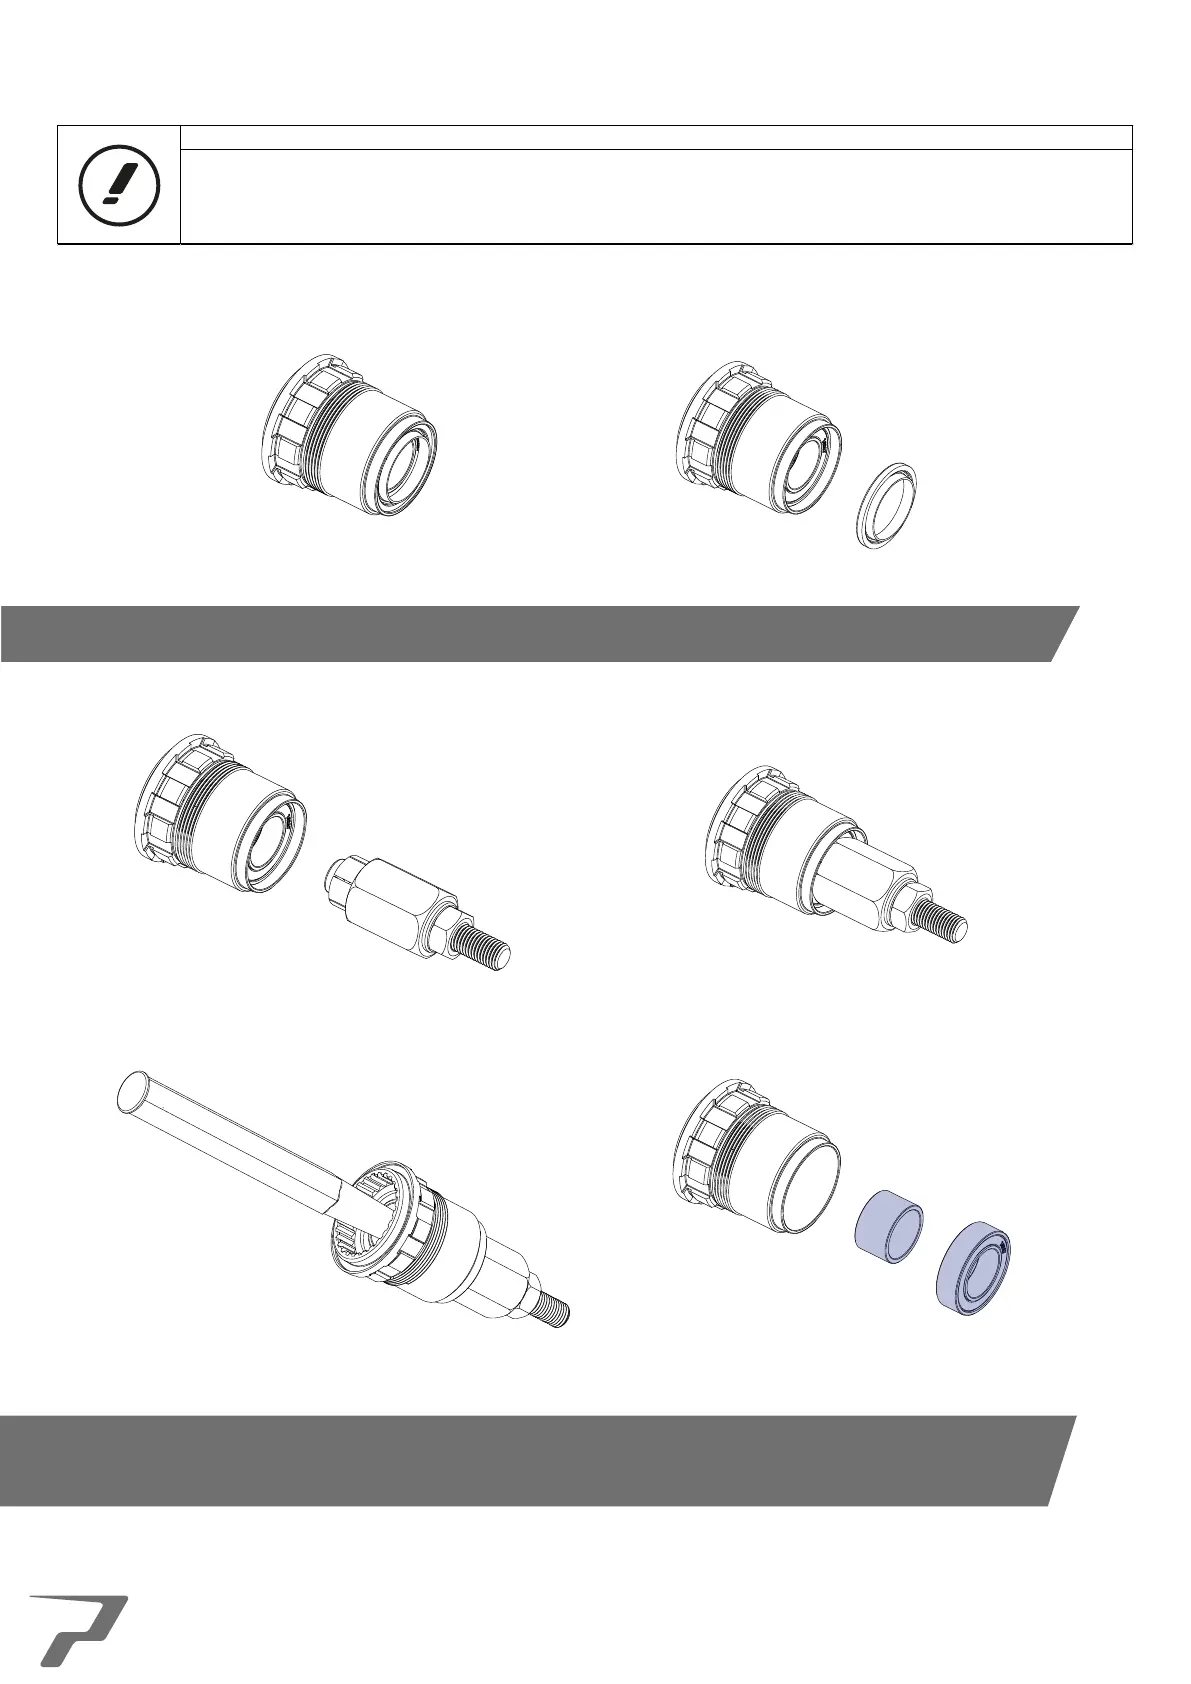
The following steps illustrate removal of bearings and hardware on a Prime XDR (SRAM) freehub. This is purely
for illustration purposes and the steps required to complete the process are the same across all types of Prime
freehubs. Different bearing specifications will be required depending on the freehub that is being worked on
so please use page 2 for guidance.
11. Using the small flat head screw driver remove the freehub seal. Make sure that the seal is removed evenly and
undamaged. If the seal is damaged it could cause drag on the freehub when refitted.
11. Using the small flat head screw driver remove the freehub seal. Make sure that the seal is removed evenly and
undamaged. If the seal is damaged it could cause drag on the freehub when refitted.
12. Take the correct bearing extractor tool required for the freehub bearings and fit it to the outer bearing of the
freehub. Take the drift and insert this into the back of the freehub, using the dead blow or rubber mallet remove the
outer bearing. The Freehub may need to be rested on the hub support tool oran open vice to the allow the bearing to
rest on enough for the bearing to pass through.
11
 Loading...