Do you have a question about the Primrose Awnings B and is the answer not in the manual?
General safety precautions regarding lifting, plastic wrappers, and suffocation risks.
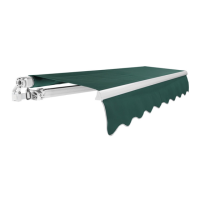
Recommended height from ground and headroom considerations for awning installation.
Emphasis on accurate measurement before drilling to avoid errors.
Crucial check for bracket tightness to prevent awning detachment.
Warning against using mortar joints for secure fixing of brackets.
Guidance on lifting the awning unit onto wall brackets with assistance.
Warning about mis-alignment affecting retraction and projection.
Recommendation to consult a qualified electrician for mains wiring.
Procedure for synchronizing the remote zapper with the awning motor.
Cautionary advice on operating the awning and avoiding maximum extension/retraction.
How electric awnings stop automatically at preset limits.
Instructions on adjusting the maximum extension and retraction points.
Details on adjusting the white hole for the retraction point.
Details on adjusting the red hole for the extension point.
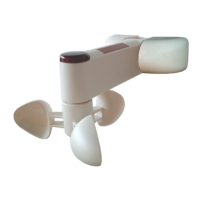
How the awning retracts automatically when the wind sensor is activated.
Steps to synchronize the sensor with the awning and remote control.
Recommendation to always retract the awning during severe weather conditions.
Troubleshooting for motor cut-off, wiring issues, or remote synchronization.
Used to adjust extension and retraction points on the motor.
| Brand | Primrose Awnings |
|---|---|
| Model | B |
| Category | Accessories |
| Language | English |