Do you have a question about the Primrose Awnings Full Cassette and is the answer not in the manual?
Use a hammer-action drill with a 12mm bit to drill 90mm holes into brick or concrete.
Full cassette awnings are heavy; require at least three people and potentially scaffold towers for installation.
Lift the awning unit into the wall brackets, ensuring it clips in place and securing the front plate.
Adjust jack bolts on wall brackets using an Allen key to level the front bar when the awning is fully opened.
Lists electrical components for the remote control kit, including zappers, receiver box, and wiring.
Connect the 4-core cable from the awning to the receiver box and the 3-core mains cable to the box.
Procedure to program remote control zappers by pressing buttons on the receiver and zapper.
Lists electrical components for the indoor wall switch setup, including switch, connecting block, and cable.
Connect the awning's 4-core cable to the wall switch, then run a 3-core mains cable from the switch.
Use hexagonal bolts inside the cassette to adjust maximum extension and full-retraction points.
Adjust the white hole clockwise (+) to increase retraction; avoid over-retracting to prevent damage.
Adjust the red hole counter-clockwise (-) to reduce awning extension if fabric sags.
Use the green stick to adjust the white (retraction) and red (extension) points on the motor.
| Operation | Manual Crank or Motorized |
|---|---|
| UV Protection | UPF 50+ |
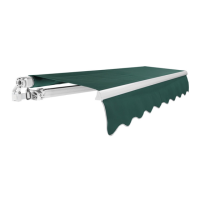
| Type | Full Cassette |
| Fabric Material | Acrylic or Polyester |
| Frame Material | Aluminum |
| Water Resistance | Water-resistant |