10
The maximum length of hose connections between the pump box unit and R.O. ltration unit
is 50 . You may place both units under your kitchen sink, or you may place the R.O. ltration
unit under the sink in your kitchen near the faucet, and the pump box unit in your bathroom
near the electrical outlet, cold water supply and drain pipes.
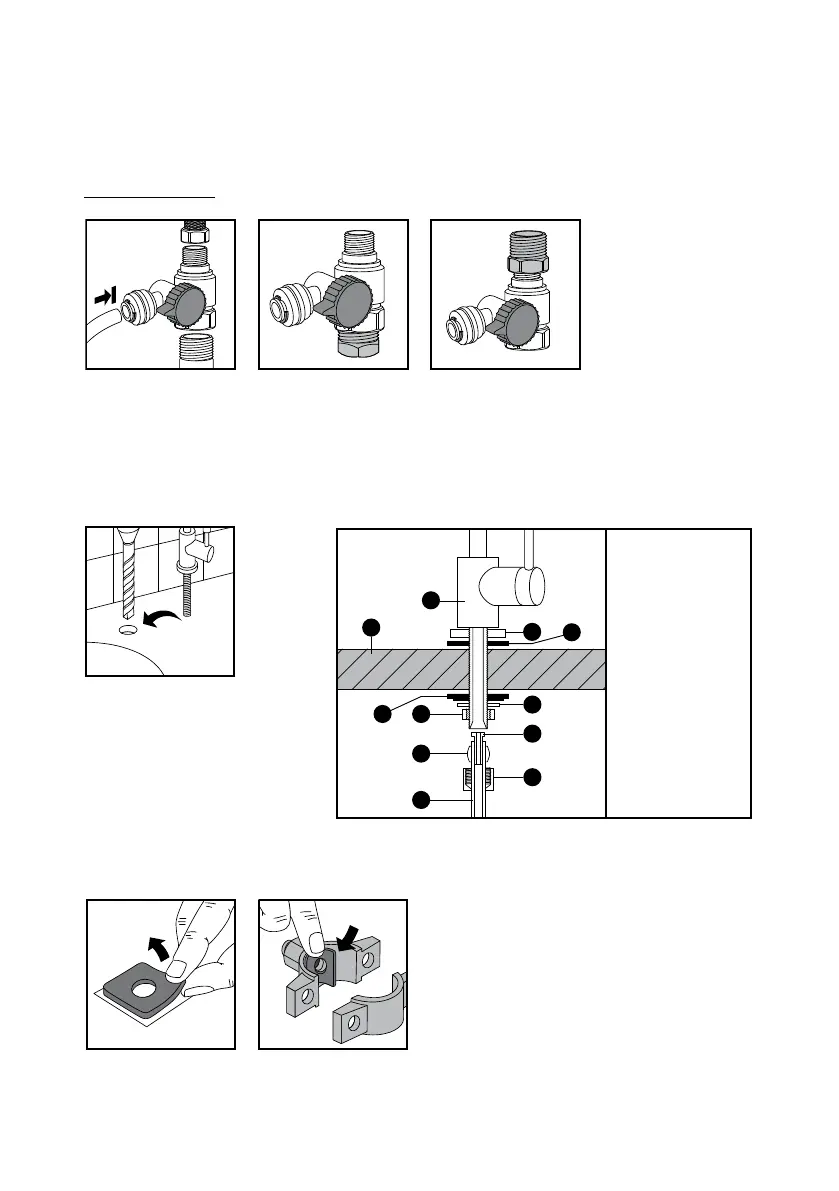
Installation Steps:
3/8”
3/8”
3/8”
1/2”
1/2”
1/2”
1. Install adapter ball valve (included) to the cold water supply. Use some Teon or plumbers
sealing tape to prevent leaks.
Use adapter valve without Conversion Adapter to have 1/2” and 3/8” conguration or Conver-
sion Adapter can be threaded to either side of the valve to make congurations of 1/2” x 1/2”
or 3/8” x 3/8”.
2. Create ½” hole for the ltered
water faucet and install it.
Tip: If you have a soap dispenser
or a water sprayer in an exist-
ing hole you may remove it and
use its hole for the ltered water
faucet.
3. Install drain saddle.
The square foam gasket with a circle cut out must be applied to the inside of the drain sad-
dle. Remove sticky tape backing and stick to the drain saddle as shown.
1
2
3
4
5
6
7
8
9
10
11
1. Faucet
2. Chrome washer
3. Black rubber
washer
4. Countertop or
sink deck
5. Black washer
6. Lock washer
7. Lock nut
8. Insert
9. Sleeve
10. Compression
nut
11. Tubing
 Loading...