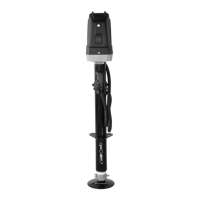
V1.0 3,500 LB 12V DC ELECTRIC A-FRAME TRAILER JACK 8787780
Visit www.princessauto.com for more information 5
7. Do not adjust the drop leg when there is load on the trailer
jack. The trailer tongue may drop and cause a crushing injury.
UNPACKING
WARNING! Do not operate the tool if any part is missing.
Replace the missing part before operating. Failure to do so
could result in a malfunction and personal injury.
Remove the parts and accessories from the packaging and inspect
for damage. Make sure that all items in the contents are included.
Contents: • Trailer Jack • Wireless Remote Control
• 7-Way Trailer Connector • Manual Crank Handle
• Foot Pad, Removable • Safety Lock Pin
• Grade 5, 1 in. Long, 3/8 in.-16 UNC Bolts x 3
• 3/8 in. Flat Washers x 3
ASSEMBLY & INSTALLATION
Numbered references in parenthesis (#1) refer to the included
Parts List. Dashed numbers in parenthesis (Fig. 1-1) refer to a
specific point in an illustration or image.
TOOLS AND COMPONENTS REQUIRED
The following tools are needed to assemble and install the
trailer jack:
• 9/16 in. Wrench • Torque Wrench • Wire Cutters
• Wire Strippers • Crimpers or Soldering Iron
• A-Frame Coupler with Lower Support Plate
INSTALLATION INSTRUCTIONS
WARNING! Install a lower support plate at the bottom of the
trailer frame if one is not already present. Do not operate the
jack without a lower support plate as the jack may fail and
cause an injury or kill you or a bystander.