7
Faulty heater
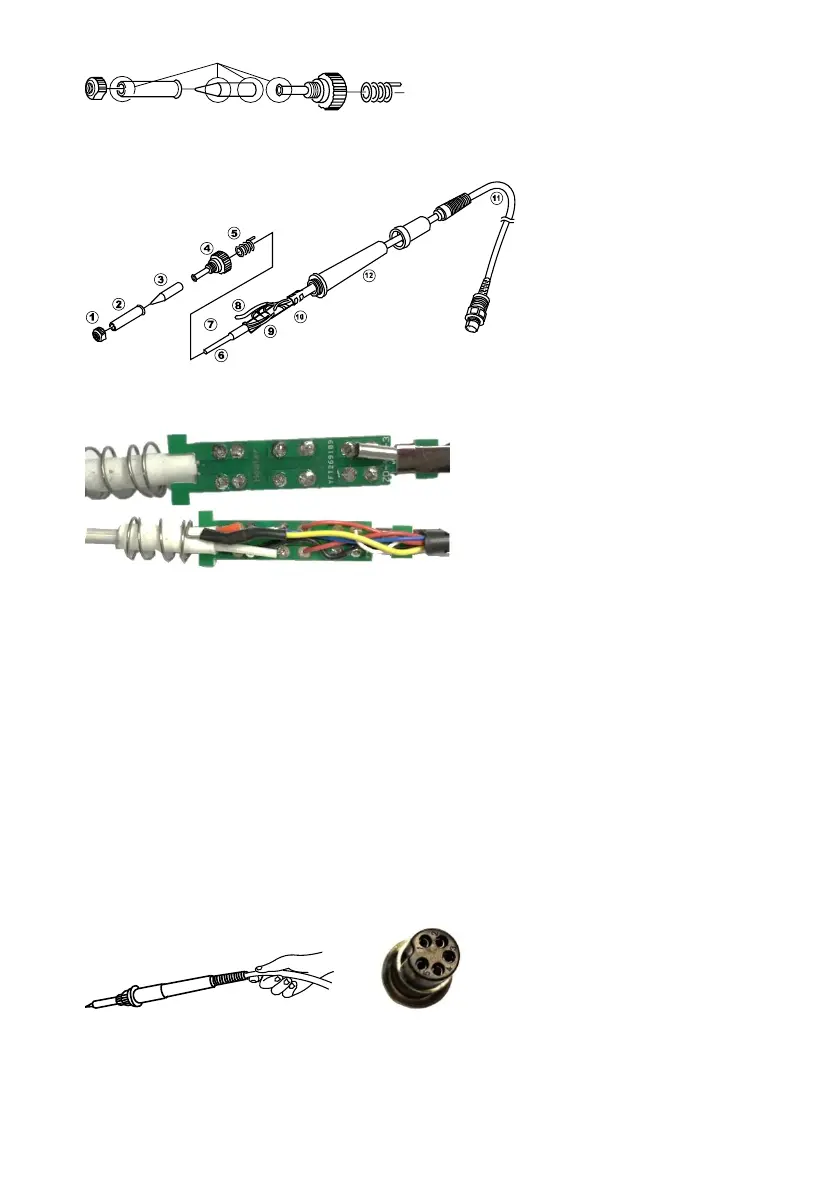
Disassemble the unit
1. Turn the nut(1) counterclockwise and remove the tip enclosure(2) and the tip(3).
2. Turn the nut(4) counterclockwise and remove it from the iron.
3. Pull both of the heater(6) and the cord assembly(11) out of the handle(12). (Toward the iron tip direction)
Measure when the heater is at room temperature.
1. Resistance value of the heater (resistance between the 2 red wires)≈1Ω
2. Resistance value of the sensor (resistance between the 2 blue wires) ≈50Ω
If the resistance value is not normal, replace the heater.
NOTE:Wire colors may differ from actual
Replace the heater. (9SS-988-HT)
1. Desolder the faulty heater's leads and remove the heater.
2. Replace it with a new one and solder it to PCB properly.
3. Solder the two leads of the heater to the other side of PCB. Bend the leads at a right angle when soldering
to avoid short-circuit
After the heater is replaced.
1. Measure the resistance value between pins 2&5 or pins 3&5 or pins 1&5. If it is not open(∞), the heater or
sensor may be in contact with the earthed casing. The problem must be solved otherwise it will damage
the PCB.
2. Measure the resistance values between all leads to check whether they are normal. Make sure the leads
and the earthed spring are well connected.
Faulty soldering iron.
How to check the soldering iron cord.
Check the resistance value between the pins of the plug and the wire on the terminal.(Pin 1 to wire; Pin 2 to
wire; Pin 3 to wire; Pin 4 to wire; Pin 5 to wire)
The value should be <2Ω. If it is more than 2Ω or ∞, the cord is faulty and the soldering iron needs to be
replaced.
Fuse replacement
When fuse is blown, replace with the same type of fuse. (refer to below picture)
1. Unplug the power cord from the power receptacle.
 Loading...