11 | English English | 12
WARNING: Always turn the appliance OFF and unplug the power cord from the electrical
outlet before handling and replacing the air lter.
• Preliminary Filter Cleaning Instructions
We recommend cleaning the Preliminary Filter every two months with warm water and
soap. Once washed this should be dried thoroughly before being placed back into the
appliance.
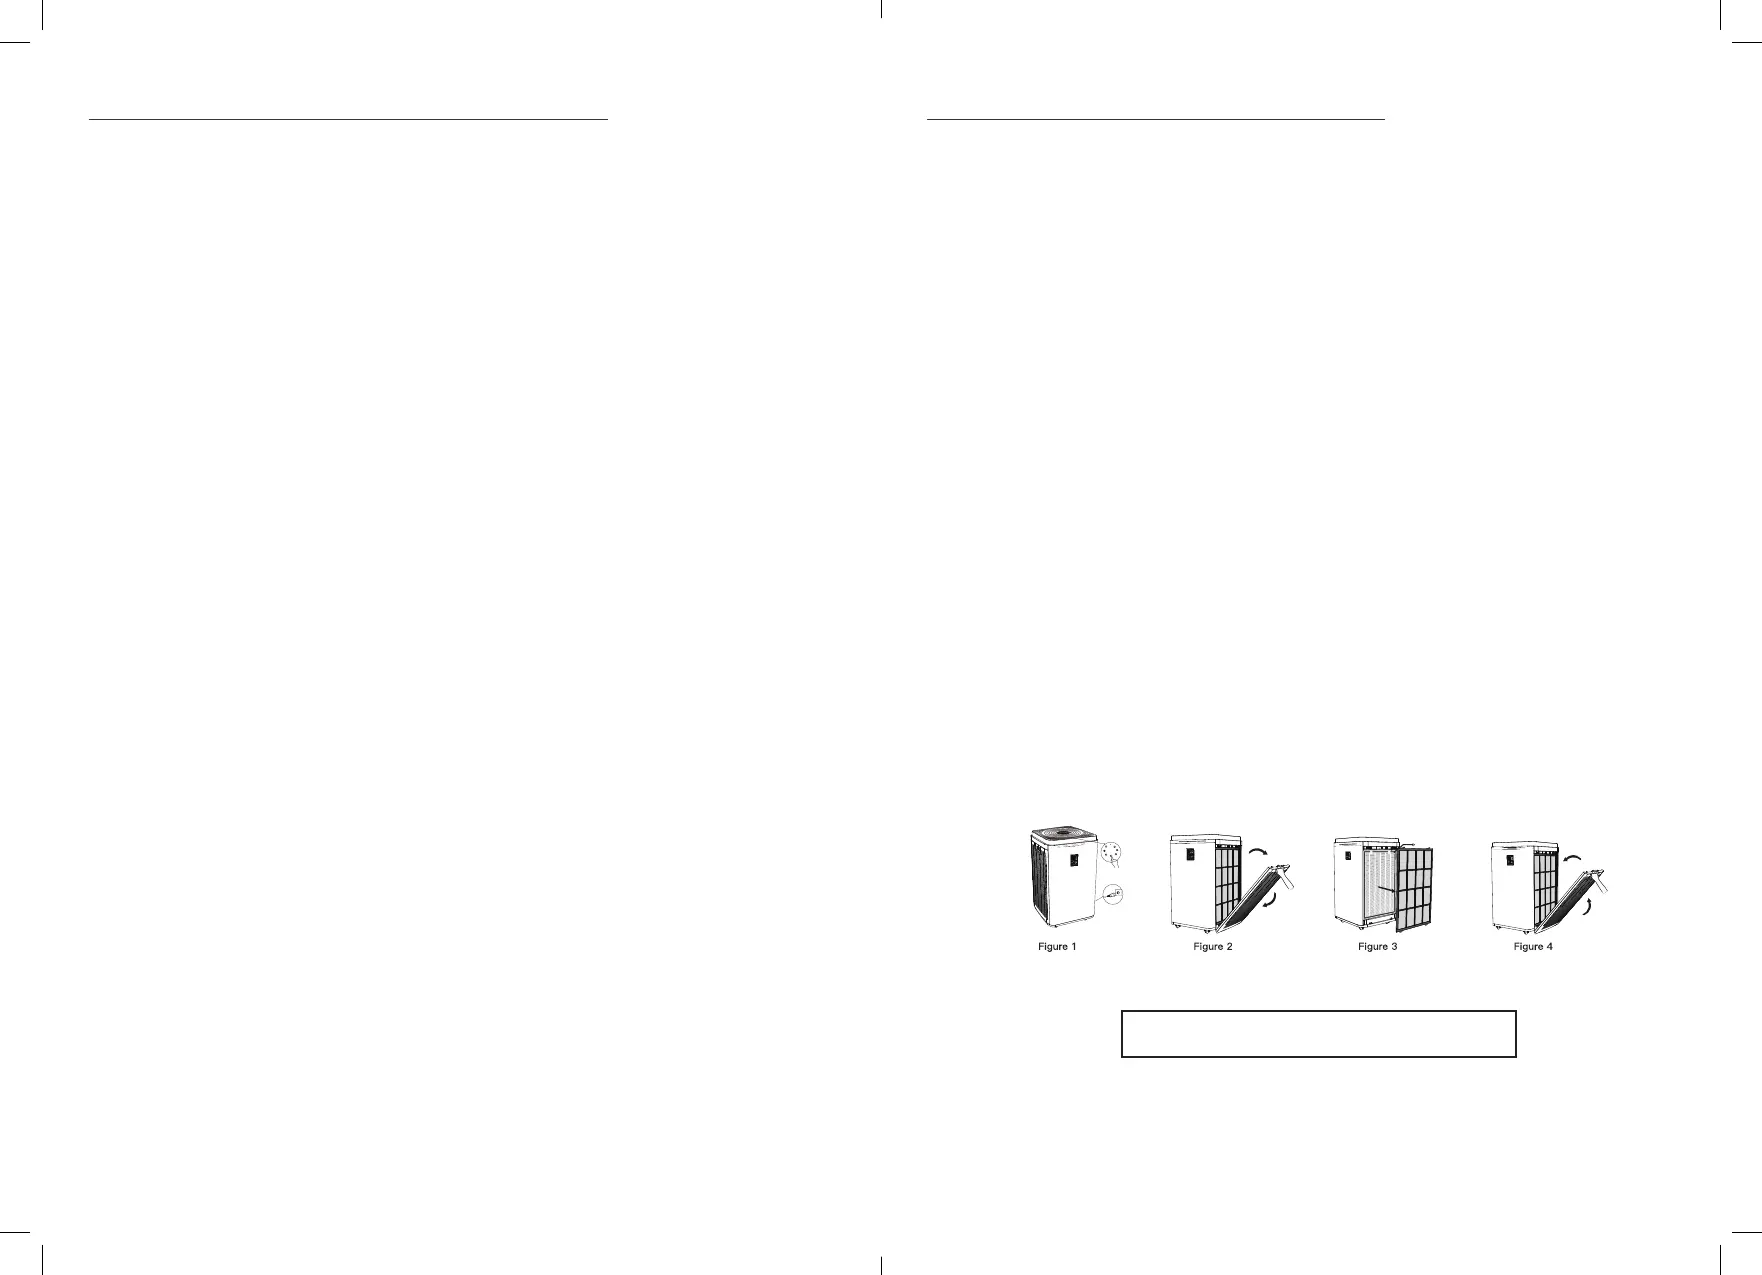
Step 1. Shut down the device and turn the power o (Figure 1).
Step 2. Open the door cover by lightly pulling the handle (Figure 2).
Step 3. Remove the preliminary lter by pulling on the clasps at the top of the lter.
Clean it with the warm water and soap.
Step 4. After cleaning, dry the lter thoroughly by exposing it to the sun or allowing it
todry naturally. Do not dry it with the drying machine.
Step 5. Place the clean and dry lter back into the appliance; ensuring the groove is on
the bottom of the unit.
Step 6. Re-attach the door cover.
• Carbon Clothes Mesh Filter Instructions
We recommended cleaning the lter with a vacuum cleaner once a month and replacing
it every 6 to 12 months, or after 3,000 hours of use. After 3,000 hours of use, the “ON/
OFF” button will blink and beep three times as a reminder to replace the lter. You may
need to replace the lter earlier depending on the environment of the room.
CLEANING AND REPLACING THE FILTER(S) REPLACING THE FILTER INSTRUCTIONS
WARNING: Always turn the appliance OFF and unplug the power cord from the electrical
outlet before handling and replacing the air lter.
Note: this lter is for Pro Breeze PB-P06 Smart Air Purier use only.
Toreplacethelter:
Step 1. Shut down the appliance and turn the power o.
Step 2. Open the door cover by lightly pulling the handle (Figure 2).
Step 3. Remove the preliminary lter by pulling on the clasps at the top of the lter.
Clean it with the warm water and soap as per instructions above.
Step 4. Remove the composite lter by pulling out the two tabs at the top of the lter.
We recommend that you have a garbage bag ready to prevent the pollutants on
the lter falling back into the room (gure 3).
Step 5. Insert the new lter, ensuring the white grooves are on the outside and the white
“front” tabs are facing outwards.
Step 6. Place the preliminary lter back into the lter space with the groove at
the bottom
Step 7. Re-attach the door cover.
Step 8. Press and hold the “SPEED” AND “AUTO” buttons for 10 seconds to reset the
lter reminder.
Replacementltermodelnumber:PB-P06F
 Loading...