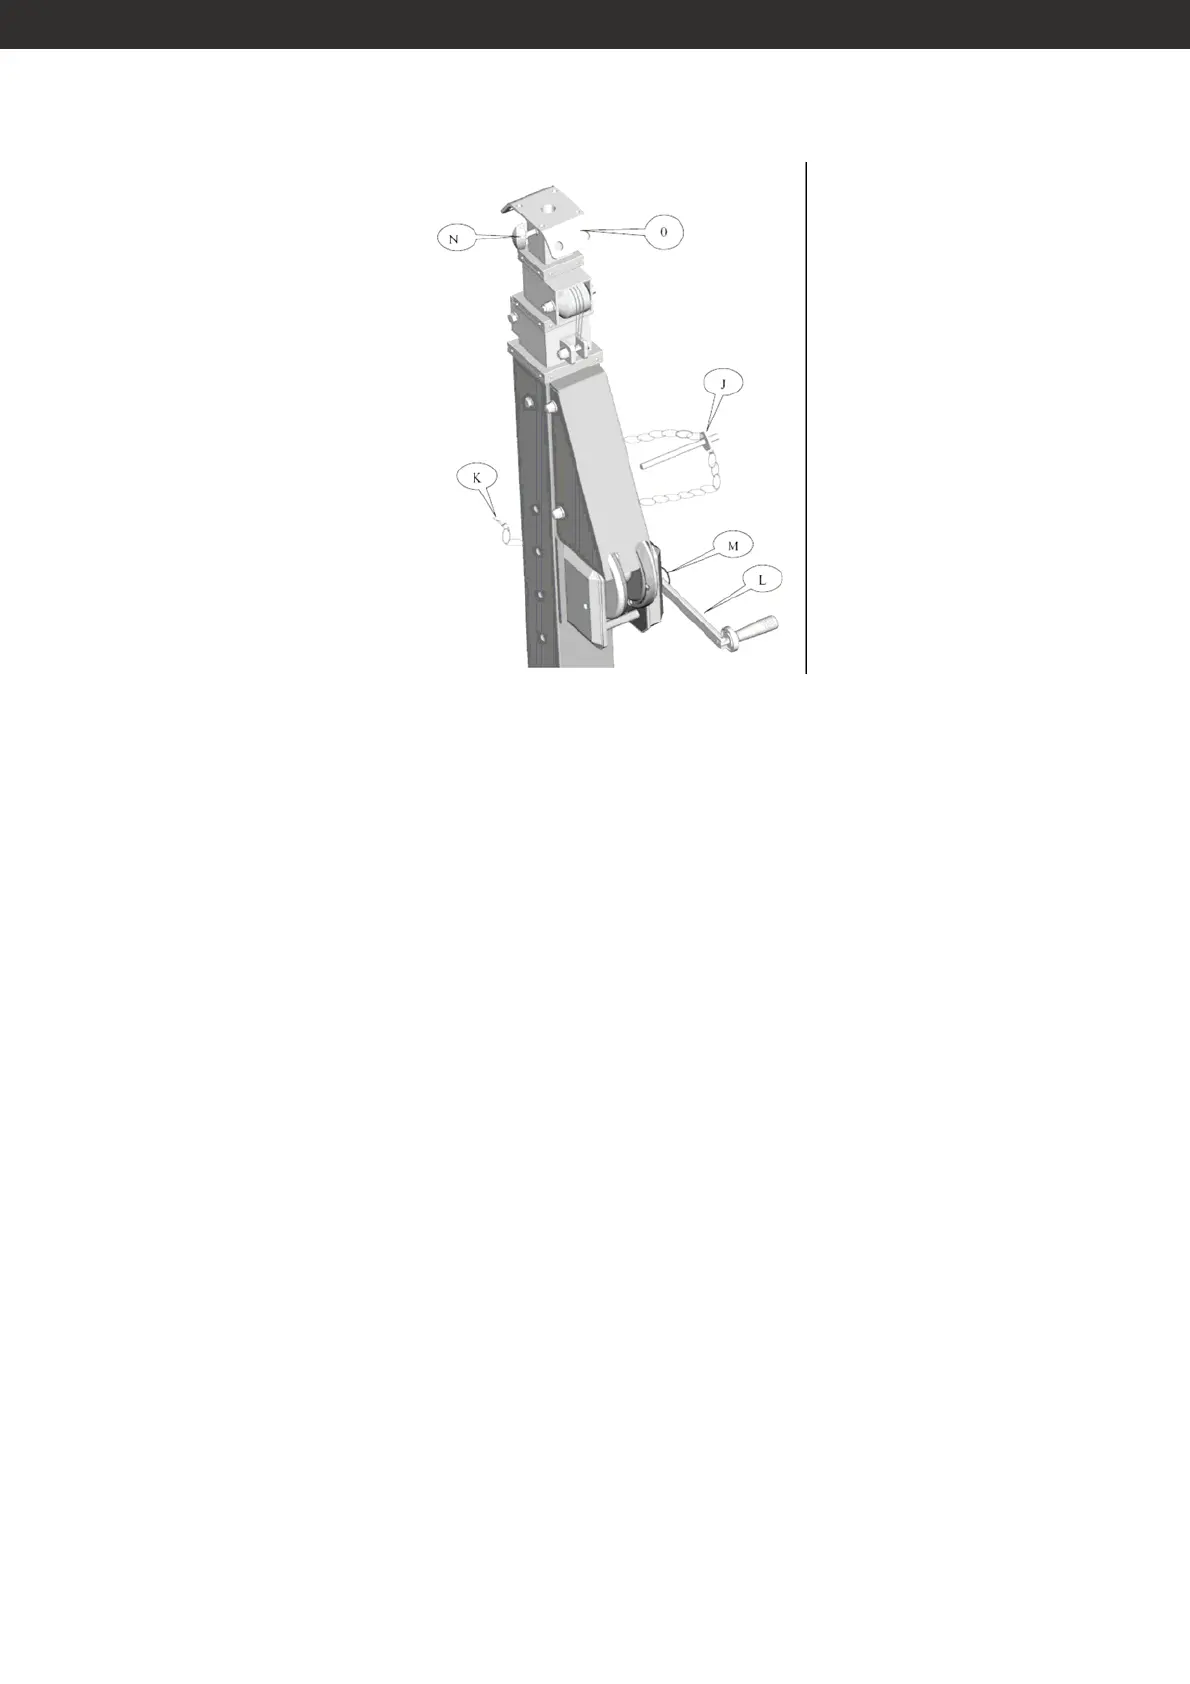
4. LIFTING THE MASTS
1. Remove the mast pin (J) from the column extracting the split pin (K).
2. If the stand is supplied with crack (L), which is folding, dismantled, mount the crank as follow:
- Remove the red cap from the crank (L),
- Remove the screw and the washer from the pin (M),
- Screw the crank without applying force on the pin (M) until to reach the stop,
- Fix the crank, screwing the screw with the washer and the spring washer curved in correct order, on the
pin (M), holding stopped the gear wheel with a screwdriver use a dynamometric key and lock at 25Nm.
- Check the crank is correctly mounted: the crank must freely rotate 1/2 turn with the gear wheel stopped.
- Reassemble the red cap onto the crank.
3. Turn the which crank (L) clockwise to raise the masts. Turn the winch crank (L) anti-clockwise to lower
the masts
4. When the load is at the required height. ALWAYS INSERT the mast pin (J) into the upper free hole
among the available; remember to insert the split pin (K).
5. Turn the winch crank(L) anti-clockwise a little to avoid the belt to support any load.
5. ADDING AND LOWERING OF THE LOAD
1. Secure the load in position by locking the handle (N). When using a T-bar, load should be balanced.
2. For out door use secure the stand with safety cables (not supplied) fixing them at the hole (O) in windy
condition. Avoid to load large reflectors.
3. Reverse the adding load procedure to lower of the load.
11