51
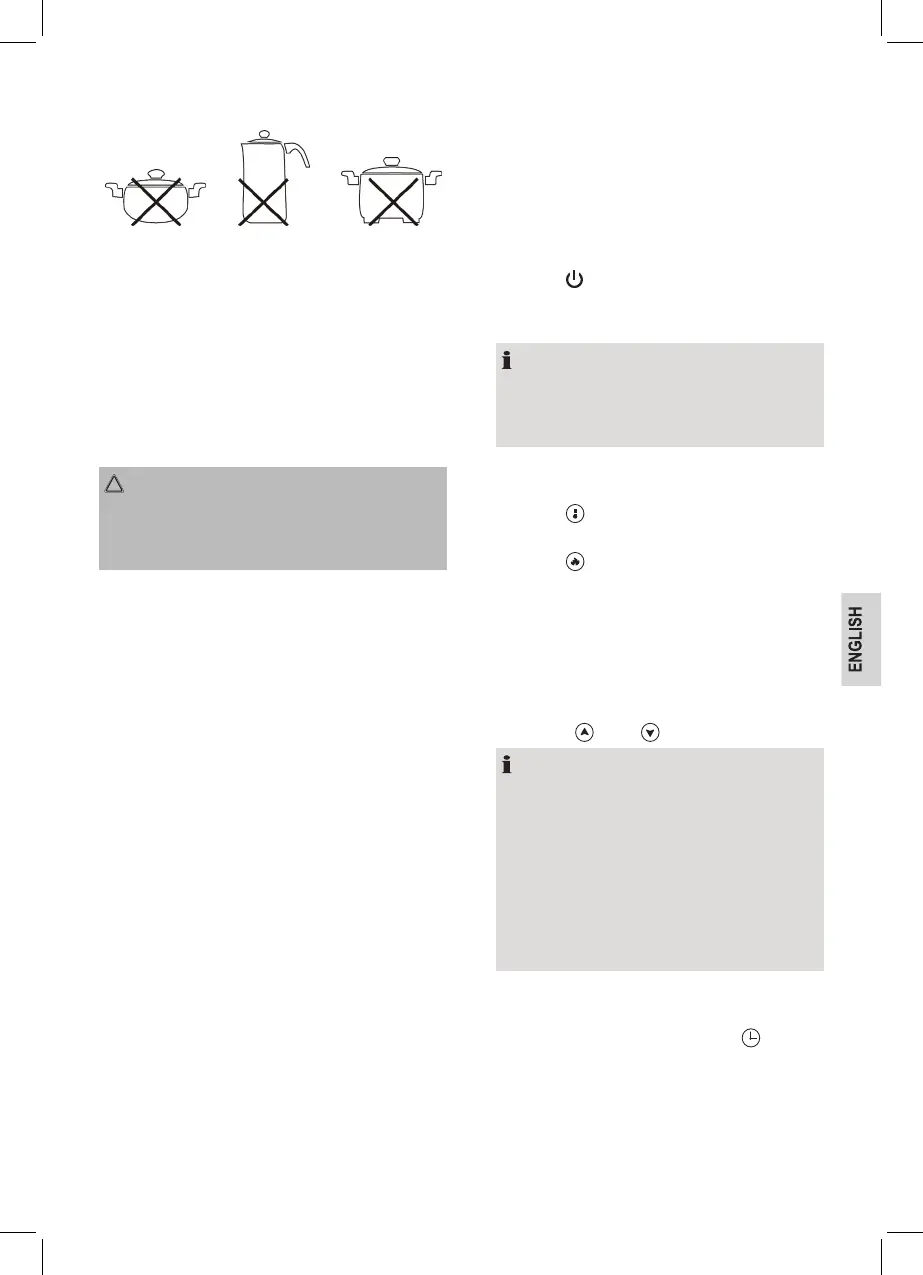
Do not use the following types of pots :
Pots with
bended (con-
vex/parabolic)
bases.
Pots with a base
diameter of less
than 12 cm.
Pots standing
on feet.
Electrical Connection
Connected load/wattage
It is recommended to use a separate connection
protected over a 16 A safety switch.
CAUTION: Overload!
Do not use extension cables or multiple sockets
as the power consumption of this device is too
high for these.
Connection
• Before inserting the mains plug into the socket
check whether the voltage which you intend to
use corresponds to that of the machine. Please
see the label on the machine for details.
• Only connect the machine to a correctly
installed safety socket.
Operation
• The appliance has a ne sensor. A light touch
of the control panel with the nger is sufcient.
Use the nger, not the tip of the nger.
• Each registered touch is conrmed by a beep.
• In the event that the appliance does not react
when you press the buttons, clean the control
panel with a soft, dry cloth. Even a thin lm of
water can make the operation difcult.
• Ensure that the control panel is always clean
and dry and that it is not covered by objects of
any kind.
Standby mode
After you have connected the device’s plug to
the mains supply, the hub is in standby mode. A
signal will sound. The indicator light above the
ON/STANDBY button will light up. The display will
show “– L –” for “LOW” (low temperature).
• Put a suitable pot on the cooking zone.
• Press the
ON/STANDBY button (9), to start
cooking. The message “– L –” will go out. The
indicator lights HEAT and TEMP. will ash.
NOTE:
You now have to press a function button
within 30 seconds, otherwise the cooking
plate will switch back to STANDBY mode.
Select Temperature or Power As Function
• Press the
TEMP button if you want to select
one of the 10 temperature settings.
• Press the HEAT button, if you want to select
one of the 10 power ranges.
Select Temperature or Power For The Cooking
Plate
• Select a temperature between 60°C and
240°C, or a power range between 1 and
10 with the
or the button.
NOTE:
•
The cooking plate always starts on temper-
ature 120°C or power level 5 respectively.
• The display shows the selected setting. The
relevant indicator light next to the display
will also light up.
• Please observe that the cooking behavior
in the pots differs. It depends on the nature
and the quality of the cooking vessels.
Enter Off Time
You can limit the cooking time with the
TIMER
button.
1. Turn the appliance on and select any range or
temperature.



 To Next Page
 Loading...