ASSEMBLY
Unpacking the machine
212 / 212Z
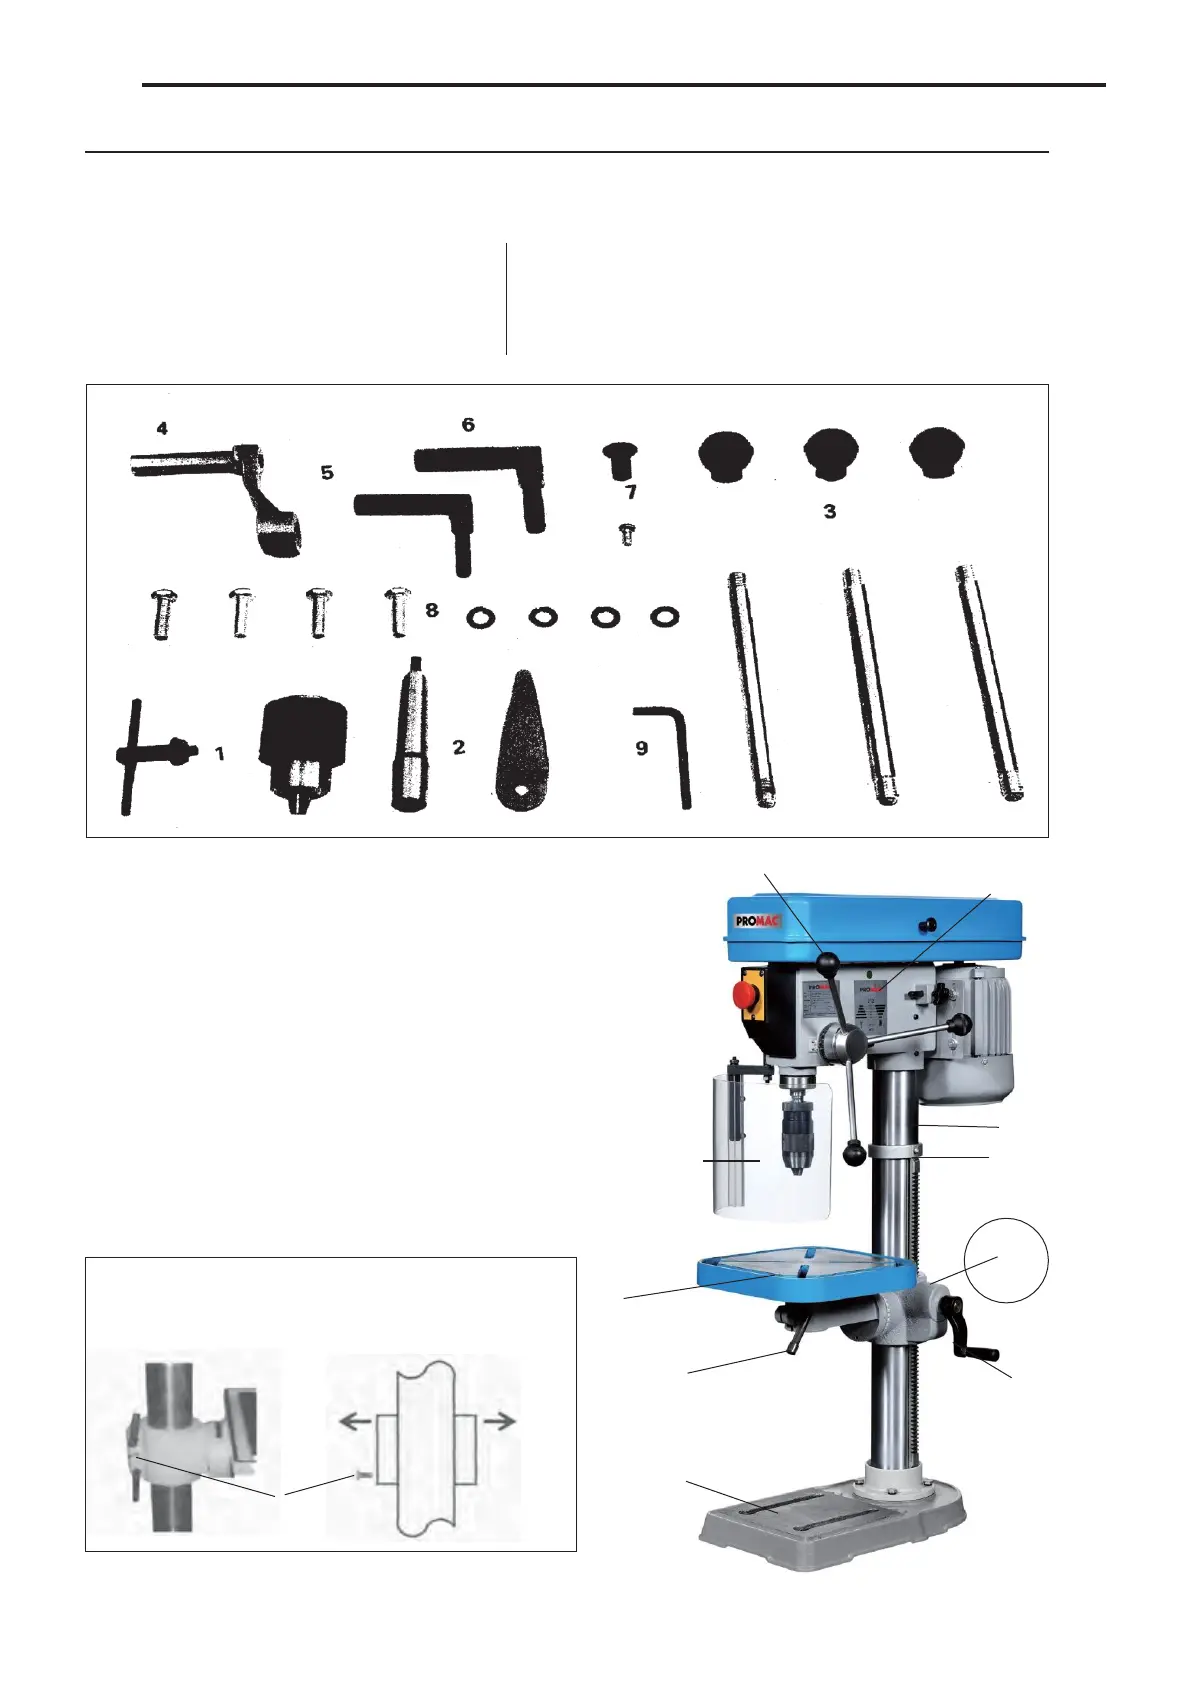
Unpack the machine with all its parts, and check the parts according to the list below.
1. 13mm Drill chuck with key
2. Adapter MT2/B18
3. Handle with rod (3)
4. Crank
5. Clamping lever
6. Clamping lever
7. Turning handle
8. Screw with spring lock washer (3)
9. Allen wrench
Assemble the machine as shown in the adjacent
figure.
1. Place the column on the base (1) and secure it with
the screws and washers (1).
2. Position the column flange (2) with the rack inserted (3) onto the
column. Fit the crank (4) and fasten using the screw.
Please follow the Note below!
3. Fit the ring (5) and secure it with the screws.
4. Fit the worktable (6) onto the flange (2).
5. Screw in the clamping levers (7).
6. Place the head (8) on the column and adjust to
align it with the base. Tighten the screws.
7. Fit the turning handles (9).
8. Fit the chip guard (10).
6
10
Note about Pos. 2:
Once the assembly of the flange is complete, remove
the screw. This screw is only used for assembly
purpose.
Remove
this screw