Press “DELAY”, “BULB”, “INTERVAL” and
“#” icon to choose the delay time, bulb time
interval time and exposure counts you
want. Then press “START”.
Pressing “START” transmits the instructions
to the receiver. Press “STOP” to stop the
timer. If you press “START” again, the timer
resets to the beginning of the program.
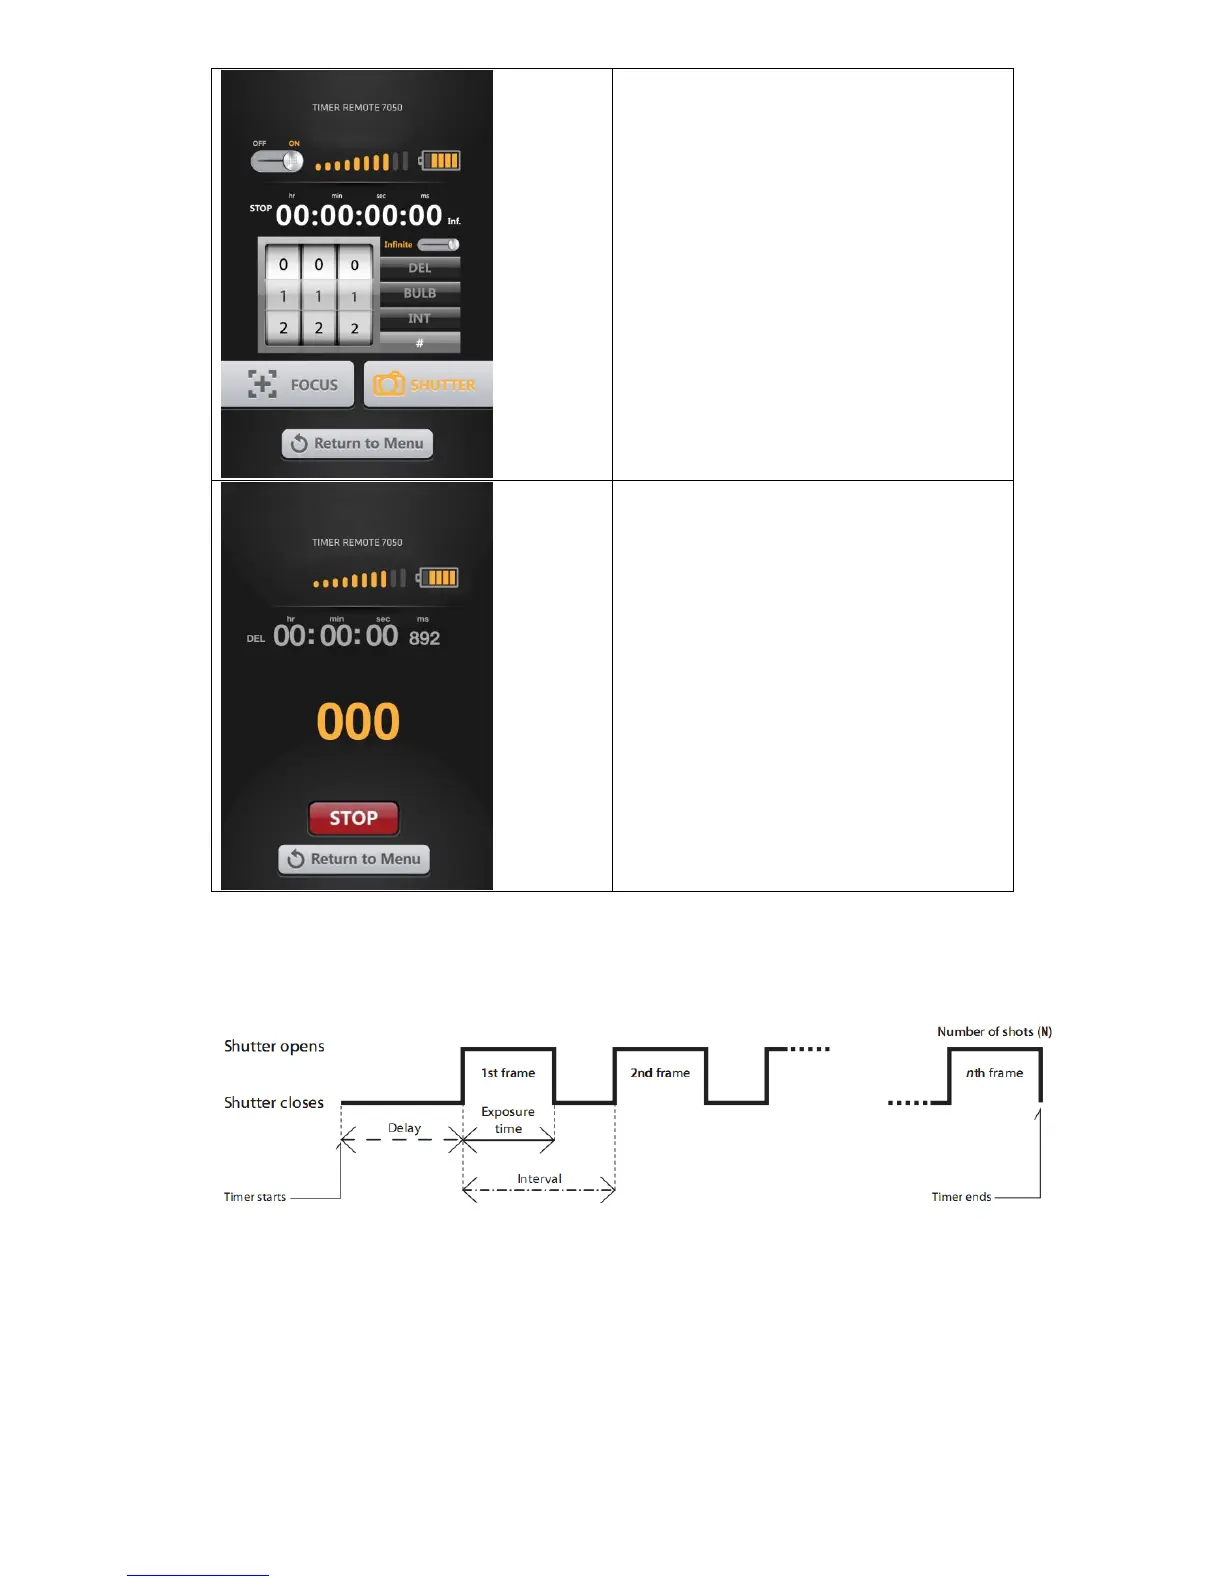
The diagram below illustrates the Timer Remote function DELAY time, BULB time
(Exposure time) and Interval Settings:
Delay time is the time you set under DELAY icon
Exposure time is the time you set under BULB icon
Interval time is the time you set under INTERVAL icon
Number of shots is the exposure count you set under “#” icon
IMPORTANT:
INTERVAL TIME is the time between when one picture starts to be taken and the next
picture starts to be taken. Please ensure that the interval time is longer than exposure
time (BULB time).