Proscend Communications Inc. All rights reserved. www.proscend.com
STEP 1: Use the screws to install the DIN-rail kit to attach at the rear side of
the device.
NOTE: Three screw types are flat head M3 x 4 mm.
STEP 2: Hook the unit onto the DIN-rail.
STEP 3: Push the bottom of the unit towards the DIN-rail until it locks in
place.
DIN-rail Mounting
Wall Mounting
(1) Access the Web Configurator
a. Type the default URL http://192.168.1.1 in your web browser.
b. In the login page, enter the default username root and the default
password 2wsx#EDC and then click the Login button.
(2) Change Password
Go to the Management → Administration and enter the desired New
Password and then scroll down the page and click the Apply button.
Setup
▪Each of M350-W5G or M350-W6 supports selectable 2.4GHz and 5GHz
radio bands. The default setting is 2.4GHz, and the default password is
12345678.
▪The default SSID is led by the model name (M350-W5G or M350-W6),
followed by a string of characters (the MAC address of the device), and
ended by the radio band (either 24G for 2.4GHz, or 5G for 5GHz). For
example, the SSID of M350-W5G is M350-W5G-xxxxxxxxxxxx-24G.
NOTE: Go to Wi-Fi setting to change the default wireless network name and password.
Wi-Fi Connection
P/N:604040000063
NOTE
This device complies with Part 15 of the FCC Rules. Operation is subject to the following two
conditions:
(1)This device may not cause harmful interference, and
(2)This device must accept any interference received, including interference that may cause
undesired operation.
Please scan below QR Code to download online resources.
Download link: https://www.proscend.com/en/product/M350.html
M350 Series
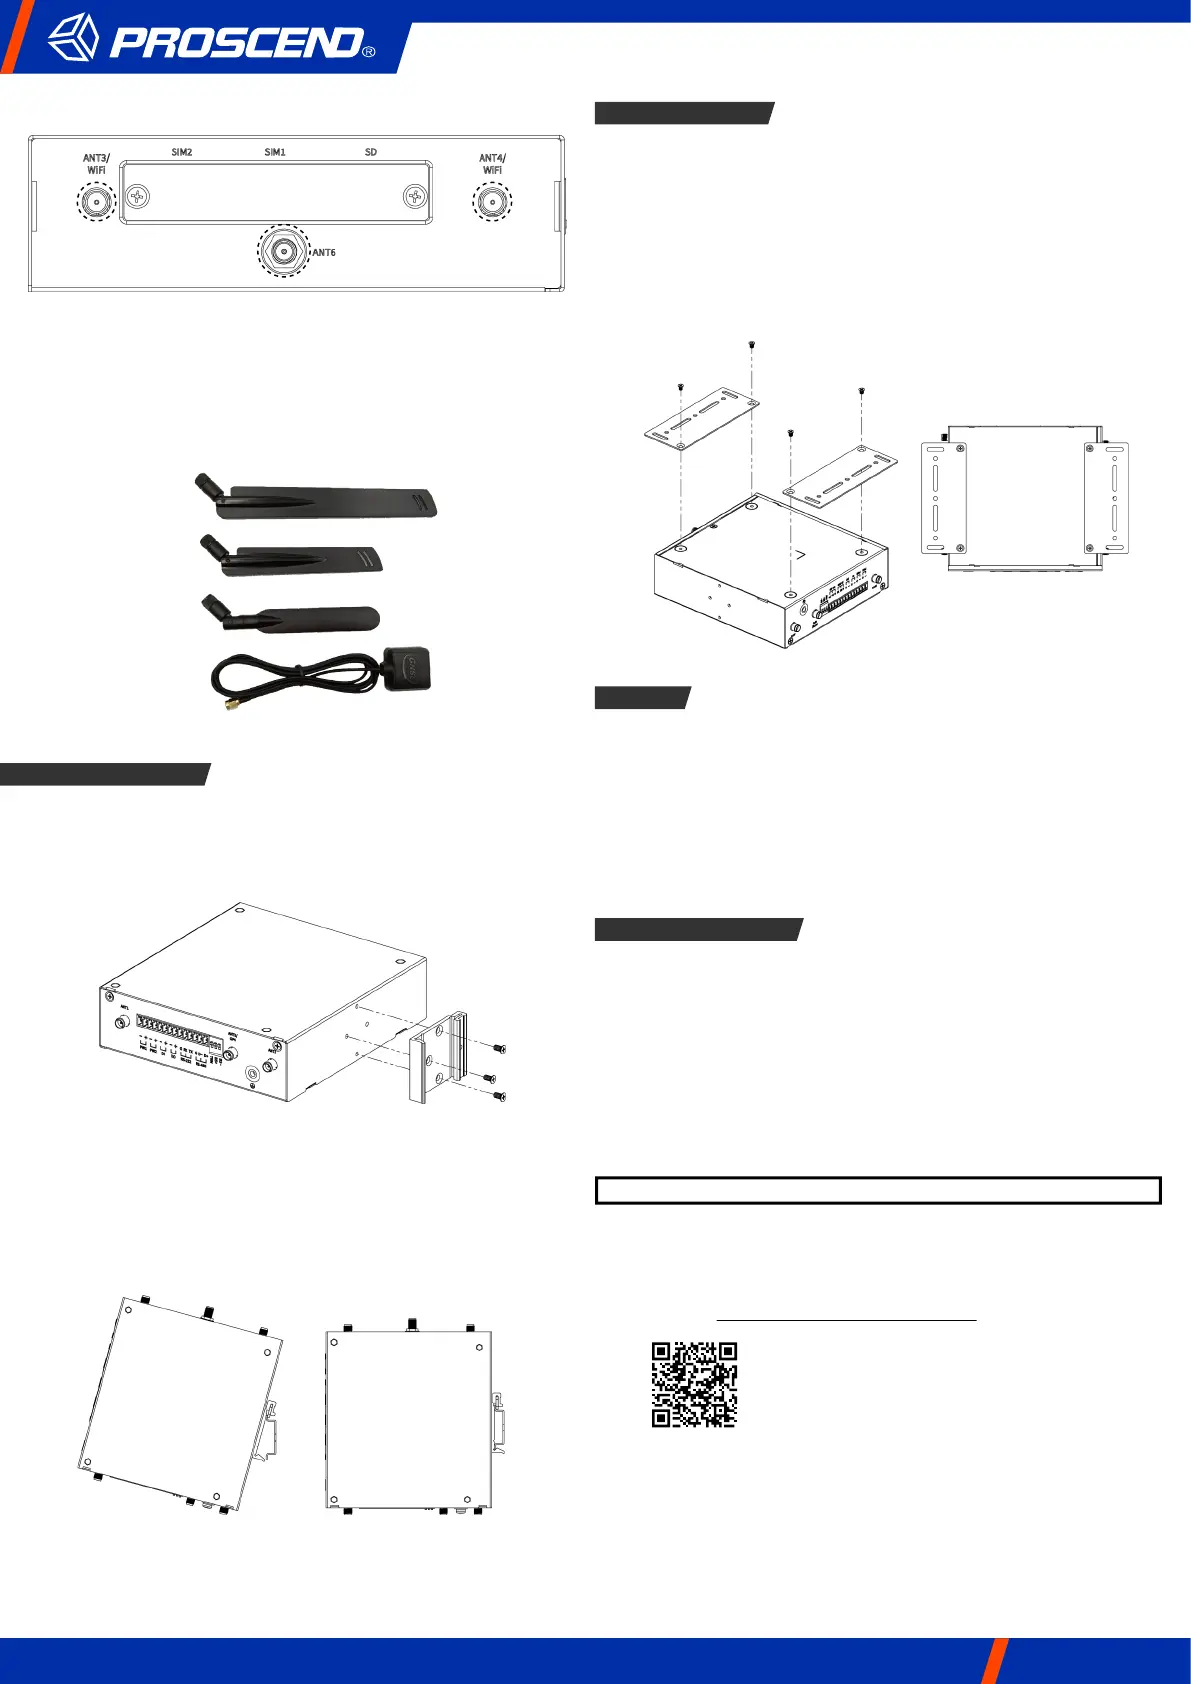
NOTE:
ANT1, ANT2, ANT5, and ANT6 are the SMA connectors.
ANT3 and ANT4 are the RP-SMA connectors.
For the 5G models (M350-5G, M350-W5G), all 5G antennas must be installed on the assigned
ANT1, ANT2, ANT5, and ANT6 connectors. The 5G antenna is integrated with GPS.
For the LTE models (M350-6, M350-W6), all LTE antennas must be installed on the assigned
ANT1 and ANT2 connectors.
Each different antenna type is shown in the following picture.
▪ANT3/WiFi, ANT4/WiFi, and ANT6 are on the left panel of the device.
5G Antenna
LTE Antenna
Wi-Fi Antenna
GPS Antenna
STEP 1: At the bottom side of the device, use two screws to install each
bracket.
NOTE: Each screw type is flat head M3 x 4 mm.
STEP 2: Use the screws to attach the bracket of the device for wall
mounting.
NOTE: These screws are not included in the package. The head of each screw is less
than 7 mm in diameter, the shaft is less than 3 mm in diameter, and the length is less
than 10 mm in diameter.
- 2 -

 Loading...