Do you have a question about the Proslat 88102 and is the answer not in the manual?
Ensure wall mounting surface and structure are sufficient for Slatwall weight and contents.
List of tools necessary for installation, including stud finder, level, drill, and saws.
Details of included hardware, such as screws and bits, with quantities.
List of items included in the package, such as panels and trims.
Decide where and how high to install Slatwall section, considering stud placement.
Verify installation location, locate studs between start and finish points using a stud finder.
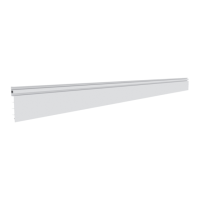
Install bottom horizontal J-trim, level and screw into middle five studs.
Overlap vertical J-trims with horizontal J-trim, level and screw into place.
Insert panel into vertical J-trims, ensure it's seated, level, and screw into studs.
Insert and overlap panels, push down to seat, and screw into every stud.
Set last panel, mark trims, remove to cut, then reinstall and screw into place.
Slatwall panels are durable and water-resistant; clean with mild detergents or low-pressure washer.
Install 2x3 studs vertically on concrete/block walls for panel mounting.
For 24-inch stud centers, install 5/8 in. plywood and mount panels to it.
When installing multiple sections vertically, a J-trim may not be needed at the start of the second section.
Use two J-trims back-to-back to join horizontal sections for a seamless finish.
Center and secure H-trim to stud for joining two sections, ensuring it is straight.
Overlap bottom J-trims with H-trim, screw into studs, and level vertical J-trims.
Lifetime warranty for new Proslat Panels against material or workmanship defects.
Excludes damage from improper installation, misuse, acts of God, or non-Proslat accessories.
Seller not responsible for proper use, service, or installation; buyer waives all liability claims.
| Weight Capacity | 75 lbs per square foot |
|---|---|
| Material | Recycled PVC |
| Color | Gray |
| Mounting Type | Wall Mounted |
| Included Components | Wall panels, hardware |