8
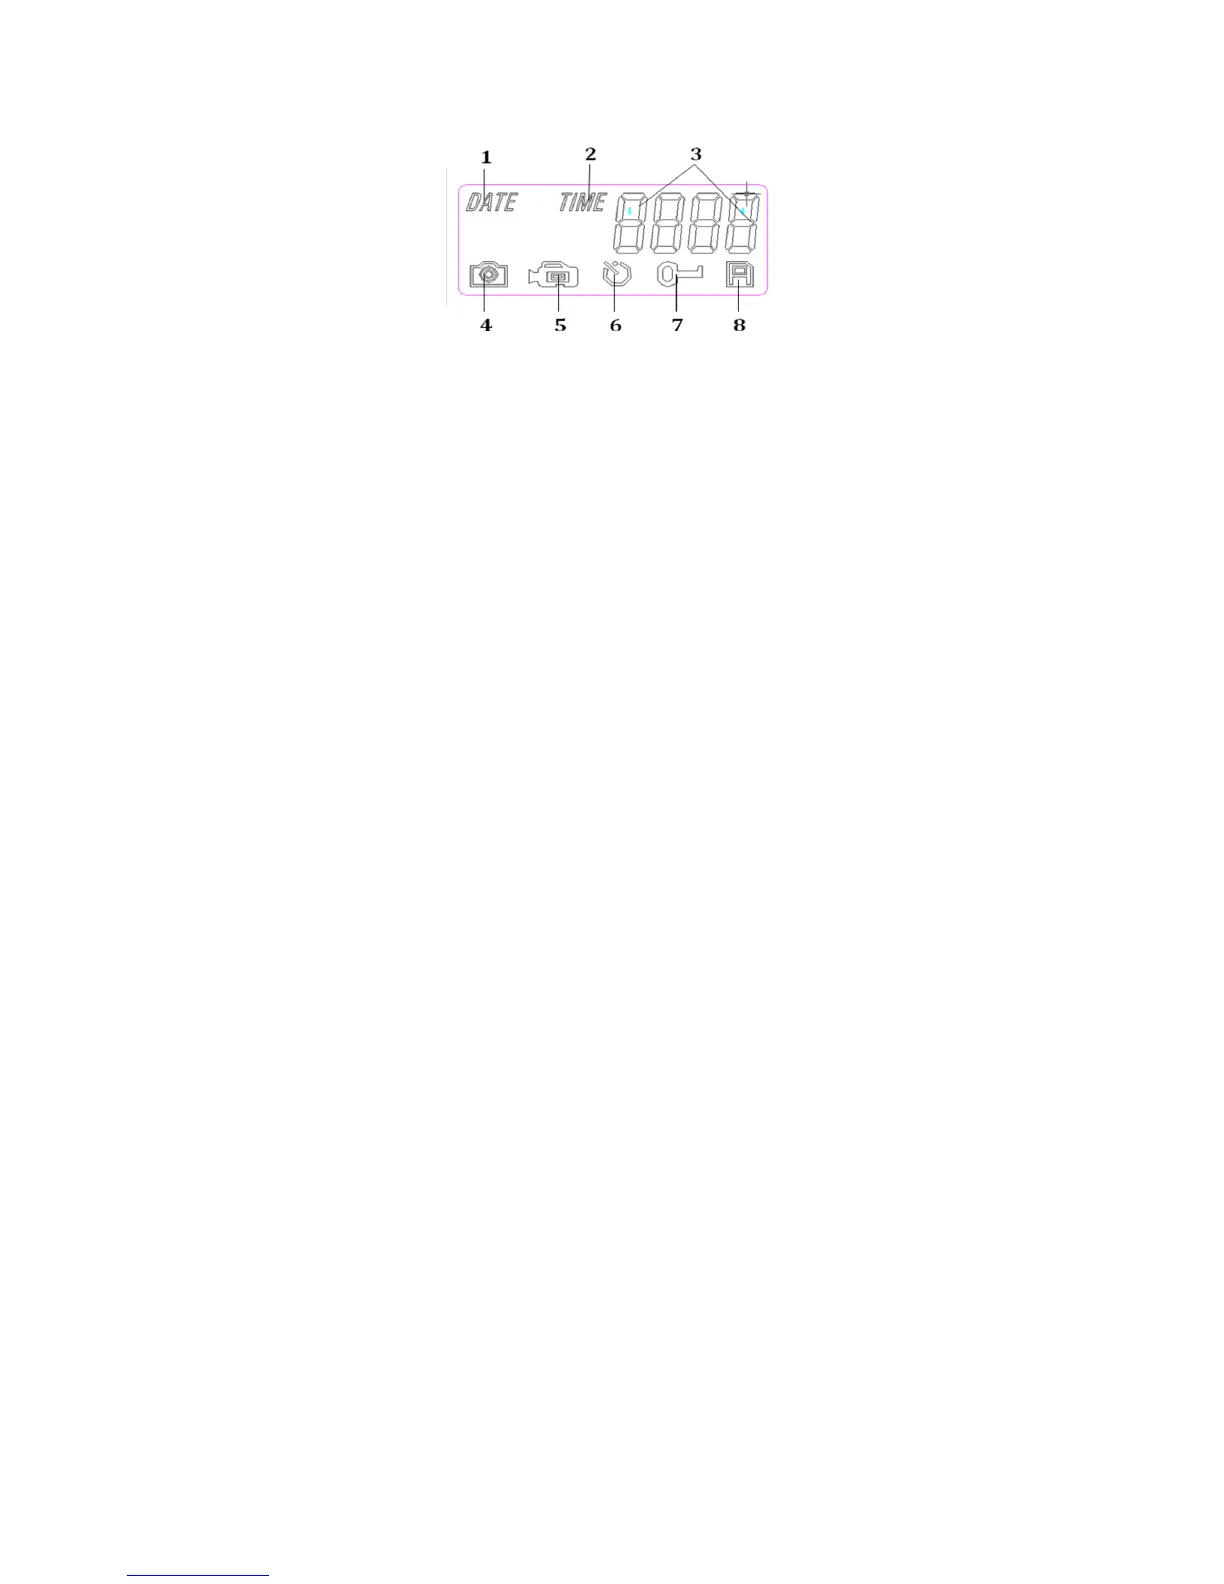
1. Date
2. Time
3. 4 Digit Display
4. Image Resolution Select
5. Movie Recording
6. Camera Delay Setting
7. Password
8. SD Card
It is very easy to setup this camera. Turn on the unit and then press the “SETUP” button, the
“DATE” icon will start to blink, press “UP” or “DOWN” to navigate the setup menu. Press the “OK”
button to enter the specific menu item which is blinking. Use the “UP” or “DOWN” buttons to
make adjustments. After the setting is done, press “SETUP” to save and exit the menu setting
status.
6.1 Set Camera Delay
Camera Delay is to set the amount of preset time in minutes and seconds the camera will sleep
between PIR triggering. This setting ranges from 1 second to 60 minutes 59 seconds. The default
delay is 1 minute.
a) Turn on the unit and press the “SETUP” button
b) The menu icon will start to blink, press the “UP” or “DOWN” button till icon 6 “Camera Delay
Setting” is blinking, press “OK” to enter.
c) Then the LCD will display “0100”, first two digits represent minutes and the last two digits
represent seconds.
d) When the cursor stays at minutes, press “UP” and “DOWN” to change the value (Range from
00-60, step 1), press “OK” to confirm.
e) Then it enters the second setting. press “UP” and “DOWN” to change the value (Range from
00-59, step 1), press “OK” to confirm.
f) Then it comes to the next setting item. If the setting is done, press “SETUP” to save and exit
the setting.