EasyManua.ls Logo

Prostat PRS4110 User Manual

Prostat PRS4110
20 pages
To Next Page IconTo Next Page
Page #1 background imageLoading...
Page #1 background image
This thermostat requires 24 Volt AC Power or two (2) properly installed
“AA Alkaline batteries for proper operation. When connecting 24 Volt
AC Power the batteries may be installed as a backup.
Thermostat
installation and all components of the system shall conform to
Class II Circuits per NEC code.
For use only as described in this manual. Any other use will void warranty.
1
Specifications
2
Installation
3
Setting User Options
4
Setting Your
Program Schedule
5
Operating Your Thermostat
6
Additional Operation Features
7
Thermostat Maintenance
Warning
Turn off power to the heating or cooling
equipment before installation.
Attention
For installation by experienced service
technicians only.
Read all instructions before proceeding.
This thermostat is compatible with:
• Single stage heat / cool conventional and heat pump systems
• Conventional systems up to 2 heat / 2 cool (PRS4210 only)
Single compressor heat pump systems with an auxiliary heat stage (
PRS4210
)
• 250 – 750 millivolt heat only systems
Electrical and control specifications:
• Electrical Rating: 24 Volt AC
• 1 amp maximum load per terminal
• AC Power: 18 – 30 Volts AC
• DC Power: 3.0 Volt DC (2 “AA Alkaline Batteries Included)
• Control Range: 45° – 90° F (7° – 32° C)
• Temperature Accuracy: +/- 1° F (+/- .5° C)
Terminations
• PRS4110 – Rc, Rh, O, B, Y1, W1, G, C
• PRS4210 – Rc, Rh, O, B, Y1, E/W1, G, W2, C
1
Specifications
PRS4110-100-02
Model number is located on back of thermostat
Programmable Thermostats
User
Manual
PRS4110
PRS4210
Single Stage Heat / Cool
Conventional and Heat Pump
Up to 2 Heat / 1 Cool
Conventional and Heat Pump
Question and Answer IconNeed help?

Do you have a question about the Prostat PRS4110 and is the answer not in the manual?

Prostat PRS4110 Specifications

General IconGeneral
DisplayLCD
OutputRelay
Protection ClassIP20
Stages1
Temperature Range5°C to 30°C
Accuracy±0.5°C
MountingWall Mount

Summary

Specifications

Installation

Thermostat Location

Guidance on selecting an optimal location for thermostat installation, avoiding environmental interference.

Install the Sub-Base

Step-by-step instructions for mounting the thermostat sub-base to the wall.

Provide Power

Details on connecting 24 Volt AC power or installing backup AA batteries.

Connect Your Wires

Wiring configurations for conventional and heat pump systems, including terminal assignments.

Set Installer Switches

Instructions for configuring the thermostat's installer switches for system type and temperature scale.

Attach Thermostat to Sub-Base

Final step to connect the thermostat body to the installed sub-base.

Setting User Options

Programming Mode Options

Selection of 7-day, 5-2 day, or non-programmable modes for thermostat operation.

Temperature Differential Settings

Configuring 1st and 2nd stage temperature differentials for heating and cooling.

Hold Period and Filter Monitor

Setting temporary/permanent hold modes and configuring the service filter reminder.

Adaptive Recovery Mode

Enabling or disabling the adaptive recovery mode for efficient temperature management.

Setting Your Program Schedule

Setting the Time and Day

Procedure for setting the current time and day of the week on the thermostat.

7 Day Programming Setup

Configuring individual days or the entire week with 4 events per day.

5-2 Day Programming Setup

Setting weekday and weekend schedules with distinct 4-event programs.

Operating Your Thermostat

System Control Modes

Selecting between COOL, OFF, HEAT, and EMER (Emergency Heat) modes.

Fan Control Modes

Choosing between AUTO and ON modes for the system fan operation.

Temperature Adjustment

Performing temporary and extended temperature adjustments using buttons or HOLD function.

Status and Event Indicators

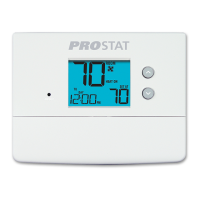
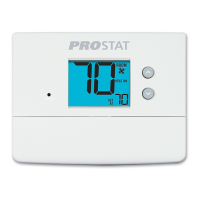
Understanding display icons for system status, auxiliary/emergency heat, and program events.

Resetting the Thermostat

Procedure to reset the thermostat to factory defaults using a small object.

Additional Operation Features

Compressor Protection

Automatic delay feature to prevent short-cycling damage to the system compressor.

Thermostat Maintenance

Changing the Batteries

Instructions for replacing low batteries and recommendations for annual replacement.

Thermostat Cleaning

Guidelines for cleaning the thermostat using a soft damp cloth, avoiding liquids and abrasives.

Related product manuals