INSTALLATION
Install the controller in a ventilated area away from flammable materials and gases.
The surface should be solid, even, dry and nonflammable.
The battery to controller cable should be as short as possible (1-2mtrs is ideal) and be of a suitable
diameter to minimize voltage loss.
Do not assemble outdoor, the unit should be installed in the way to be protected against humidity,
dripping, rainwater as well as direct and indirect heat (sunlight).
To ensure the air circulation for cooling an area of 15cm on each side of the unit must be kept free.
The LCD display should be protected against UV rays (e.g. sunlight). Long time exposure to UV rays
can permanently discolor the LCD.
The solar charge controller may only be connected to the local loads and the battery by trained
personnel and in accordance with any applicable regulations.
Follow the installation and operating instructions for all components of the PV system.
Ensure that no cables are damaged.
Ensure that polarity of Solar panel/battery/load is correct and use only insulated tools.
WARNING
ISC3042 can work with input voltage up to 65 V DC maximum; when installing at this voltage, particularly with
regard to module open circuit voltage (Voc), the entire solar energy system must be installed with protection
class II. Cover solar modules during installation and use only insulated tools.
GROUNDING
Grounding ISC3042 is not technically required when installing a stand alone solar system. However, if
required, Common grounding of the negative Battery and Load control output is OK (for negative earth
electrical systems such as a caravan or motor-home).
Note: ISC3042 can ground the negative only, and PV array Output should NOT be grounded.
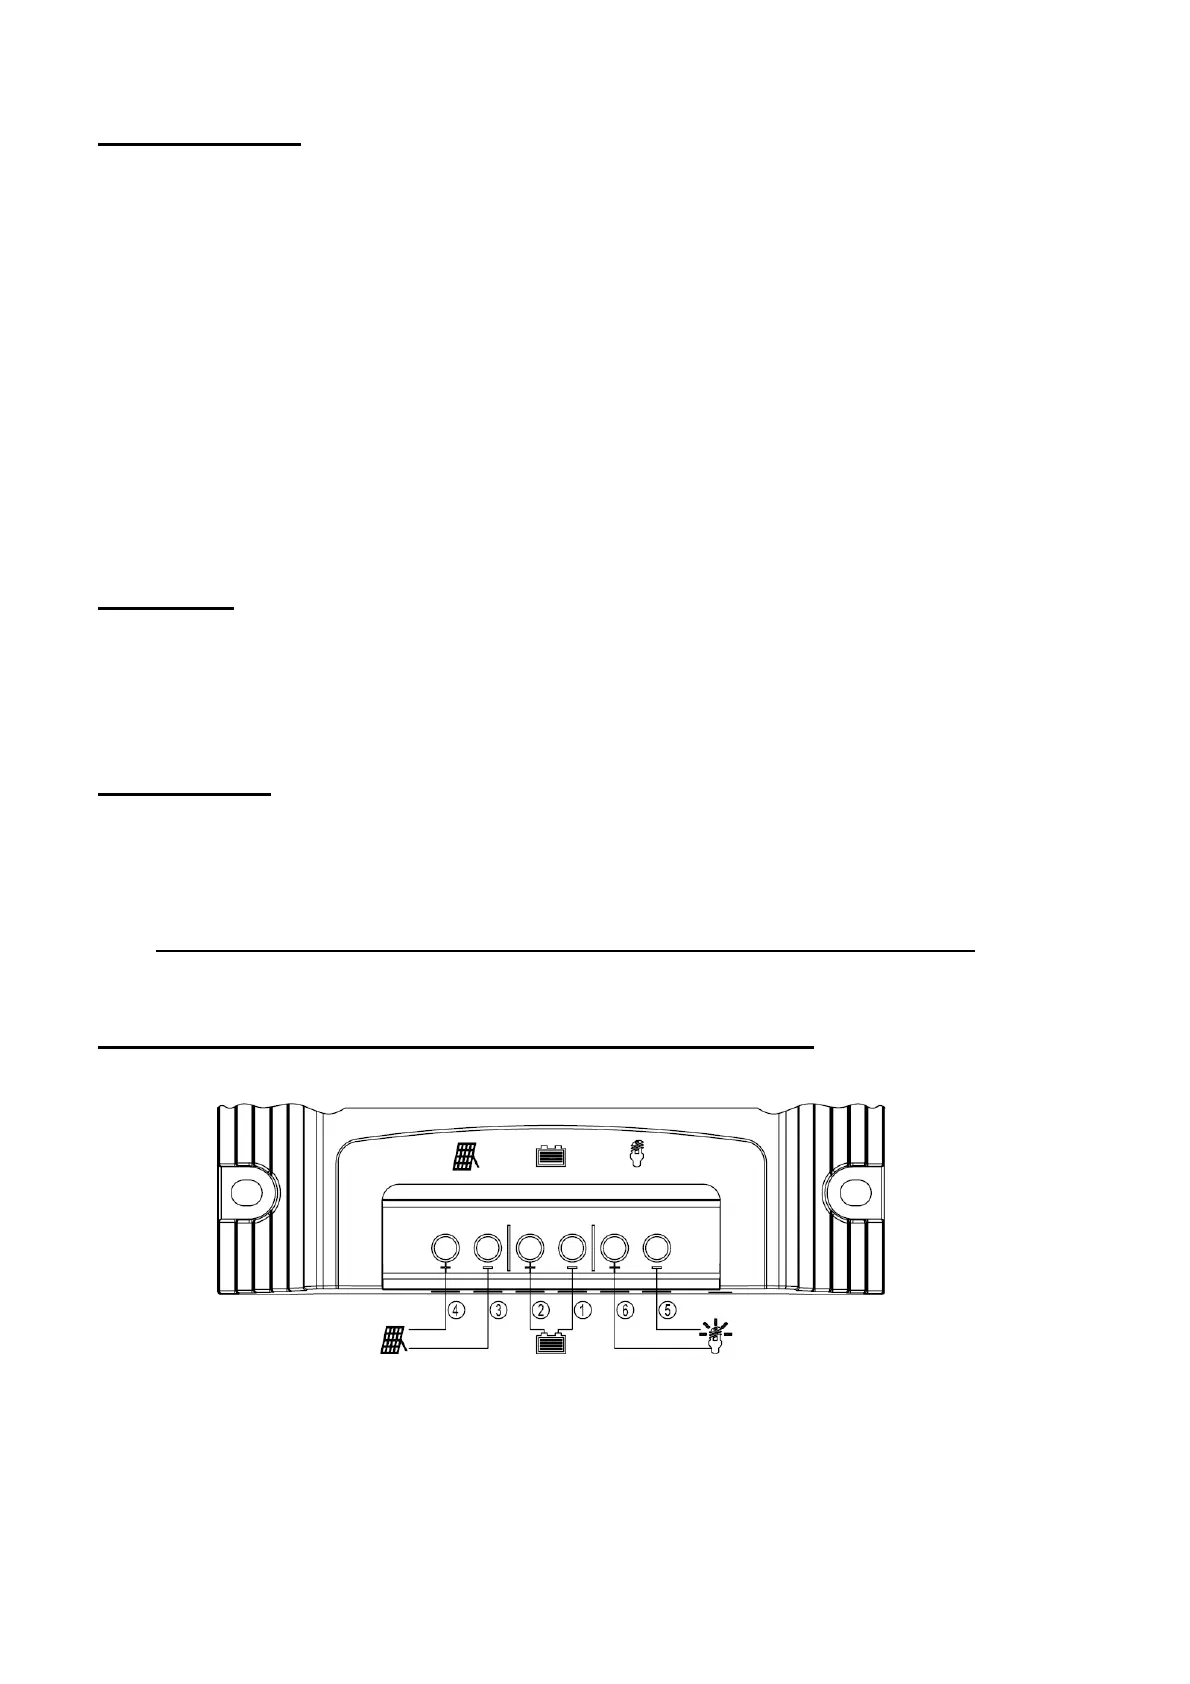
CONNECTING / DIS-CONECTING SYSTEM SEQUENCE
Connect the wires in the sequence from 1 to 6 according the above diagram; when
Disconnect the wires in the REVERSE sequence from 6 to 1 according the above diagram.
Use with 12V or 24V battery bank, (controller will detect voltage of battery automatically).
Never exceed the nominal ratings (see below technical data for reference).
Suggested cable length, 10m solar panel connection cable/2m battery connection cable/5m load
connection cable.
8
 Loading...