-16-
1p
c. Finishing miller, ball shaped Ø2.3 mm
2pcs. Sandingdisc Ø22mm (pink colour) of high-grade
corundum, forsteel, castiron, HSS steels
2p
cs. Sanding disc Ø22mm (grey), of silicon carbide,
fine, even grainsize with consistent hardness.
Forengraving and frosting of glass, ceramic and
stellites, also forgrinding of metal, white castiron
and high-alloy steels
1pc. Polishing disc foracrylic glass and Plexiglas
1pc. Brass brush formachiningbrass,brass alloys,
copper, precious metals, semi-precious stones,
plastic andwood. Forcleaning electronic com-
ponents and printed circuit boards.
10 pcs.Corundum cutting discs forcutting alloyedand
non-alloyed steel,stainlesssteels and non-fer-
rous metals.Can alsobeused to cut woodand
plastic.
1pc. Clamping arbour shaftdiameter Ø3.2 mm
Operating instructions
Important!
•Prevent unintentional starting.Ensure the switch is in
the off-position before connectingtopower source
and/or batterypack, picking up or carryingthe tool.
•Never pressthe lock button while the device is oper-
ating.
•Depending on the collet size, bits and cutters may
have ashaftdiameter of max. 3.2 mm.
•Insertthe tools arefar as possiblewhen clamping.En-
sure thatthe shaftofthe tool doesnot standout more
than 30 mm from the collet. Excessivelyprotruding
shafts can bend easily and contributetopoor concen-
tricity.
•Donot in anycase usebits and cutterswith an arbour
lengthofmore than 55 mm!
•When using collets, alwaysmake sure thatthe collet
chuck and the utilisedtool have the same shaft diam-
eter! Thearbourofthe tool must be seatedfirmly and
securely in the collet!
•Donot work with damaged,bent or worn bits and cut-
ters! Make sure the tools are in perfectcondition.
Damaged or worn tools can break and cause injuries!
•When storing the bits and cutters, make sure theyare
reliablyprotected from damage!
Clamping, changing the tool
Atte
ntion!
Pul
lthe mains plug out beforechanging tools.
1. Turn the spigot nut1(fig.2)slightly and press the
Iocking button at the same time, until it engages.
Loosen the nutfor afew turnsand change the tool.
lf the union nut sticks, use the enclosedchuck key.
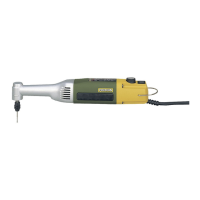
The drill grinderIBS/E has an ergonomically design, so
thatitcan be easily guided at the fitting collar.The thread
for the clamping jawnut is lowered into the machine hous-
ing. The use of adrillchuck ist therefore not possible.
Working withthe machine
Attention:
•Never work withoutsafety glasses.
•Wear aprotective mask if largeamounts of dust or
harmful dusts accumulate.
•Never pressthe lock button while the device is oper-
ating.
•Acorrect and consistent speedachieves ahigh grind-
ing performance,not excessive contact pressure!
•
By tendency: Bits and cutterswith smaller diametersre-
quire higher speeds thanthose with alarger diameter.
•Attention: Youabsolutely must observethe permissible
maximumspeedofthe bits and cutters! The tool can
break when the maximum permissible speedisex-
ceeded. Flying parts can cause damageand severein-
juries!
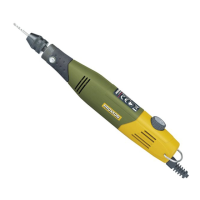
1. To activate, operate switch 2(Fig. 1) and set the right
speed forthe workonrotational speed adjustingknob
1(Fig. 1).Applicable in principle,tools with smaller di-
ametersmust be operatedathigher speeds, and tools
with greater diameters at lower speeds in order to
achieve optimal results.
2. If youwouldlike to guide the device by hand while
working, hold it like aballpoint pen whilst milling or
engraving. Do not cover the ventilationslots(Fig. 3).
Forcoarser work, holdthe device like the shaftofa
hammer(Fig. 4).

 Loading...