EasyManua.ls Logo

Prunus J-110 - User Manual

Prunus J-110
2 pages
Print Icon
To Next Page IconTo Next Page
Loading...
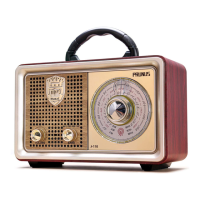
PRUNUS J-110 radio/Bluetooth speaker/mp3 player User Manual
Thank you for purchasing the PRUNUS J-110 radio/Bluetooth speaker/mp3 player. In
order to get the best from the radio please read this manual carefully before using it
and take special notice of the section on maintenance.
Maintenance
◆Don’t let the radio get wet and don’t use it in a moist environment - keep it out of the
rain and use carefully in bathrooms and kitchens;
◆Do not place potentially damaging objects such as liquid-filled containers or lighted
candle on top of the radio. Keep the radio, and the battery pack, away from sources of
heat such as radiators, hot water pipes or fires. Do not leave it in full sunlight;
◆Make sure that solvents, such as white spirit, paraffin or petrol and not spilt onto the
radio;
◆Keep it away from magnets and magnetic fields;
◆Position the radio so that air can circulate around it leave a space of 5 to 10 cm in
front of and behind the radio;
◆Do not cover the radio with cloth or paper and avoid placing it on a bed where it might
be covered by a blanket or duvet;
◆The radio is a sophisticated electronic device - do not attempt to disassemble it or
repair it and take care not to drop it.
Functional component
1.Mode switch among USB/TF/ AUX/Bluetooth
2. Forward
3. Previous
4. Play/Pause Button
5. Flash Drive Slot
6. TF Card Slot
7. AUX in Jack
8. Charging Indication
9. DC5V Power Slot
10. Volume / Power Knob
11. Speaker
12. Band Switch among MP3/ FM/AM/SW
13. Tuning Knob
14. AC in Jack
15. Battery Bin
16. Telescopic Aerial
17. IR (Infrared)
Radio reception
1. Turn the <12. Band Switch among MP3/ FM/AM/SW> to the “FM”, AM” or “SW”
position
2. Turn the <10. volume/power knob> to the power-on position.
3. Rotate the <13. tuning knob> to select the station you want to listen to.
4. Turn the <10. volume/power knob> again to adjust the volume.
◆When tuning to the FM/SW stations, extend the <14. telescopic aerial> and adjust the
position of the aerial for the best reception;When listening to AM stations, rotate the
radio to get the best reception.
◆ In order to get better reception, when using the radio indoors, please approach it to
the window and do your best to keep it away from the electronic devices (such as com-
puters, TVs, refrigerators, mobile phones, etc).
Music Playing
1. Play by Bluetooth
(1) Rotate the <12. Band Switch among MP3/ FM/AM/SW> to "MP3" mode, the radio will
give a "Bluetooth Mount" sound, which implies the Bluetooth connection is available
and ready pair;
(2) Switch on the Bluetooth on your services, such as: mobile phone, iPod, computer,
etc., search for the device named “BT-888”, and then connect it, the radio should have a
“Dingdong” sound, which means the device has been connected successfully.
(3) Open your music player app/software and choose your desired music;
Power Supply
1.AC power supply:
When to use it? At home, office, workshop or anytime you can reach mains power.
Power in method: Step1: Take the included AC power cord out from battery bin; Step 2:
plug the end with two holes into <14. AC in Jack> and plug the other end into the socket
(Voltage: 110-220V ).
EN EN
2.Type D (UM-1) Battery * 2:
When to use it? In outing, picnic, long trip or any outdoor time you need the radio play
for a long time.
Batteries Installation: 1) Open the Battery Compartment Cover; 2) Follow the electrode
marks inside battery compartment to install two Type D batteries. 3) Replace the
battery compartment cover.
Note:
A. Don't use a new battery and old battery together; B. Don't use batteries of different
type or brand together; C. Don't use batteries with different power (mAh) ; D. Don't use
alkaline battery and rechargeable battery together.
3. Built-in rechargeable battery:
When to use it? In your private garden, nearby park, home or any time you need the
radio play for a short movable time.
Charging method: plug the big end into the USB jack of your computer or USB power
adapter, and plug the small end into the <9.DC5V Power Slot> of the unit.
Charging indicator:Charging time is 3-5 hours, while the radio is being charged,
<8.Charging Indication> will light up. (Notes: the light will turn off when it is fully
charged.)
Please Note:
(1) Please use standard DC5V/500-1000mAh charger (or other devices can supply this
type of power) to charge it, or it may damage the radio.
(2) Inordertomakesurethebatteryhaslongerusinglife,you'dbetterreducethelong
continuouscharging,suchas24hourschargingormore.
(4) Short press <2. Forward /3. previous> to select the song you want to play;
(5) Short press <4. Play/Pause/Mode button > to pause the current play, press this
button again to resume playback.
2. Play by Flash Drive/ TF card
(1) Rotate the <12. Band Switch among MP3/ FM/AM/SW> to "MP3" mode;
(2) Insert the Flash Drive/TF card loaded with MP3 format into the <5.Flash drive slot /
6.TF card slot >. Once mp3 files are detected, it will play automatically;
(3) Short press the <2. forward/3. previous> button to select the song you want to play;
Long press to fast forward/rewind down;
(4) When playing mp3 tracks pressing the <4. Play/Pause/ button> will pause playing the
current track; pressing this button again will resume playing this track.
3. Play by AUX
(1) Rotate the <12. Band Switch among MP3/FM/AM/SW> to "MP3" mode, long press <1.
Mode Switch among USB/TF/AUX/Bluetooth> to switch the radio mode to AUX mode,
then the radio will give a "AUX mode" sound;
(2) Insert one end of the AUX cable into the "AUX" jack of the radio, and insert the other
end into the earphone jack of the mobile phone or computer, and then open the music
software/app to play music;
(3) Short press <4. Play/Pause button> to mute the radio (!), press it again to resume the
sound.
(4) Short press <1. Mode Switch among USB/TF/AUX/Bluetooth> will change to other
mode.
Question and Answer IconNeed help?

Do you have a question about the Prunus J-110 and is the answer not in the manual?

Summary

Product Maintenance and Safety Precautions

General Maintenance and Safety

Instructions on keeping the radio safe from moisture, heat, liquids, magnets, and physical damage.

Device Components and Controls

Functional Components Overview

Identification and description of the radio's physical parts and controls.

Power Supply Options

AC Power Supply

Guidance on connecting the radio to mains power using the AC adapter.

Type D Battery Power

Instructions for installing and using Type D batteries for portable operation.

Built-in Rechargeable Battery

Details on charging and using the internal rechargeable battery.

Radio Reception Guide

Tuning and Improving Reception

Steps for selecting radio stations and optimizing signal reception.

Music Playback Modes

Bluetooth Playback

Connecting and playing audio wirelessly via Bluetooth.

Flash Drive;TF Card Playback

Playing music files from USB flash drives or TF memory cards.

AUX Mode Playback

Connecting external audio devices using the AUX input.

Remote Control Operations

Remote Control Setup and Usage

Initial setup for the remote and guidelines for effective use.

Remote Control for Bluetooth Mode

Using the remote to control Bluetooth playback functions.

Remote Control for USB;TF Card Mode

Using the remote to control playback from USB/TF card.

Remote Control for AUX Mode

Using the remote to control playback from AUX input.

After Sale Service

Overview

The PRUNUS J-110 is a versatile device that functions as a radio, Bluetooth speaker, and MP3 player, designed for both indoor and outdoor use.

Function Description:

The device offers multiple modes for audio playback. As a radio, it supports FM, AM, and SW bands, allowing users to tune into a wide range of stations. For personal music playback, it features an MP3 player that can read files from a Flash Drive or TF card. Additionally, it functions as a Bluetooth speaker, enabling wireless audio streaming from compatible devices like mobile phones, iPods, and computers. An AUX-in jack further expands its connectivity, allowing for wired connection to external audio sources.

Important Technical Specifications:

  • Power Supply: The PRUNUS J-110 offers three power options:
    • AC Power: Operates on 110-220V AC power, suitable for home, office, or workshop use. The AC power cord is stored in the battery bin and connects to the <14. AC in Jack>.
    • Type D (UM-1) Batteries: Requires two Type D (UM-1) batteries for portable use, ideal for outings, picnics, or long trips. Battery installation involves opening the compartment cover, following electrode marks, and replacing the cover.
    • Built-in Rechargeable Battery: Provides portable power for shorter durations, such as in a private garden or nearby park. Charging is done via a USB connection (big end to computer/USB power adapter, small end to <9. DC5V Power Slot>). Charging time is 3-5 hours, indicated by the <8. Charging Indication> light, which turns off when fully charged. It's recommended to use a standard DC5V/500-1000mAh charger and avoid continuous charging for more than 24 hours to prolong battery life.
  • Connectivity:
    • Flash Drive Slot (<5. Flash Drive Slot>)
    • TF Card Slot (<6. TF Card Slot>)
    • AUX in Jack (<7. AUX in Jack>)
    • Bluetooth (device name "BT-888")
    • DC5V Power Slot (<9. DC5V Power Slot>) for charging
    • AC in Jack (<14. AC in Jack>) for AC power
  • Controls:
    • Mode switch (<1. Mode switch among USB/TF/AUX/Bluetooth>)
    • Forward button (<2. Forward>)
    • Previous button (<3. Previous>)
    • Play/Pause Button (<4. Play/Pause Button>)
    • Volume / Power Knob (<10. Volume / Power Knob>)
    • Band Switch (<12. Band Switch among MP3/FM/AM/SW>)
    • Tuning Knob (<13. Tuning Knob>)
  • Antenna: Telescopic Aerial (<16. Telescopic Aerial>) for FM/SW reception.
  • Remote Control: Includes an infrared remote control (<17. IR (Infrared)>) for convenient operation. The remote requires pulling out a battery insulation gasket to activate and is effective in USB/TF/AUX/Bluetooth modes. It's best to point the remote control lamp at the IR receiver for optimal performance.

Usage Features:

  • Radio Reception:
    1. Select the desired band (FM, AM, or SW) using the <12. Band Switch>.
    2. Turn the <10. Volume / Power Knob> to power on.
    3. Rotate the <13. Tuning Knob> to select a station.
    4. Adjust volume with the <10. Volume / Power Knob>.
    5. For FM/SW, extend and adjust the <16. Telescopic Aerial> for best reception. For AM, rotate the radio itself.
    6. For indoor use, position the radio near a window and away from electronic devices (computers, TVs, refrigerators, mobile phones) to minimize interference.
  • Music Playing (Bluetooth):
    1. Switch to "MP3" mode using the <12. Band Switch>. The radio will emit a "Bluetooth Mount" sound.
    2. Enable Bluetooth on your device, search for "BT-888," and connect. A "Dingdong" sound confirms successful connection.
    3. Play music from your device's music player app.
    4. Use <2. Forward> / <3. Previous> to select songs.
    5. Use <4. Play/Pause/Mode button> to pause/resume playback.
  • Music Playing (Flash Drive/TF Card):
    1. Switch to "MP3" mode using the <12. Band Switch>.
    2. Insert a Flash Drive or TF card with MP3 files into the respective slot (<5. Flash Drive Slot> / <6. TF Card Slot>). Playback starts automatically.
    3. Use <2. Forward> / <3. Previous> to select songs (short press) or fast forward/rewind (long press).
    4. Use <4. Play/Pause/button> to pause/resume playback.
  • Music Playing (AUX):
    1. Switch to "MP3" mode using the <12. Band Switch>, then long press <1. Mode Switch> to enter AUX mode. The radio will emit an "AUX mode" sound.
    2. Connect one end of an AUX cable to the radio's <7. AUX in Jack> and the other end to your mobile phone or computer's earphone jack.
    3. Play music from your device's music software.
    4. Short press <4. Play/Pause button> to mute/unmute the radio.
  • Remote Control Functions:
    • Bluetooth Mode: Power on/off Bluetooth (<3. Power Button>), change mode (<5. Mode Switch>), adjust timbres (<7. EQ (Equaliser)>), select songs (<8. Previous Button>/<9. Forward Button>), pause/resume playback (<10. Play/Pause Button>), and adjust volume (<11. Volume Down Button>/<12. Volume Up Button>).
    • Flash Drive/TF Card Playing Mode: Turn on/off playback (<3. Power Button>), change mode (<5. Mode Switch>), switch to Bluetooth mode (<6. BT (Bluetooth)>), adjust timbres (<7. EQ (Equaliser)>), select songs/fast forward/rewind (<8. Previous Button>/<9. Forward Button>), pause/resume playback (<10. Play/Pause Button>), adjust volume (<11. Volume Down Button>/<12. Volume Up Button>), and select specific MP3s using <13. 0-9 Number Buttons>.
    • AUX Mode: Disconnect/connect AUX (<3. Power Button>), change mode (<5. Mode Switch>), switch to Bluetooth mode (<6. BT (Bluetooth)>), adjust timbres (<7. EQ (Equaliser)>), mute/unmute (<10. Play/Pause Button>), and adjust volume (<11. Volume Down Button>/<12. Volume Up Button>).

Maintenance Features:

  • Environmental Protection:
    • Avoid moisture: Keep the radio dry and do not use it in wet environments (bathrooms, kitchens).
    • Prevent damage: Do not place liquid-filled containers or lighted candles on top.
    • Heat sources: Keep away from radiators, hot water pipes, or fires. Avoid direct sunlight.
    • Chemicals: Ensure solvents like white spirit, paraffin, or petrol do not spill on the radio.
    • Magnetic fields: Keep away from magnets and magnetic fields.
  • Ventilation: Position the radio to allow air circulation, leaving 5-10 cm space in front and behind. Do not cover with cloth or paper, and avoid placing it on a bed where it might be covered.
  • Handling: The radio is a sophisticated electronic device; do not attempt to disassemble or repair it. Handle with care to prevent dropping.
  • Battery Care (Type D): Do not mix new and old batteries, different types or brands, or batteries with different power (mAh). Do not mix alkaline and rechargeable batteries.
  • Battery Care (Built-in Rechargeable): Use a standard DC5V/500-1000mAh charger. Avoid continuous charging for more than 24 hours to extend battery life.

Prunus J-110 Specifications

General IconGeneral
BrandPrunus
ModelJ-110
CategorySpeakers
LanguageEnglish

Related product manuals