TO START:
With the power cable plugged into a proper outlet, squeeze the
switch bar beneath the handle grips.
TO OPERATE
This machine is designed to move from side to side. To guide right,
raise the handle slightly. The higher the handle is raised, the faster
the machine will move to the right. Conversely, to guide left, lower
the handle. The more the handle is lowered, the faster the machine
will move to the left. Do not leave a plugged in machine unat-
tended.
CARE AND MAINTENANCE:
This machine will afford you many years of trouble-free service pro-
vided it is given proper care. Throwing, dropping, bumping across
the thresholds and other misuse may result in a damaged unit and
invalidate the warranty. For best results,use a clean pad and change
pads frequently as they load up. When storing your floor machine,
always remove the pad and brush.
It is not necessary to lubricate this machine.
ABOUT THE MACHINE
TO ASSEMBLE:
Refer to separate assembly instruction sheet enclosed.
TO ADJUST HANDLE:
The handle adjustment is controlled by a “star knob” located at the
rear of the machine near the bottom of the handle pipe. To release,
turn the knob counter-clockwise or apply foot pressure to the lower
portion of the knob. When a convenient handle location for machine
operation has been found,lock the handle in place by turning the star
knob clockwise to tighten. When transporting the machine or attach-
ing brush/pad be sure the handle is LOCKED in the upright position.
Never turn on the machine with handle in the upright lock posi-
tion.
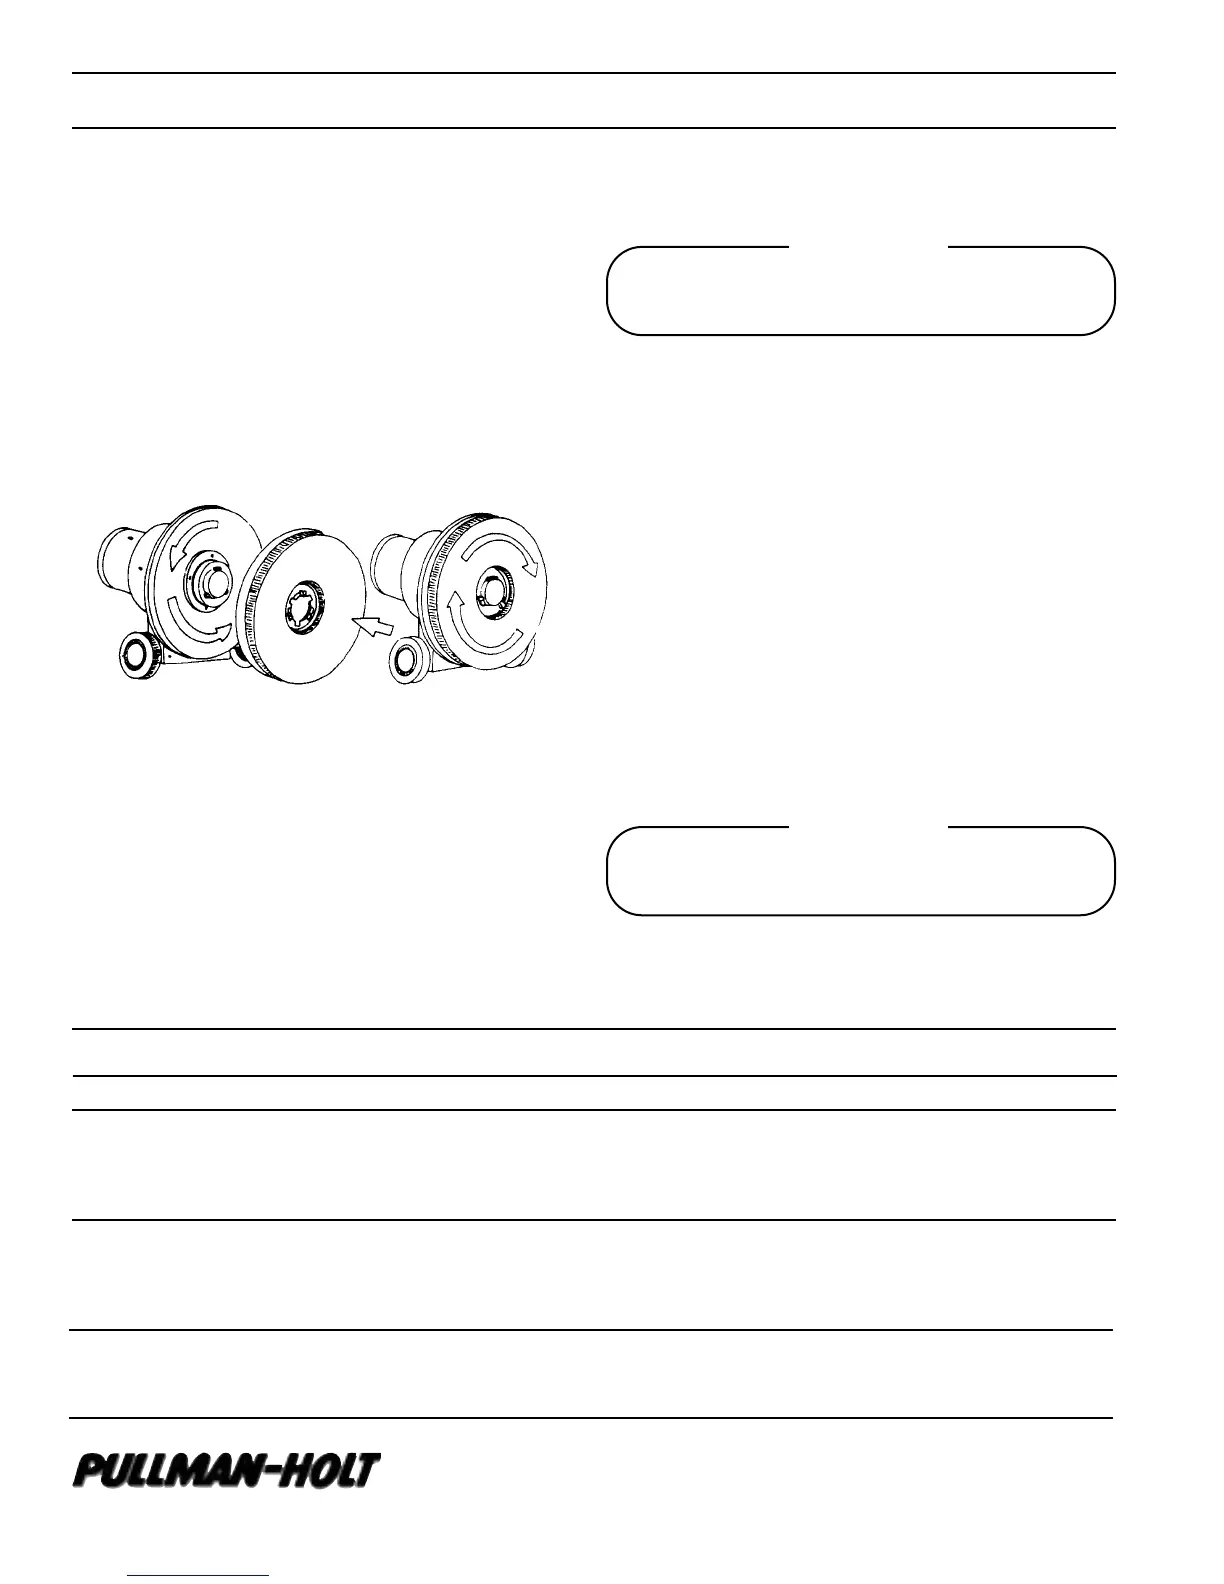
To Attach Brush:
Always attach brush by hand. Never by placing machine over an
unattached brush and starting machine to lock brush. This will
cause gear box damage not covered by warranty.
With cable unplugged, LOCK handle in upright position and tilt
machine back on the handle until the underside of the machine is
fully exposed. Select the desired brush or pad driver and position the
three slots of the clutch plate over the three lugs of the gear box.
Turn the brush counter-clockwise as far as it will go. The brush is
now seated in ready-to-use position. To Remove Brush, disengage
clutch plate slots from drive plate lugs by turning clockwise. Do not
operate this machine with scrub brush or drive brush and pad
in place.
Caution
Machine will immediately veer to one side. Be prepared to
control action.
Symptom Possible Cause Corrective Action
Motor Won’t Run 1. Blown fuse or tripped circuit 1. Replace fuse or reset circuit breaker
breaker at wall panel
2. Defective Switch 2. Replace Switch
3. Defective power cord 3. Replace power cord
Polisher Runs Slows 1. Low line voltage 1. If voltage under recommended minimum, check size of wiring
from main switch
2. Defective motor capacitor 2. Refer to service center
3. Pad loaded, heavily soiled 3. Clean or replace pad
Machine Noisy 1. Defective Motor 1. Return to service center
2. Defective Gear Box 2. Return to service center
3. Wheels vibrating 3. Return to service center
TROUBLESHOOTING GUIDE
10702 N 46th Street • Tampa, FL 33617
(813)971-2223 • fax (813) 971-6090
www.pullmanholtcorp. com
B701176
1/04
Warning
Always disconnect power cable from electrical outlet when
working on this machine.
 Loading...