ENGLISH
ENGLISH
Package Contents
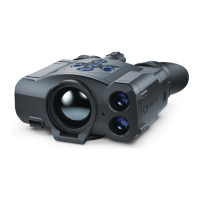
• Accolade 2 LRF Thermal Imaging Binocular
• IPS7 Battery Pack
• Battery Pack charger with mains adapter
• USB cable
• Quick User Manual
• Warranty sheet
• Carrying case
• Neck strap
• Lens-cleaning cloth
Starting Operation
Powering on and image setting
• Open the lens cover (10).
• Press the ON/OFF button (1) briey to power the device on.
• Set the pupillary distance by squeezing the eyepieces together or pulling
farther apart while holding the adjustment rings (6).
• Get a sharp image of the symbols on the display by rotating the optical
adjustment ring of the eyepieces (7).
• Rotate the lens focus ring (8) to focus on target.
• Select the calibration mode: manual (M), semi-automatic (SA) or automatic
(A) in the main menu (enter the menu by long pressing the MENU button (3)).
• Calibrate the image with a short press of the ON/OFF button (1) (when
calibration mode (SA) or (M) has been selected). Close the lens cap before
manual calibration.
• Select the desired observation mode (Forest, Rocks, Identication or User)
by a long press of the DOWN (5) button or in the main menu. User mode
allows you to congure and save custom brightness and contrast settings, as
well as one of three modes as a base.
• Adjust the brightness, display contrast, smooth digital zoom in the quick
menu (activate by briey pressing the MENU button (3).
• Turn off the device by long pressing the ON/OFF button (1) after use.
1
 Loading...