ENGLISH
9 11
7
5
10
8
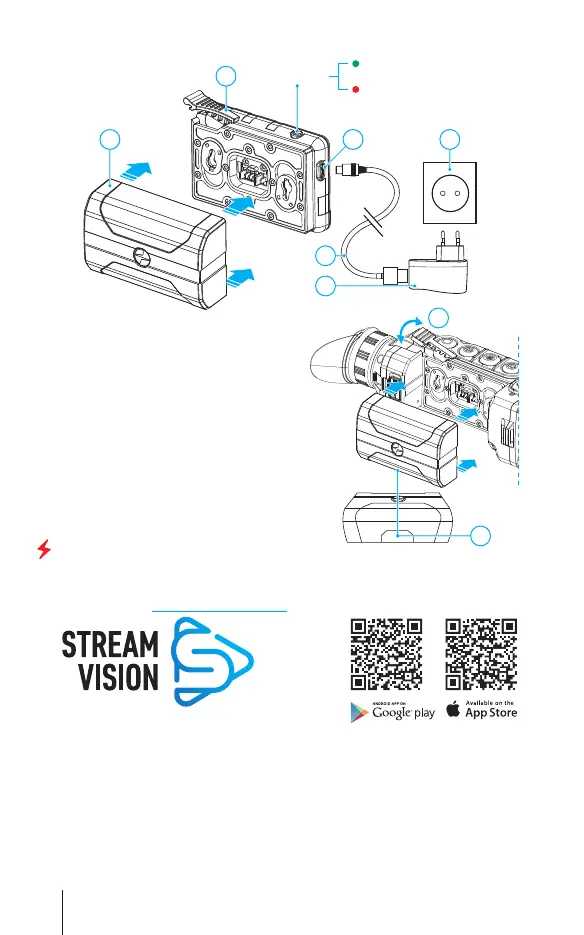
LED Indicator
continuously – battery is full
Blinking red LED light –
battery is empty
Micro
USB port
Network
Lever
USB cable
Battery Pack
Installing Battery Pack
• Lift up the lever (7). Remove the
battery (5) from the charging pad.
• Lift up the battery locking the lever (6).
• Insert the battery (5) as far as it will go into
the slot of the device body designed for it so
that the F part is at the bottom.
• Lock the battery by lowering the lever (6).
Stream Vision App
Download the Stream Vision app to stream the image via Wi-Fi from the display
of your device to a smartphone or tablet. Detailed instructions are available on
the Internet at: www.pulsar-vision.com
6
F
Lever
3

 Loading...


