= hardware version
= service information
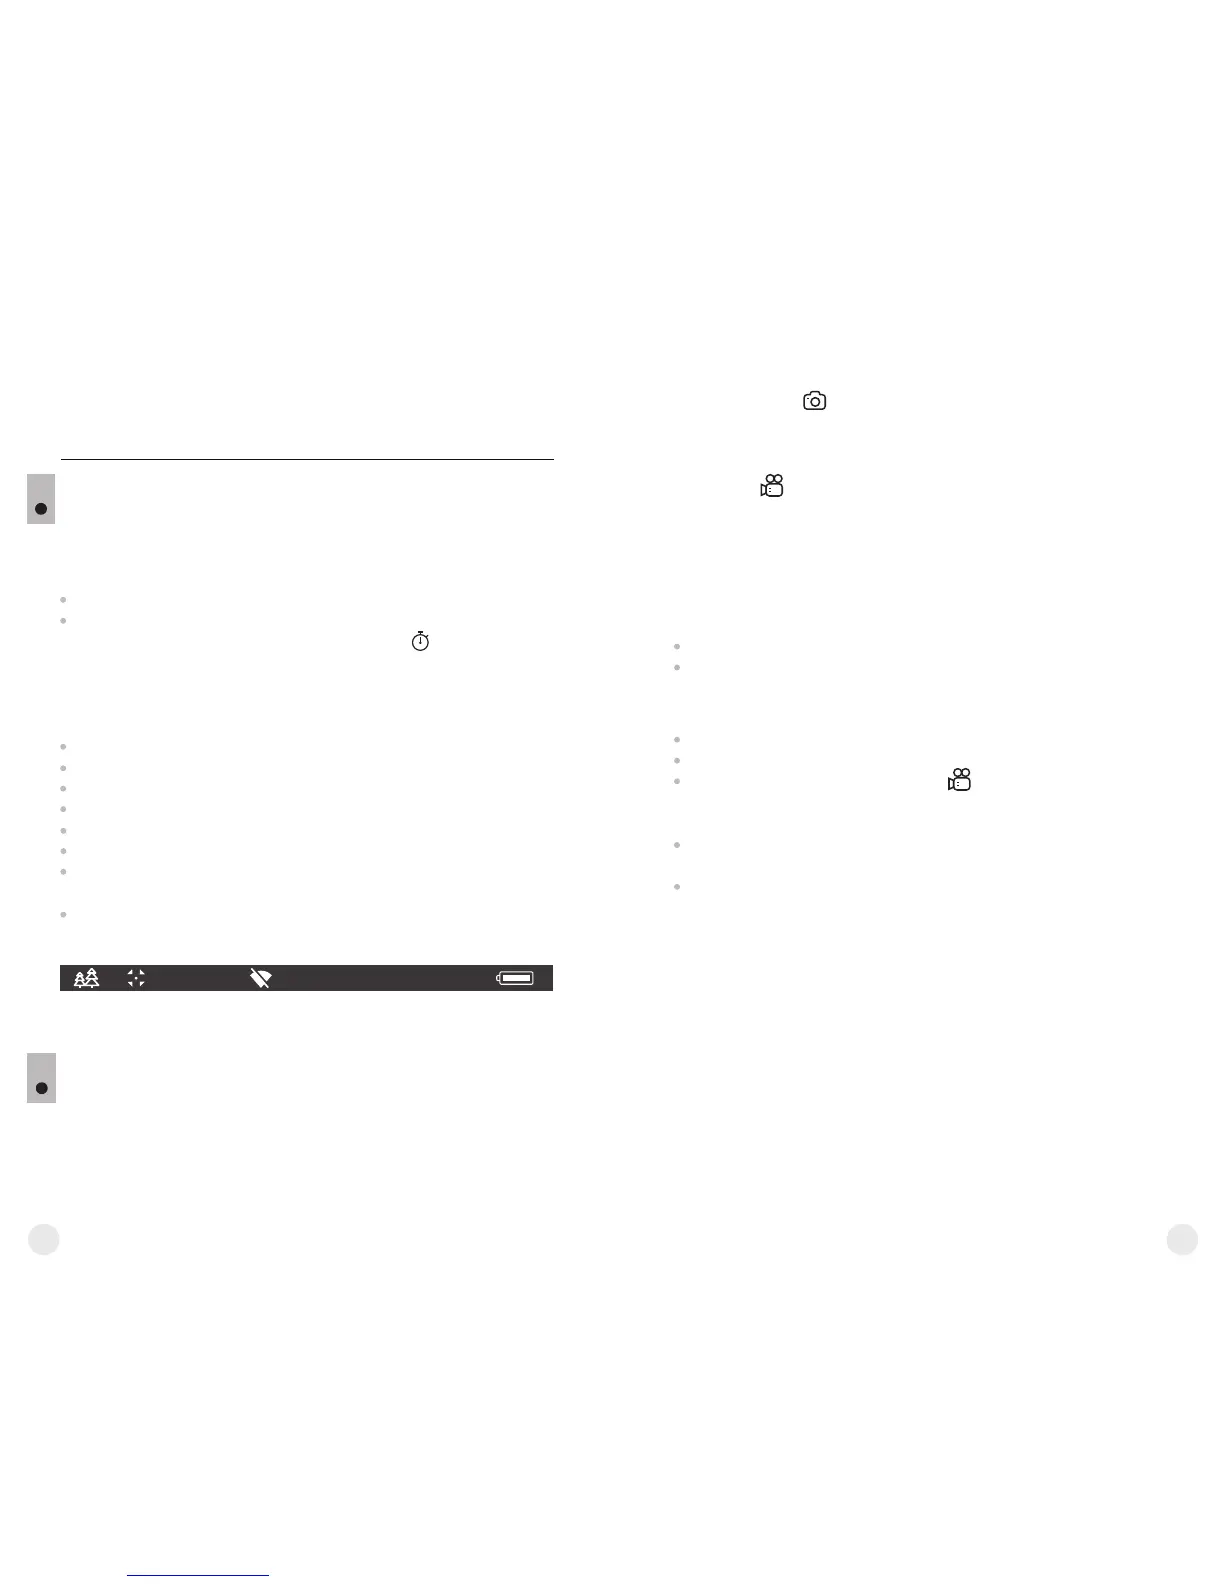
STATUS BAR
The status bar is located in the lower part of the display and shows
information on the actual operating status of the device, including:
13
Operating mode
Calibration mode (in the automatic calibration mode, three seconds
before automatic calibration a countdown timer 00:01 is shown in
place of the calibration mode icon. The timer appears only as soon as
the operating temperature of the microbolometer is stabilized (in 5-7
minutes of continuous operation of the sight). Upon start of the sight
the shutter is actuated automatically without showing the timer).
Current full magnification
Wi-Fi connection
USB connection (if the device is connected)
Colour palette (shown only if the “Black Hot” palette is selected)
Running time
Battery charge level (if the device is powered by the Battery Pack) or
External battery power indicator (if the device is powered by an
external power supply) or
Battery charge with current level in per cent (if battery is installed or it
is being charged by external power supply)
x16
12:30AM
A
Note: the image “freezes” on the display during calibration.
VIDEO RECORDING AND PHOTOGRAPHY
HELION thermal imagers feature video recording and photography of
the image being ranged to the internal memory card.
Before using this feature please read the menu options “Date setup”,
“Time setup” of the section “Main menu functions”.
14
Select menu option Device information with a short
press of the M button to review information.
- Photo (photography; in the top left corner of the display you can see:
photography icon .
If estimated number of photos that can be saved to the Flash card is more
than 100, message «>100». Is shown.
- Video (video recording; in the top left corner of the display you can see:
video icon , current video resolution, total video time left in the
format HH:MM:SS (hours : minutes : seconds)
When switched on, the device is in the Video mode. Switch between
Video and Photo modes with a long press of the REC (7) button.
Switching is cyclical (Video-> Photo-> Video…).
The built-in recorder operates in two modes:
Photo mode. Photography
Switch to the Photo mode.
Take a picture with a short press of the REC (7) button. The image
freezes for 0.5 sec and a photo is saved to the internal memory.
Video mode. Video recording
Switch to the Video mode.
Start video recording with a short press of the REC (7) button.
Upon start of video recording icon disappears, icon REC and
recording timer in the format MM:SS (minutes : seconds) appear
instead:
Pause and resume recording video with a short press of the REC
button.
Stop recording video with a long press of the REC button.
Video files are saved to the memory card:
џ After stopping video / after taking a picture;
џ Upon powering the sight off if recording was on;
џ When the memory card is overfilled during record message
“Memory full” appears.
Notes:
- you can enter and operate the menu during video recording;
- recorded videos and photos are saved to the built-in memory card in
the format img_xxx.jpg (photos); video_xxx.avi (videos). xxx –
three-digit counter for videos and photos;
- counter for multimedia files cannot be reset;
- if a file is deleted from the middle of the list, its number is not taken by
another file.
- when the counter is full, a new folder is created – img_xxxx. Where
xxxx is folder counter.
18
17
 Loading...