11
SETTING UP PUREIT ADVANCED
߶mo[aQ> ES>dmÝgS> H$s ñWmnZm
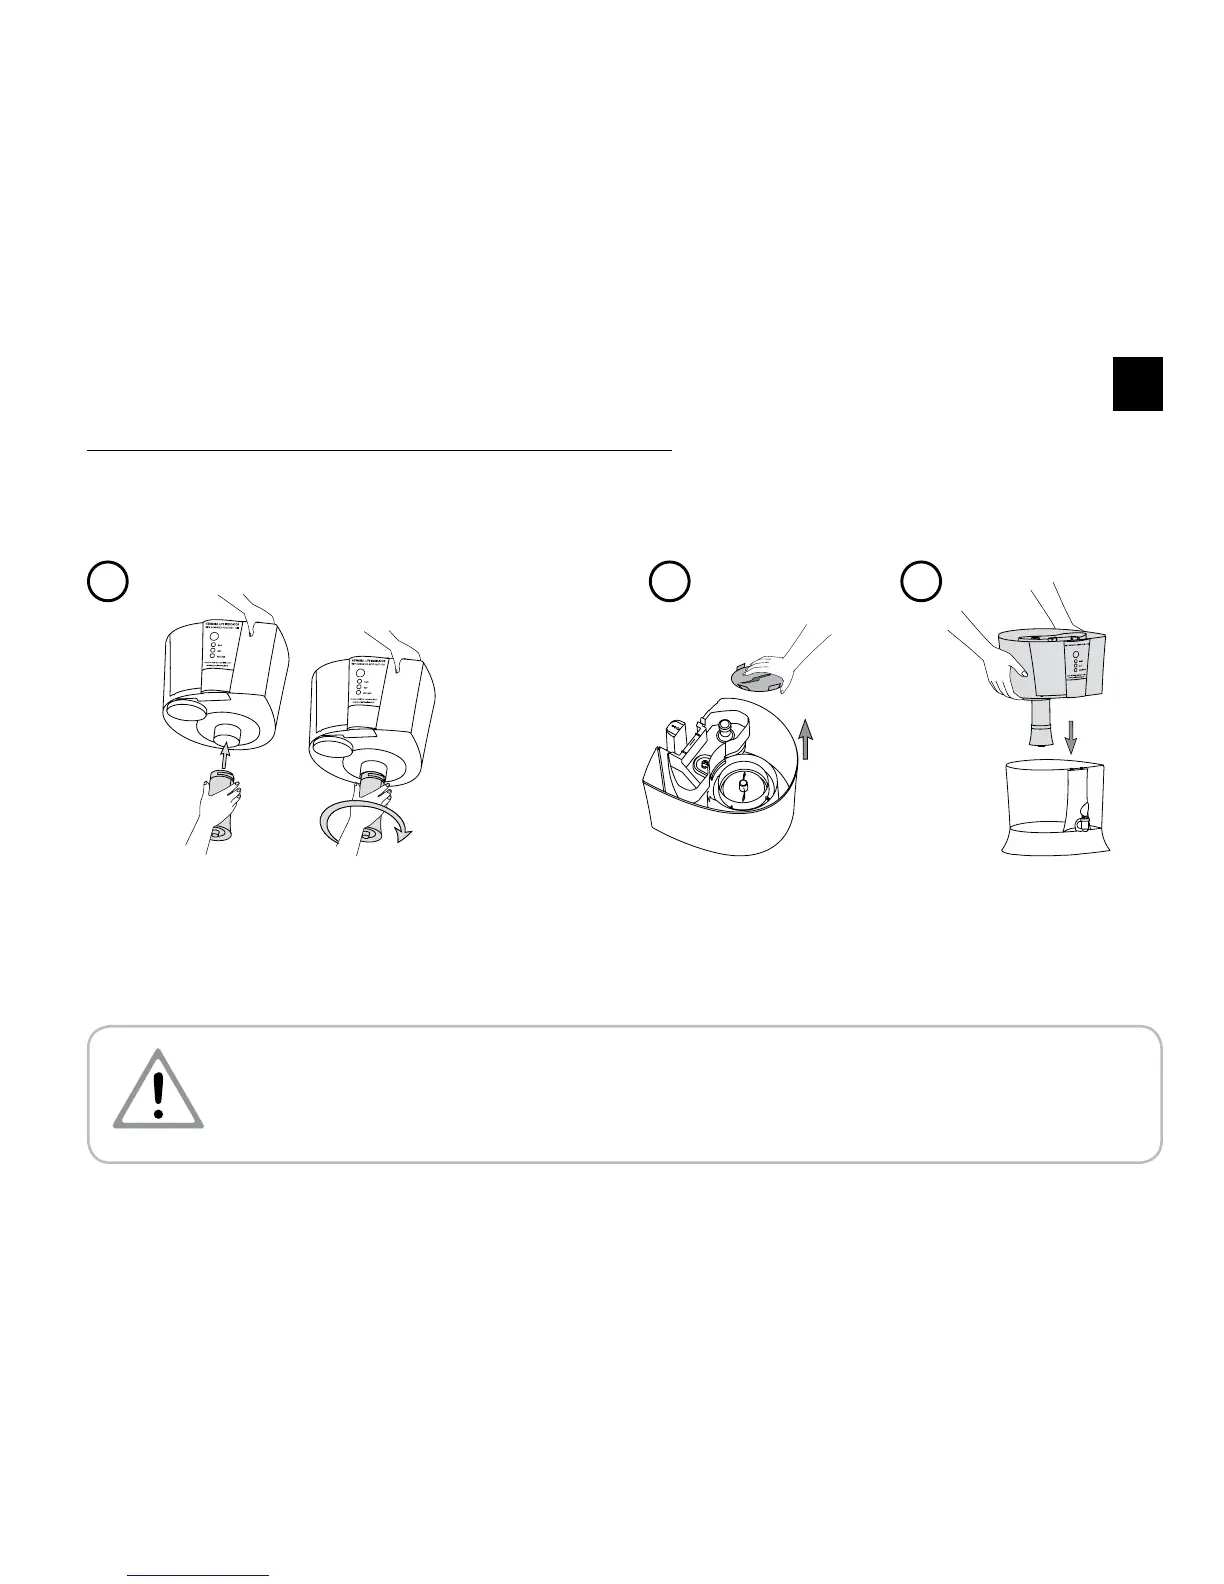
Insert the Microcharged Membrane assembly at
the base of the Cleansing Collection Chamber.
Twist in clockwise direction to t.
‘mB©H«$moMmO©S> ‘oå~«oZ Ag|ãbr H$mo ³boqOJ H$bo³eZ Moå~a Ho$ ZrMo
bJm¶| & Xm§¶o Vaµ’$ ‘| Bgo ‘mo‹S>o {Oggo ¶h AÀN>r Vah go bJ Om¶o &
5
Remove paper sleeve from the
Cleansing Collection Chamber.
nona ñbrd H$mo ³boqµOJ H$bo³eZ Moå~a
go {ZH$mb| &
6
Now place the Cleansing
Collection Chamber on the
Transparent Chamber.
³boqµOJ H$bo³eZ Moå~a H$mo
Q´>m§gna|Q> Moå~a Ho$ D$na aI| &
7
After tting the Microcharged Membrane assembly to the Cleansing Collection Chamber, do not rest the
assembly on a at surface.
‘mB©H«$moMmO©S> ‘oå~«oZ Agoå~br H$mo ³boqµOJ H$bo³eZ Moå~a ‘| AÀN>r Vah go bJmZo Ho$ ~mX Bgo g‘mZ gVh na Zm aIo &
Please remove the paper sleeve from the Cleansing Collection Chamber before use.
߶mo[aQ> H$m Cn¶moJ H$aZo go nohbo H¥$n¶m nona ñbrd H$mo ³boqµOJ H$bo³eZ Moå~a go {ZH$mb| &
CAUTION