Do you have a question about the Pureline PL1600 Series and is the answer not in the manual?
This document provides an installation and user guide for the Pureline Pure Flow Pump, specifically the PL1600 Series models. It covers essential information for safe installation, operation, and maintenance of the pool pump.
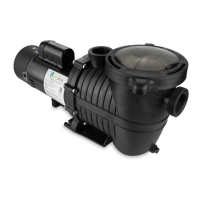
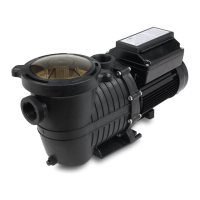
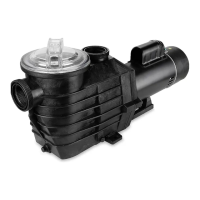
The Pureline Pure Flow Pump is designed for use in permanently installed swimming pools, and may also be used with hot tubs and spas if marked accordingly. Its primary function is to circulate water within the pool and spa water circulation system. The pump creates suction to draw water from the pool/spa, passes it through a filter, and then discharges it back into the system. This process is crucial for maintaining water quality and overall system functionality. The pump is not submersible.
The pump features 1.5" plumbing ports, making it compatible with standard pool plumbing systems. It includes a voltage switch for easy wiring, supporting both 115V and 230V electrical configurations. All components are molded from corrosion-proof reinforced thermoplastic, ensuring durability and a long lifespan. The motor shaft is constructed from stainless steel grade 304. The mechanical seals are made from carborundum and graphite, contributing to long life and low noise operation.
Electrical guidance for 60Hz single-phase motors is provided, detailing rated KW, HP, Volts, Circuit Breaker Amps, Branch Fusetron Amps, and Recommended Wire Size (0-50'). For example:
The pump is designed for ease of use and maintenance. It features a transparent strainer basket cover, allowing users to easily monitor when the basket needs cleaning without opening the pump. A drain plug is included for easy pump winterization, simplifying the process of preparing the pump for cold weather.
For installation, the pump should be placed as close to the pool as possible, with suction lines run as directly as possible to reduce friction loss. Suction lines should have a continuous upward slope from the lowest point. The suggested installation height is 12" above the pool water level, and it should not be installed more than 30" above the water level. The pump should be mounted on a firm, level, rigid, and vibration-free base or pad, secured with screws or bolts to reduce vibration and stress on pipe or hose joints. While designed for outdoor use, protecting electrical components from weather is advised. It should not be installed in damp or non-ventilated areas, as motors require free air circulation for cooling.
Plumbing best practices emphasize using larger plumbing on the suction side for easier priming and longer pump life. A minimum of 12" of straight pipe should lead into the suction port. Avoiding 90-degree elbows within 12" of the suction or discharge port is recommended; two 45-degree fittings are preferred over one 90-degree elbow. A check valve on the suction side can help maintain prime, but its placement is critical: not within 7.5" for 1.5" plumbing, 10" for 2" plumbing, or 12.5" for 2.5" plumbing from the pump suction port.
Electrical installation requires adherence to National Electrical Code and local ordinances. A means for disconnection must be incorporated into the fixed wiring. Grounding and bonding are essential, with the motor permanently grounded using the green ground terminal. For single-speed pumps, wiring instructions are provided for both 230V and 115V, involving connecting hot and neutral/hot wires to terminals 1 and 3, and the ground wire to the ground terminal, ensuring the voltage switch is set correctly. For two-speed pumps, ground wire connects to the ground terminal, and hot/neutral wires connect to terminals marked "Line." All electrical wiring must be performed by a licensed electrician, conform to local codes and NEC regulations, and use copper conductors only.
Priming the pump is a critical step. All suction and discharge valves, as well as the filter air relief valve, must be open. If the pump is placed below water level, it will self-prime. If above water level, specific steps include turning off power, ensuring proper water level in the skimmer, opening all valves, cleaning the strainer basket, filling the strainer housing with water, cleaning and lubricating the O-ring, and tightening the strainer cover by hand. The pump should prime within five minutes; if not, the cause must be determined.
Regular maintenance is crucial for the pump's longevity and efficient operation. The strainer basket should be cleaned regularly, and the strainer cover gasket inspected and replaced as necessary. The pump's motor bearings and shaft seals are self-lubricating and do not require additional lubrication. The motor should be kept clean, and air vents must be free from obstruction to prevent damage. Water should not be used to hose off the motor. Occasionally, shaft seals may need replacement, for which a genuine seal assembly kit should be used.
For storage and winterization, the system should not be purged with compressed air; instead, a low-pressure (below 5 PSI), high-volume blower should be used for air purging. Allowing the pump to freeze will void the warranty. Only propylene glycol should be used as antifreeze in the pool/spa, as it is nontoxic and will not damage plastic system components. All water must be drained from the pump and piping when freezing temperatures are expected or during long-term storage. The motor should be kept dry and covered during storage to prevent condensation and corrosion. Steps for winterization include draining water below inlets, removing drain plugs and strainer cover, disconnecting the pump from its mounting pad and piping, and storing it in a dry area after re-installing the strainer cover and drain plugs.
Troubleshooting guidance is provided for common issues:
The manual includes an exploded view diagram of the pump with a parts list, identifying components such as the pump cover, cover O-ring, pump basket, pump housing, diffuser O-ring, diffuser, impeller (1.0 HP and 1.5 HP options), pump housing O-ring, seal plate, housing bolts, shaft seal assembly, drain plug assembly, and base bracket.
| Brand | Pureline |
|---|---|
| Model | PL1600 Series |
| Category | Water Pump |
| Language | English |