DE
EN
DE
EN
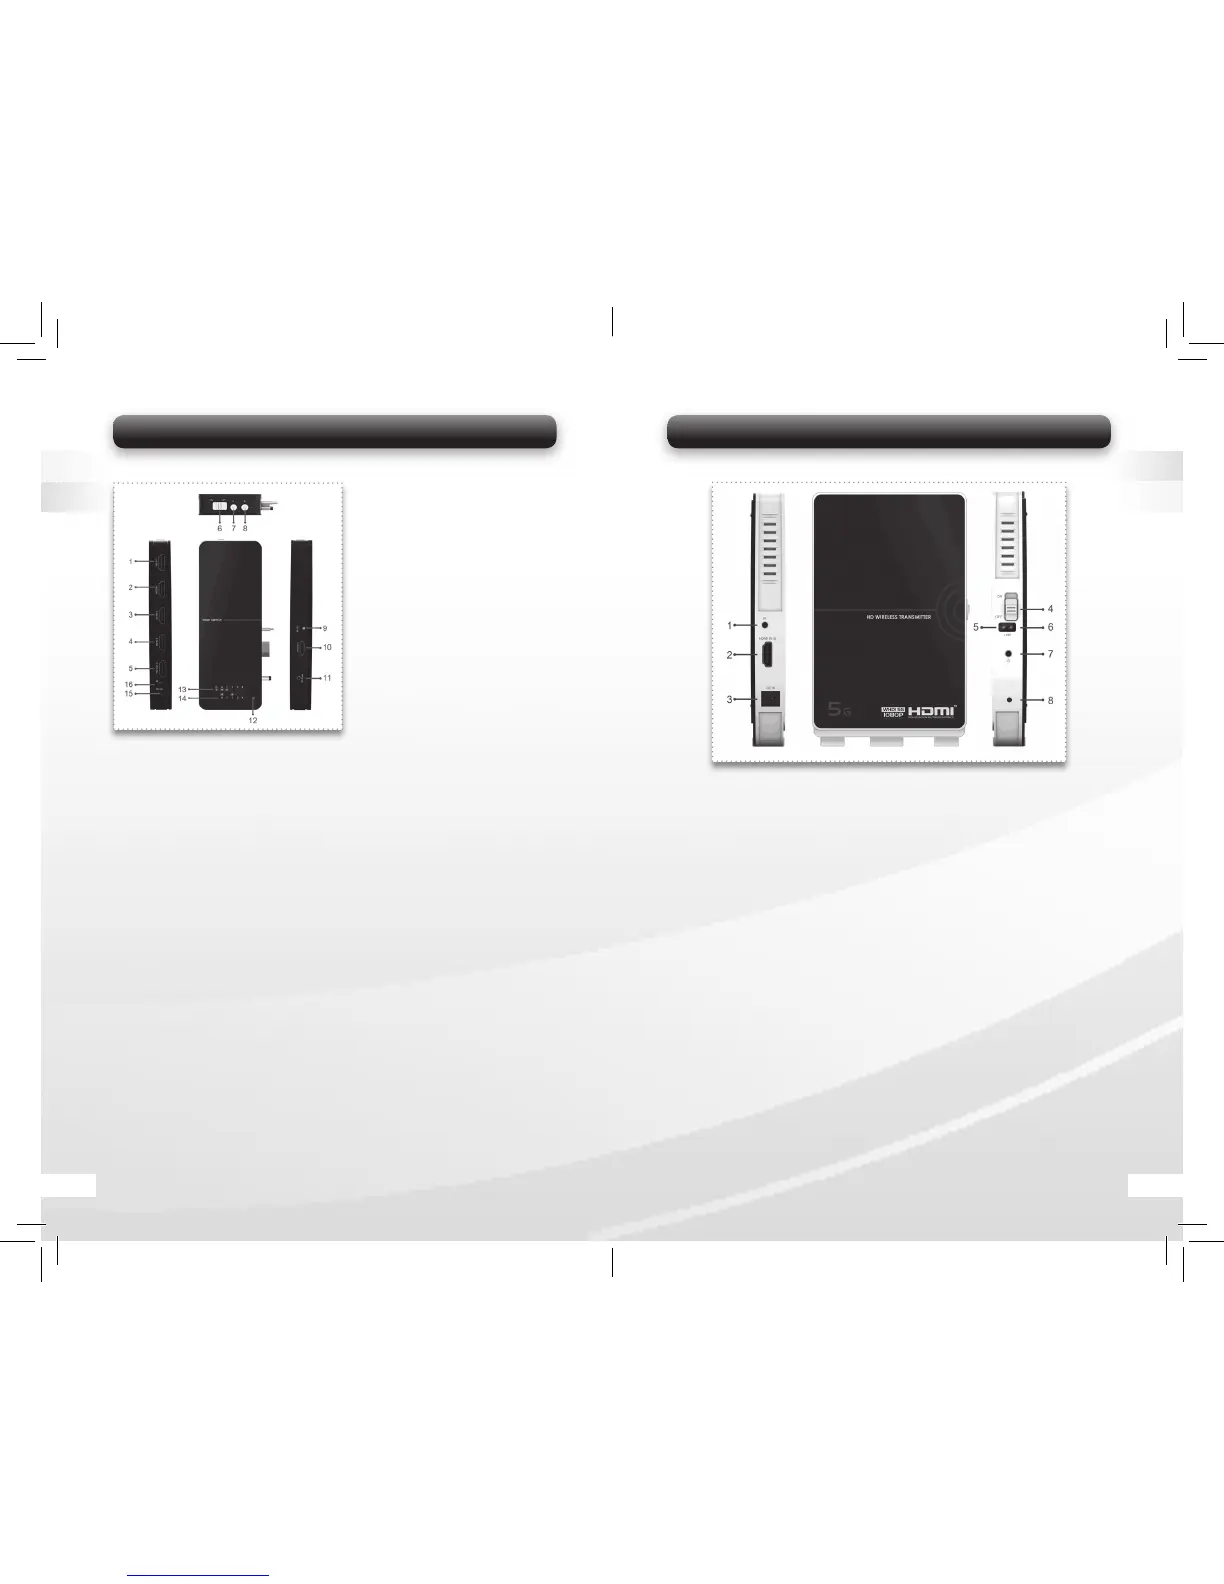
5.1 Wireless HD AV Sendeeinheit
1. IR:
Verbinden mit der IR-Out Schnittstelle (Nummer 9 in Bild 3) der HDMI
Matrix. Wichtig: Wenn Sie die HDMI Matrix nicht verwenden, können
Sie nur eine HDMI Quelle an der Sendeeinheit anschließen. Verbinden
Sie den IR-Anschluss mit dem beigelegten Infrarot Verlängerungskabel
und legen Sie den IR-Sensor in die Nähe der HDMI Quelle. Jetzt können
Sie mit der Original Fernbedienung Ihr Quellgerät von der Empfänger-
seite aus steuern.
2. HDMI Eingang:
Verbinden Sie diesen Eingang mit dem HDMI Ausgang B (Nummer
10 Bild 3) an der HDMI Matrix. Wichtig: Wenn Sie die HDMI Matrix nicht
benutzen, schließen Sie Ihr Quellgerät direkt mit einem HDMI Kabel an.
3. DC Eingang:
Verbinden Sie diesen Eingang mit dem DC Stromanschluss (Nummer 11
Bild 3) der HDMI Matrix. Wenn Sie die HDMI Matrix nicht benutzen,
verwenden Sie den 5V/2,5A Stromadapter.
4. ON/OFF Schalter:
Ein- und Aus Schalter der Sendeeinheit.
5. Wireless Statusanzeige:
Zeigt an, ob die Wireless Verbindung aktiv ist.
6. Video-Signal Statusanzeige:
Zeigt an, ob das ein Video Signal aktiv ist.
7. Strom Statusanzeige:
Zeigt an, ob das Gerät eingeschaltet ist.
8. Upgrade Anschluss
Bild 1
5.3.1 4x2 HDMI Matrix
5. HDMI OUT A: Connect with Display Device directly via an HDMI Cable.
It can output any Media Source from the HD Media Devices connected
with the 4 HDMI IN ports of the switch.
6. ON/OFF Switch: Power on/off the HDMI Switch.
7. A Channel Selection Button: Press the button to switch the media
source from HDMI IN 1 to HDMI IN 4 manually. The selected media
source will be output from the HDMI OUT A port.
8. B Channel Selection Button: Press the button to switch the media
source from HDMI IN 1 to HDMI IN 4 manually. The selected media
source will be sent to the Display Device connected with the Receiver unit
wirelessly.
9. IR Out: Connect with the IR port on the Wireless Transmitter unit.
10. HDMI OUT B: Connect with the HDMI IN port on the Wireless
Transmitter unit.
11. DC Power: Connect with the DC IN port on the Wireless Transmitter unit.
12. IR Remote Sensor: Work with enclosed remote control for media
source selection.
13. A Channel Indicator: Indicate selected media input source for
HDMI OUT A output.
14. B Channel Indicator: Indicate selected media input source for
HDMI OUT B output.
15. DC IN: Connect with the power supply (enclosed 5V/2.5A Power Adapter).
16. IR: Connect with IR Extender Box. User can control up to 4 HD Media
Devices by using their original remote control at the Wireless Receiver
side. Please fi nd detailed connection guide of the IR Extender Box in
the chapter below.
1. HDMI IN 1:
Connect with HD Media Device
via HDMI Cable.
2. HDMI IN 2:
Connect with HD Media Device
via HDMI Cable.
3. HDMI IN 3:
Connect with HD Media Device
via HDMI Cable.
4. HDMI IN 4:
Connect with HD Media Device
via HDMI Cable.
Bild 3
16 05
 Loading...