EasyManuals Logo

Pyle PCM30A User Manual

Pyle PCM30A
23 pages
To Next Page IconTo Next Page
To Previous Page IconTo Previous Page
Page #2 background imageLoading...
Page #2 background image
InfoLink 4 Port Call Button Interface Installation
1. Connect call button wiring to interface. Strip ¼” to no more than 3/8” insulation from wiring.
The small square buttons near each connection when pressed will release the spring loaded
wire capture mechanism. Depress when inserting wires. A small flat screwdriver can be used
for this purpose.
2. Interface connects easily to the Music Maestro serial port. Use screws for additional support.
3. Power on music system (or power cycle if it was already on when the interface was
connected).
4. When music returns, test button to verify proper operation / message assignment. Adjust if
necessary.
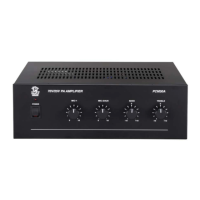
Proper installation. Label wires
with their designated port.
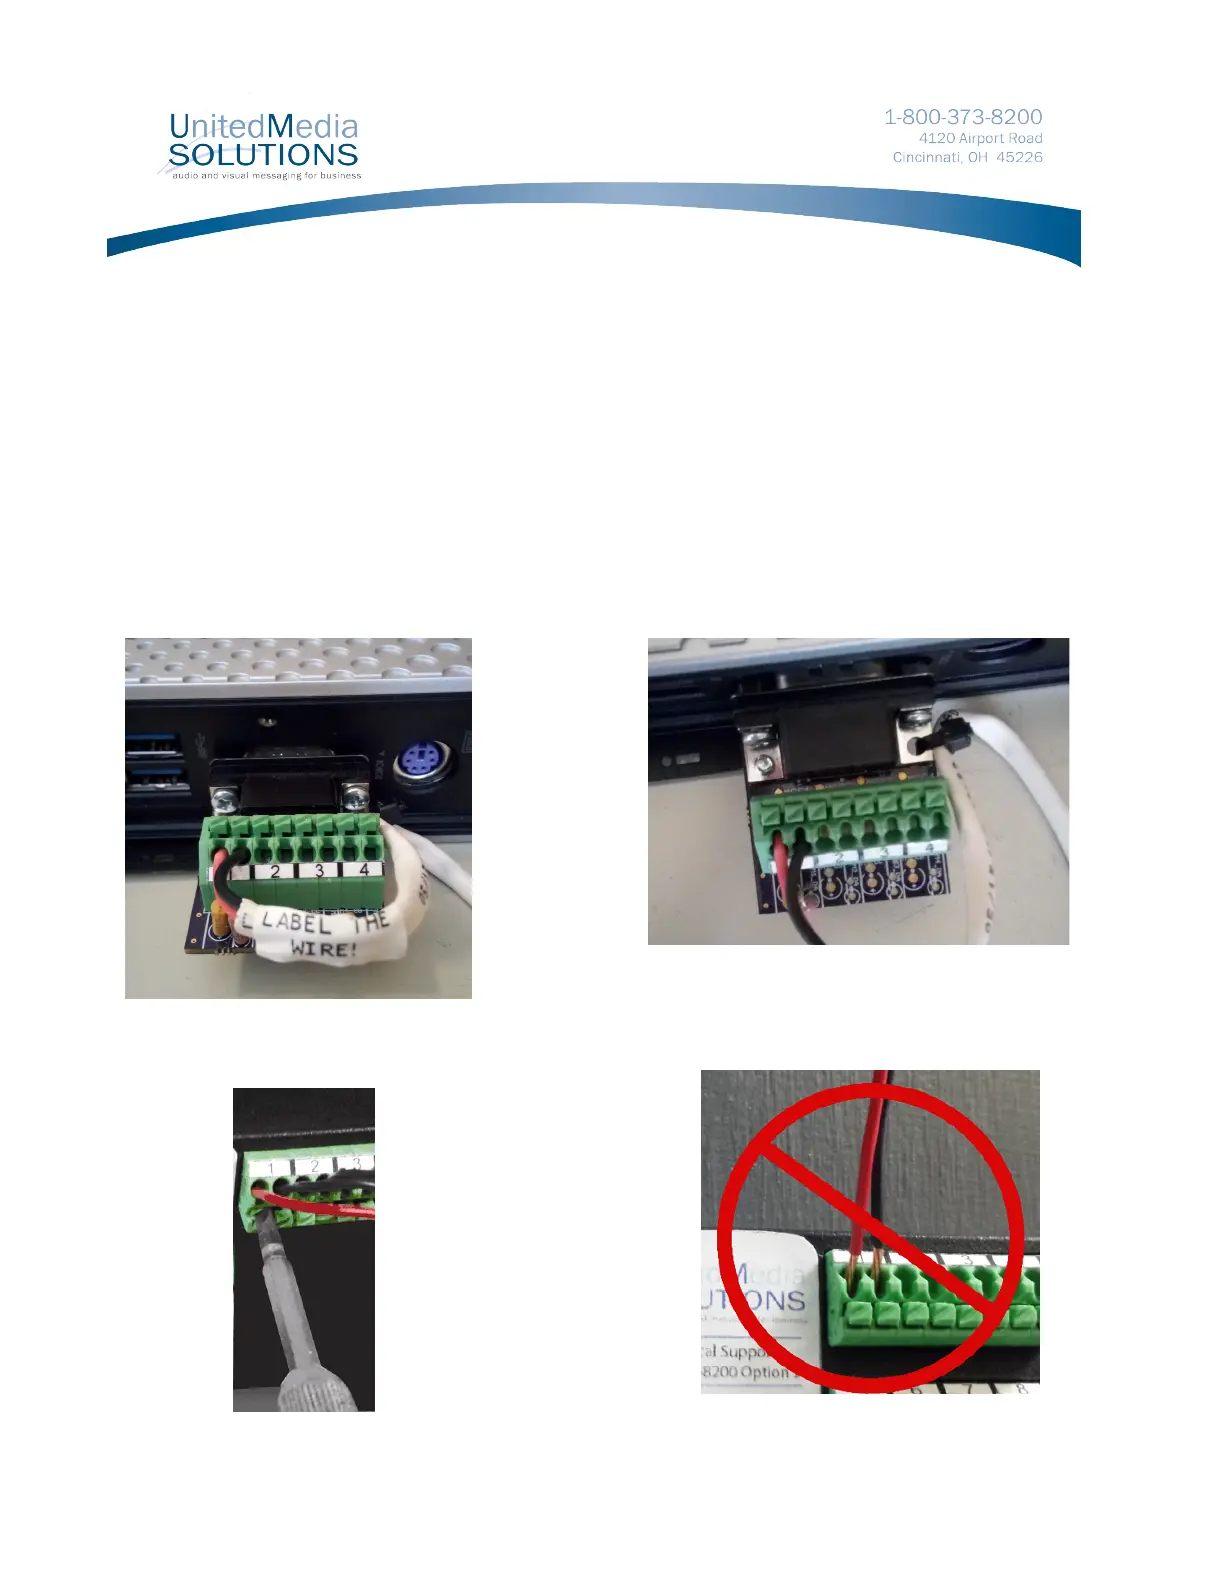
Top view of mounted interface. Note that
no bare copper is exposed.
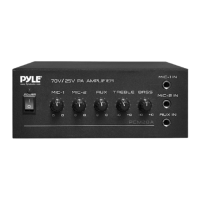
Use a small screwdriver to depress wire
release for insertion / removal of wire.
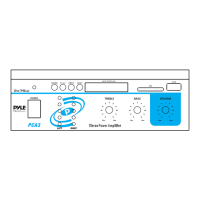
DO NOT DO THIS! No bare wire should
extend beyond face of port.

Other manuals for Pyle PCM30A

Questions and Answers:

Question and Answer IconNeed help?

Do you have a question about the Pyle PCM30A and is the answer not in the manual?

Pyle PCM30A Specifications

Input Impedance IconInput Impedance
AUX input impedance50k-Ohm
MIC 1/MIC 2 input impedance600-Ohm
TEL/PAGE input impedance600-Ohm
Output Specifications IconOutput Specifications
max output power60 Watts x 1
speaker outputs impedance4-Ohm, 8-Ohm, 16-Ohm, 25V, and 70V
monitor output impedance600-Ohm 1V (head phones) and 8-Ohm 1W (speaker)
Power IconPower
power requirement120V AC 60Hz/230V AC 50Hz
power fuse for 110-120VT 2AL 250V
power fuse for 220-240VT 1AL 250V
Weight and Dimensions IconWeight and Dimensions
dimensions10.7 x 3.46 x 8.86 inches (272 x 88 x 225 mm)
weight9.79 lbs (4.44 kg)
frequency response50 Hz to 15 kHz

Related product manuals