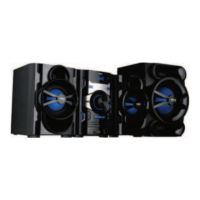
The Pyle PHSKR14 is a 3-Piece Wireless BT Streaming Stereo System designed for home entertainment. This DVD shelf system integrates a DVD player, MP3 playback, USB connectivity, FM radio, and bass reflex speakers, offering a comprehensive audio-visual experience. It comes with a remote control for convenient operation.
Function Description:
The PHSKR14 serves as a versatile media entertainment unit, capable of playing DVDs and CDs, as well as MP3 files from USB flash drives. Its built-in Bluetooth (BT) functionality allows for wireless audio streaming from a variety of external devices such as smartphones, tablets, laptops, and computers. The system features a dual amplifier for enhanced sound performance, delivering high-quality audio with powerful bass. It includes an FM radio for listening to your favorite stations and offers auxiliary (3.5mm) input for connecting other external music players. Additionally, the unit provides two 1/4" microphone inputs, making it suitable for karaoke.
Usage Features:
Power and Basic Operation:
To turn the unit on or off, press the POWER button on the front panel or the Standby/Power switch on the remote control. The DVD player automatically reads a disc if already inserted. To insert or replace a disc, press the OPEN/CLOSE button to open the disc tray, place the disc, and press OPEN/CLOSE again to close it. The screen will then display the disc type, and the player will automatically begin playback for VCD/SVCD without PBC, or display the first track for CD/MP3. For VCD/SVCD with PBC, the menu screen will appear, and you can press the PBC button to start playback from the beginning.
Mode Selection:
The unit supports various modes including DVD, USB, FM, Line In (AUX), and BT. You can switch between these modes by pressing the MODE button on the front panel or the remote control.
DVD/CD Playback:
During DVD/CD playback, you can control various aspects using the remote control.
- Play/Pause: Press PLAY/PAUSE to start or temporarily stop playback.
- Stop: Press STOP to halt playback. It is recommended to remove discs before turning off the player.
- Next/Previous Track/Chapter: Use the NEXT or PREV buttons to skip to the next or previous track or chapter.
- Fast Forward/Rewind: Press FWD or REV buttons to fast forward or rewind through the disc at different speeds (x2, x4, x8, x20). Press PLAY to resume normal playback.
- Repeat: The repeat function allows you to repeat a single track, a chapter, a title, or the entire disc. For USBVCD/CD discs, you can repeat one, all, or use random playback. For DVD discs, you can repeat a chapter, title, or all. In USB mode, repeat is direct, while in FM/Line in/BT modes, it is not available.
- A-B Repeat: This feature allows you to specify and repeatedly play a specific section of the DVD content. Press A-B REPEAT to set point A, then press it again to set point B. The section between A and B will play repeatedly. Press A-B a third time to cancel.
- Zoom: Magnify or shrink the screen image size using the Zoom button. You can move the enlarged image using the UP, DOWN, LEFT, and RIGHT buttons.
- Angle: If the disc supports multiple angles, you can switch between them using the Angle button.
- Subtitle: In DVD mode, press the SUB/COPY button to display subtitles (supports multi-subtitle discs).
- Language: Choose different audio languages for DVD discs (supports multi-language discs).
- OSD (On Screen Display): Press OSD to display information such as single elapsed time, single remaining time, total elapsed time, and total remaining time.
- L/R (Left/Right): Set audio output to Stereo, Mono L, Mono R, Auto L, or Auto R in SVCD, VCD, or CD format.
- Program Playback: Use the PROGRAM feature to create a custom playback sequence. Press PROG, then use the arrow buttons to select items and the number buttons (0-9) to specify the 2-digit order. Press OK to start programmed playback. Press STOP twice to clear the program.
- GO-TO: This function allows you to jump to a specific title, chapter, or time point on the disc. Press GO-TO, input the desired numbers, and press PLAY.
USB Playback and Copy:
The unit supports USB flash drives up to 32GB. To play content from a USB, ensure no disc is in the tray, then insert the USB. Press the MODE button on the unit or "SOURCE" on the remote control, then use the UP/DOWN arrows to select USB and press ENTER.
- USB Copy: When playing an MP3 disc, press the "COPY" button on the remote to enter the copy selection interface. You can copy tracks from the current disc to the inserted USB drive. Move the highlight bar to "START" and press ENTER to begin copying. The system will write the CD in MP3 format to the USB. During normal speed copying, you can listen to the content. At 4x speed, the audio will be muted. You can switch speeds by pressing ENTER during copying. To cancel, move the highlight bar to "CANCEL" and press ENTER. To exit the copying screen, select "RETURN" and press ENTER. Ensure sufficient space on the USB before copying.
Bluetooth Streaming:
To connect an external device via Bluetooth:
- Press the "SOURCE Switch" on the remote or the MODE button on the panel to select the BT function. The screen will display "BT".
- Enable Bluetooth on your external device and search for "PyleUSA".
- Select "PyleUSA" and pair. If a PIN code is required, try "0000" or "1234".
- A signal will indicate a successful connection.
FM Radio:
- Switch on the unit and press the MODE key to select FM mode.
- Press the SCAN key to automatically search and store radio channels.
- After scanning, the unit will play the first stored channel.
- Use the NEXT or PREV buttons to select the next or previous radio station.
- For better signal, adjust the antenna and use the REV or FWD buttons for fine-tuning.
Aux In Function:
- Switch on the unit and press the MODE button to select AUX IN mode.
- Connect your external music player using a 3.5mm cable to the AUX INPUT.
- The unit will play music from the external player.
- Use the remote control to play, pause, or stop the music. Note that some functions may not be available in Line Input mode.
Audio and Visual Adjustments:
- Volume: Adjust the overall audio volume using the VOLUME knob on the front panel or the Vol-/Vol+ buttons on the remote.
- Treble/Bass: Fine-tune the treble and bass levels using the BASS/TREB controls.
- EQ (Equalizer): Select from preset equalizer modes such as Flat, Rock, Jazz, Pop, or Classic using the EQ button.
- Mic Volume: Adjust the microphone volume using the MIC.VOL control.
- Echo: Adjust the echo effect for the microphone using the MIC.VOL control (second press).
- Brightness: Use the UP/Down arrows in the system setup menu to adjust the screen brightness.
- Downmix: If two audio channels are required, select the stereo option in the system setup menu.
- OP Mode: For night-time listening, select LINE OUT to set a lower volume. For daytime, select RF REMOD for a higher volume.
- Audio Output: Select your desired audio output in the AUDIO SETUP menu.
System Setup:
Access the system setup menu by pressing the SETUP button on the remote control. Here, you can configure various settings:
- TV System: Set the TV system to PAL (Europe) or NTSC (USA).
- Language Setup: Select the On-Screen Display (OSD) language, as well as audio, subtitle, and menu languages.
- Parental Control: Configure parental control settings.
LED Lights:
The unit features LED lights on the knob and speakers (blue). Press the LIGHT SWITCH button on the front panel or the LED button on the remote to turn these lights ON or OFF. In standby mode, the LED lights are off by default. When powered on, they turn on automatically.
Maintenance Features:
General Care:
- Cleaning: Always unplug the product from the electrical outlet before cleaning. Clean the unit with a soft cloth slightly moistened with a mild detergent. Avoid abrasive pads, scouring powder, or solvents like alcohol, as they can damage the surface.
- Disc Handling: Do not use discs with scratches or deformities, as this can damage the player. If a disc is broken or deformed, do not play it. Do not apply tape or glue to discs. If strange noises, vibrations, picture skips, or distorted images occur during playback, stop the player immediately.
- Ventilation: Place the unit in a well-ventilated area on a flat, hard, and stable surface. Avoid placing it on soft surfaces like beds, sofas, or rugs, which can block ventilation openings. Do not place heavy objects on the unit.
- Temperature: Do not expose the unit to direct sunlight or abnormally hot locations. If the unit is very cold, place it in a warm room and turn it on for about an hour before use.
- Laser Safety: The unit contains a CLASS 1 LASER PRODUCT. Do not stare directly into the laser beam, as it can harm your eyes.
- Lens Cleaning: If the player displays "NO DISC" or has trouble reading discs, the lens may need cleaning. This is typically required after about 20 hours of playback.
Troubleshooting:
The manual provides a troubleshooting section for common issues:
- "No Disc" Displayed: Check if the disc is placed correctly (label side up), verify the disc format, check for dirt or damage on the disc, and clean the lens if necessary.
- No Sound: Ensure the unit is connected to the correct channel, replace audio connections if needed, and confirm that the connected unit is working properly and the volume is turned up.
Service:
The product has no user-serviceable parts. Do not attempt to repair it yourself. Only qualified service personnel should perform servicing. If repair is needed, take the unit to an authorized service center for inspection and repair.